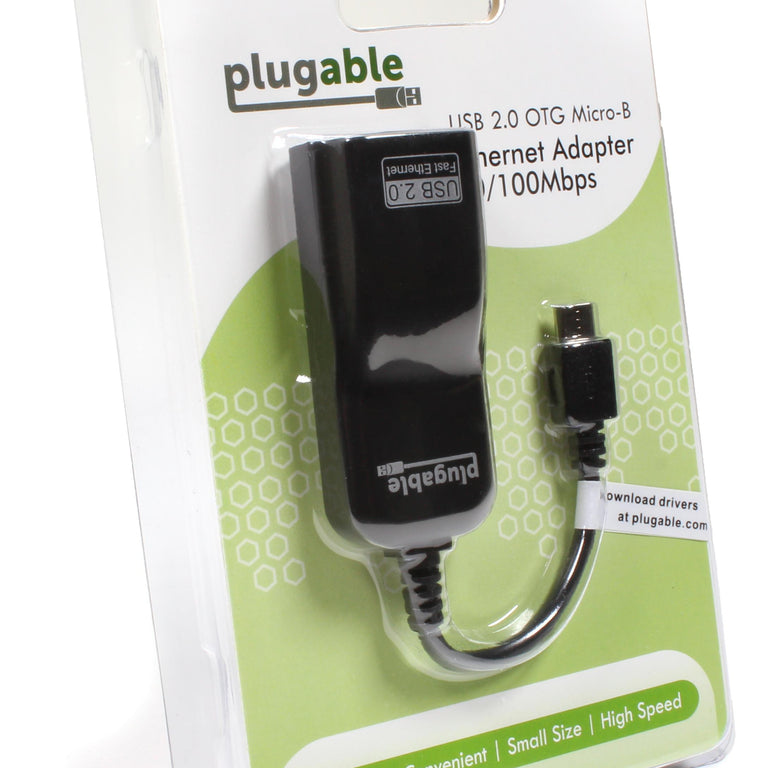
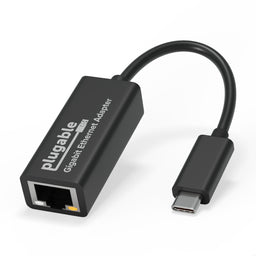
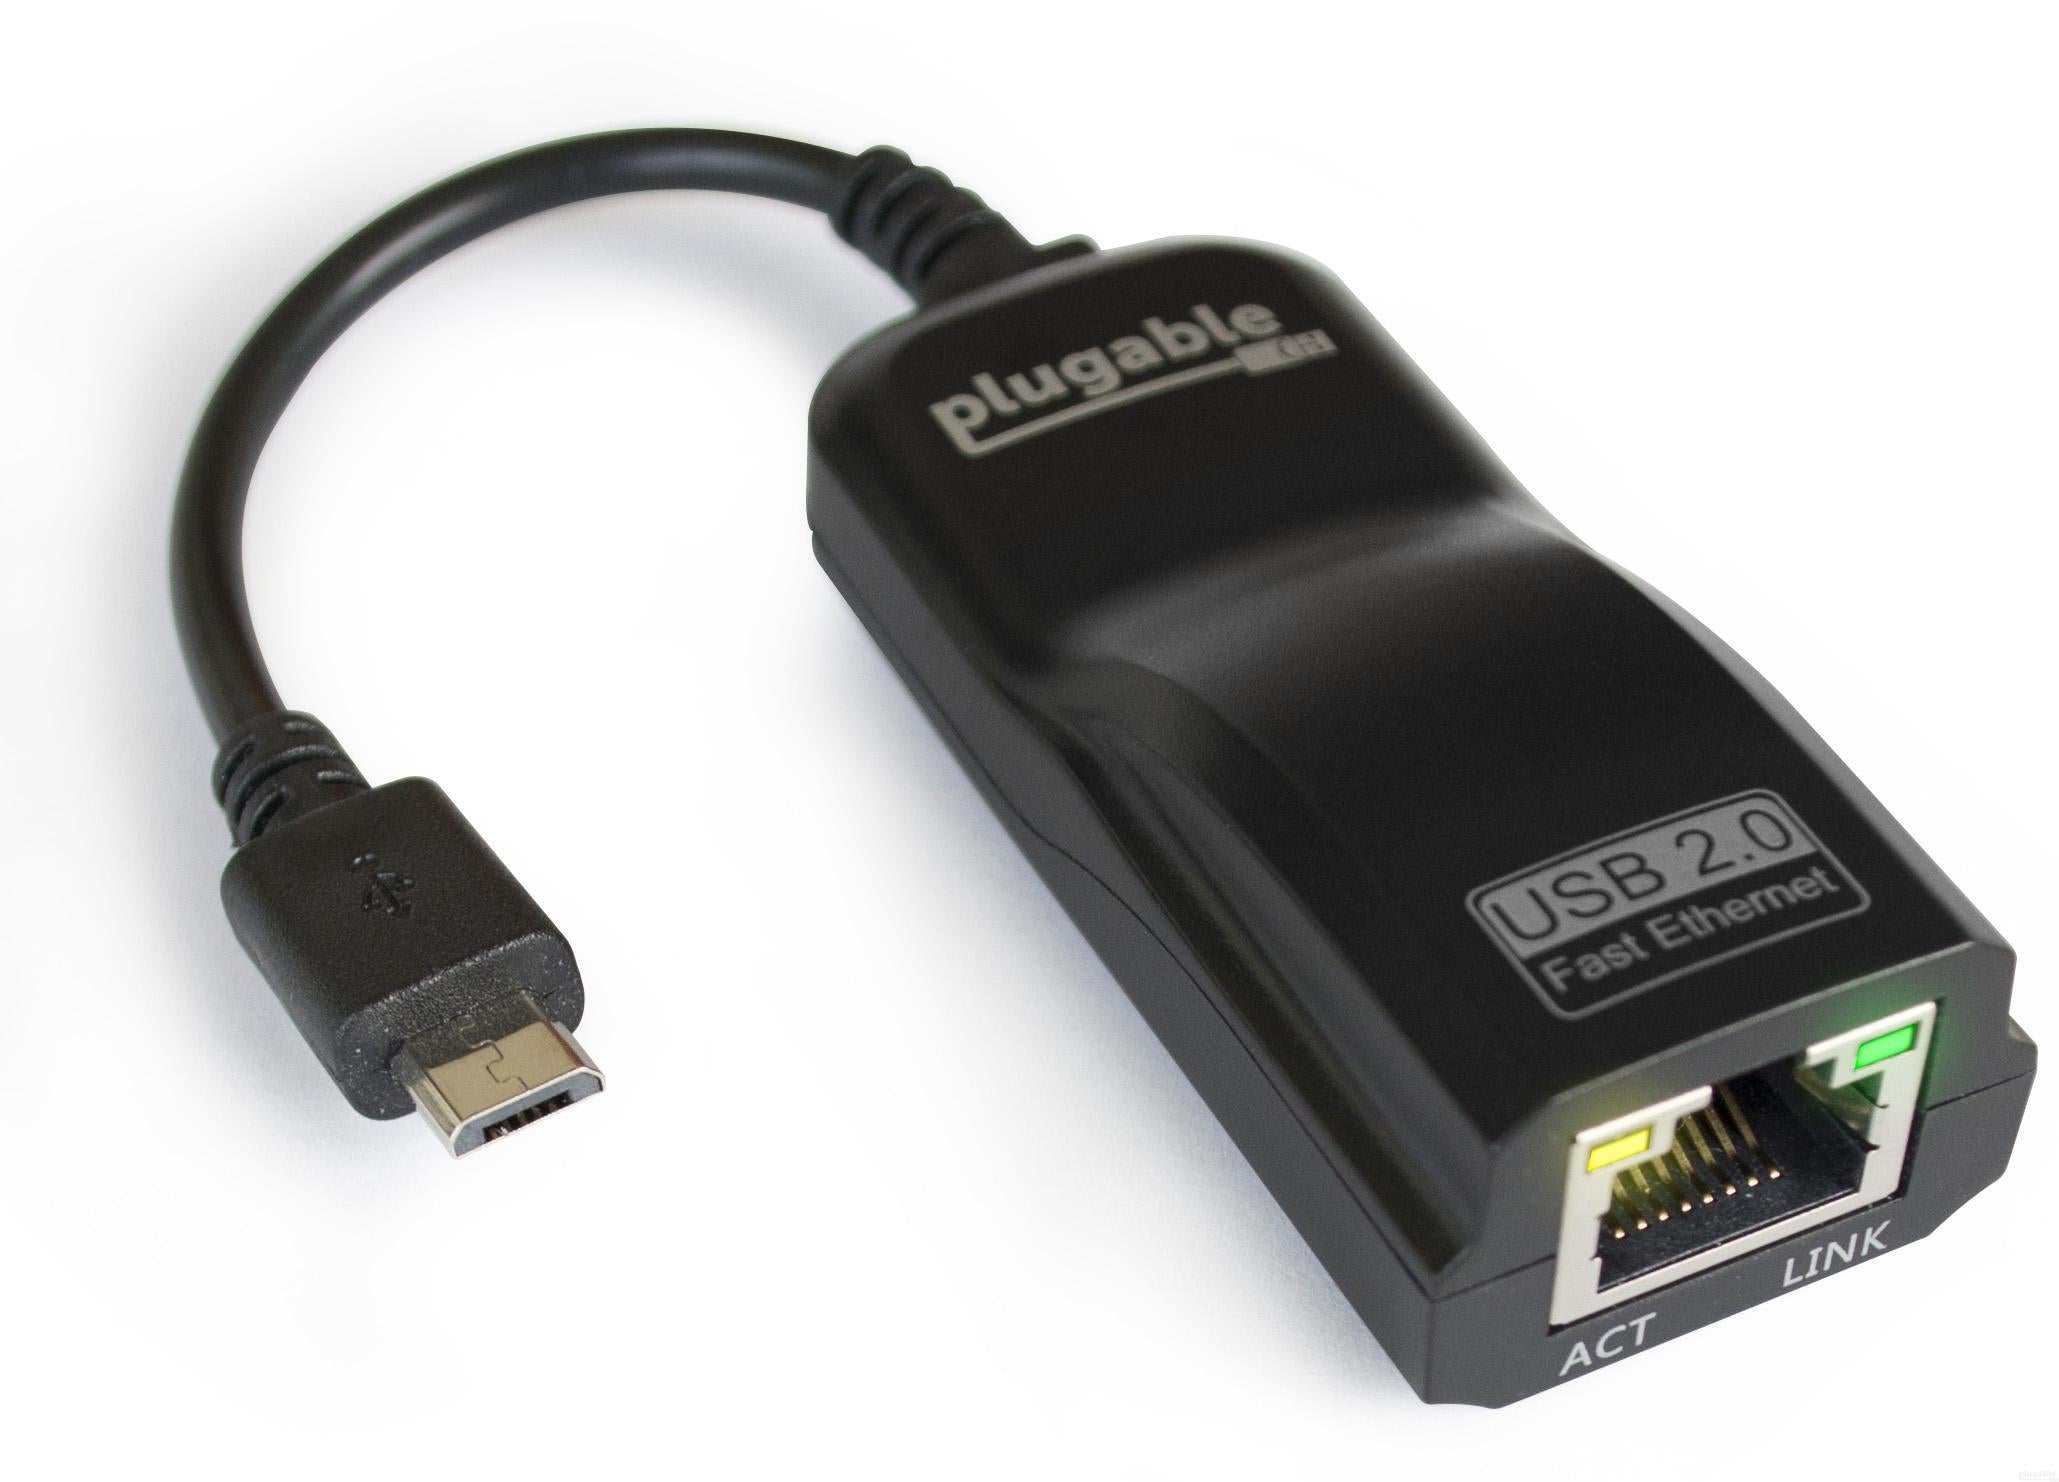
Plugable USB2.0 OTG MicroB 10/100 高速イーサネット・アダプター
SKU: USB2-OTGE100
List Price : $15.95
Amazon Rating :
(1855 Reviews)
機能
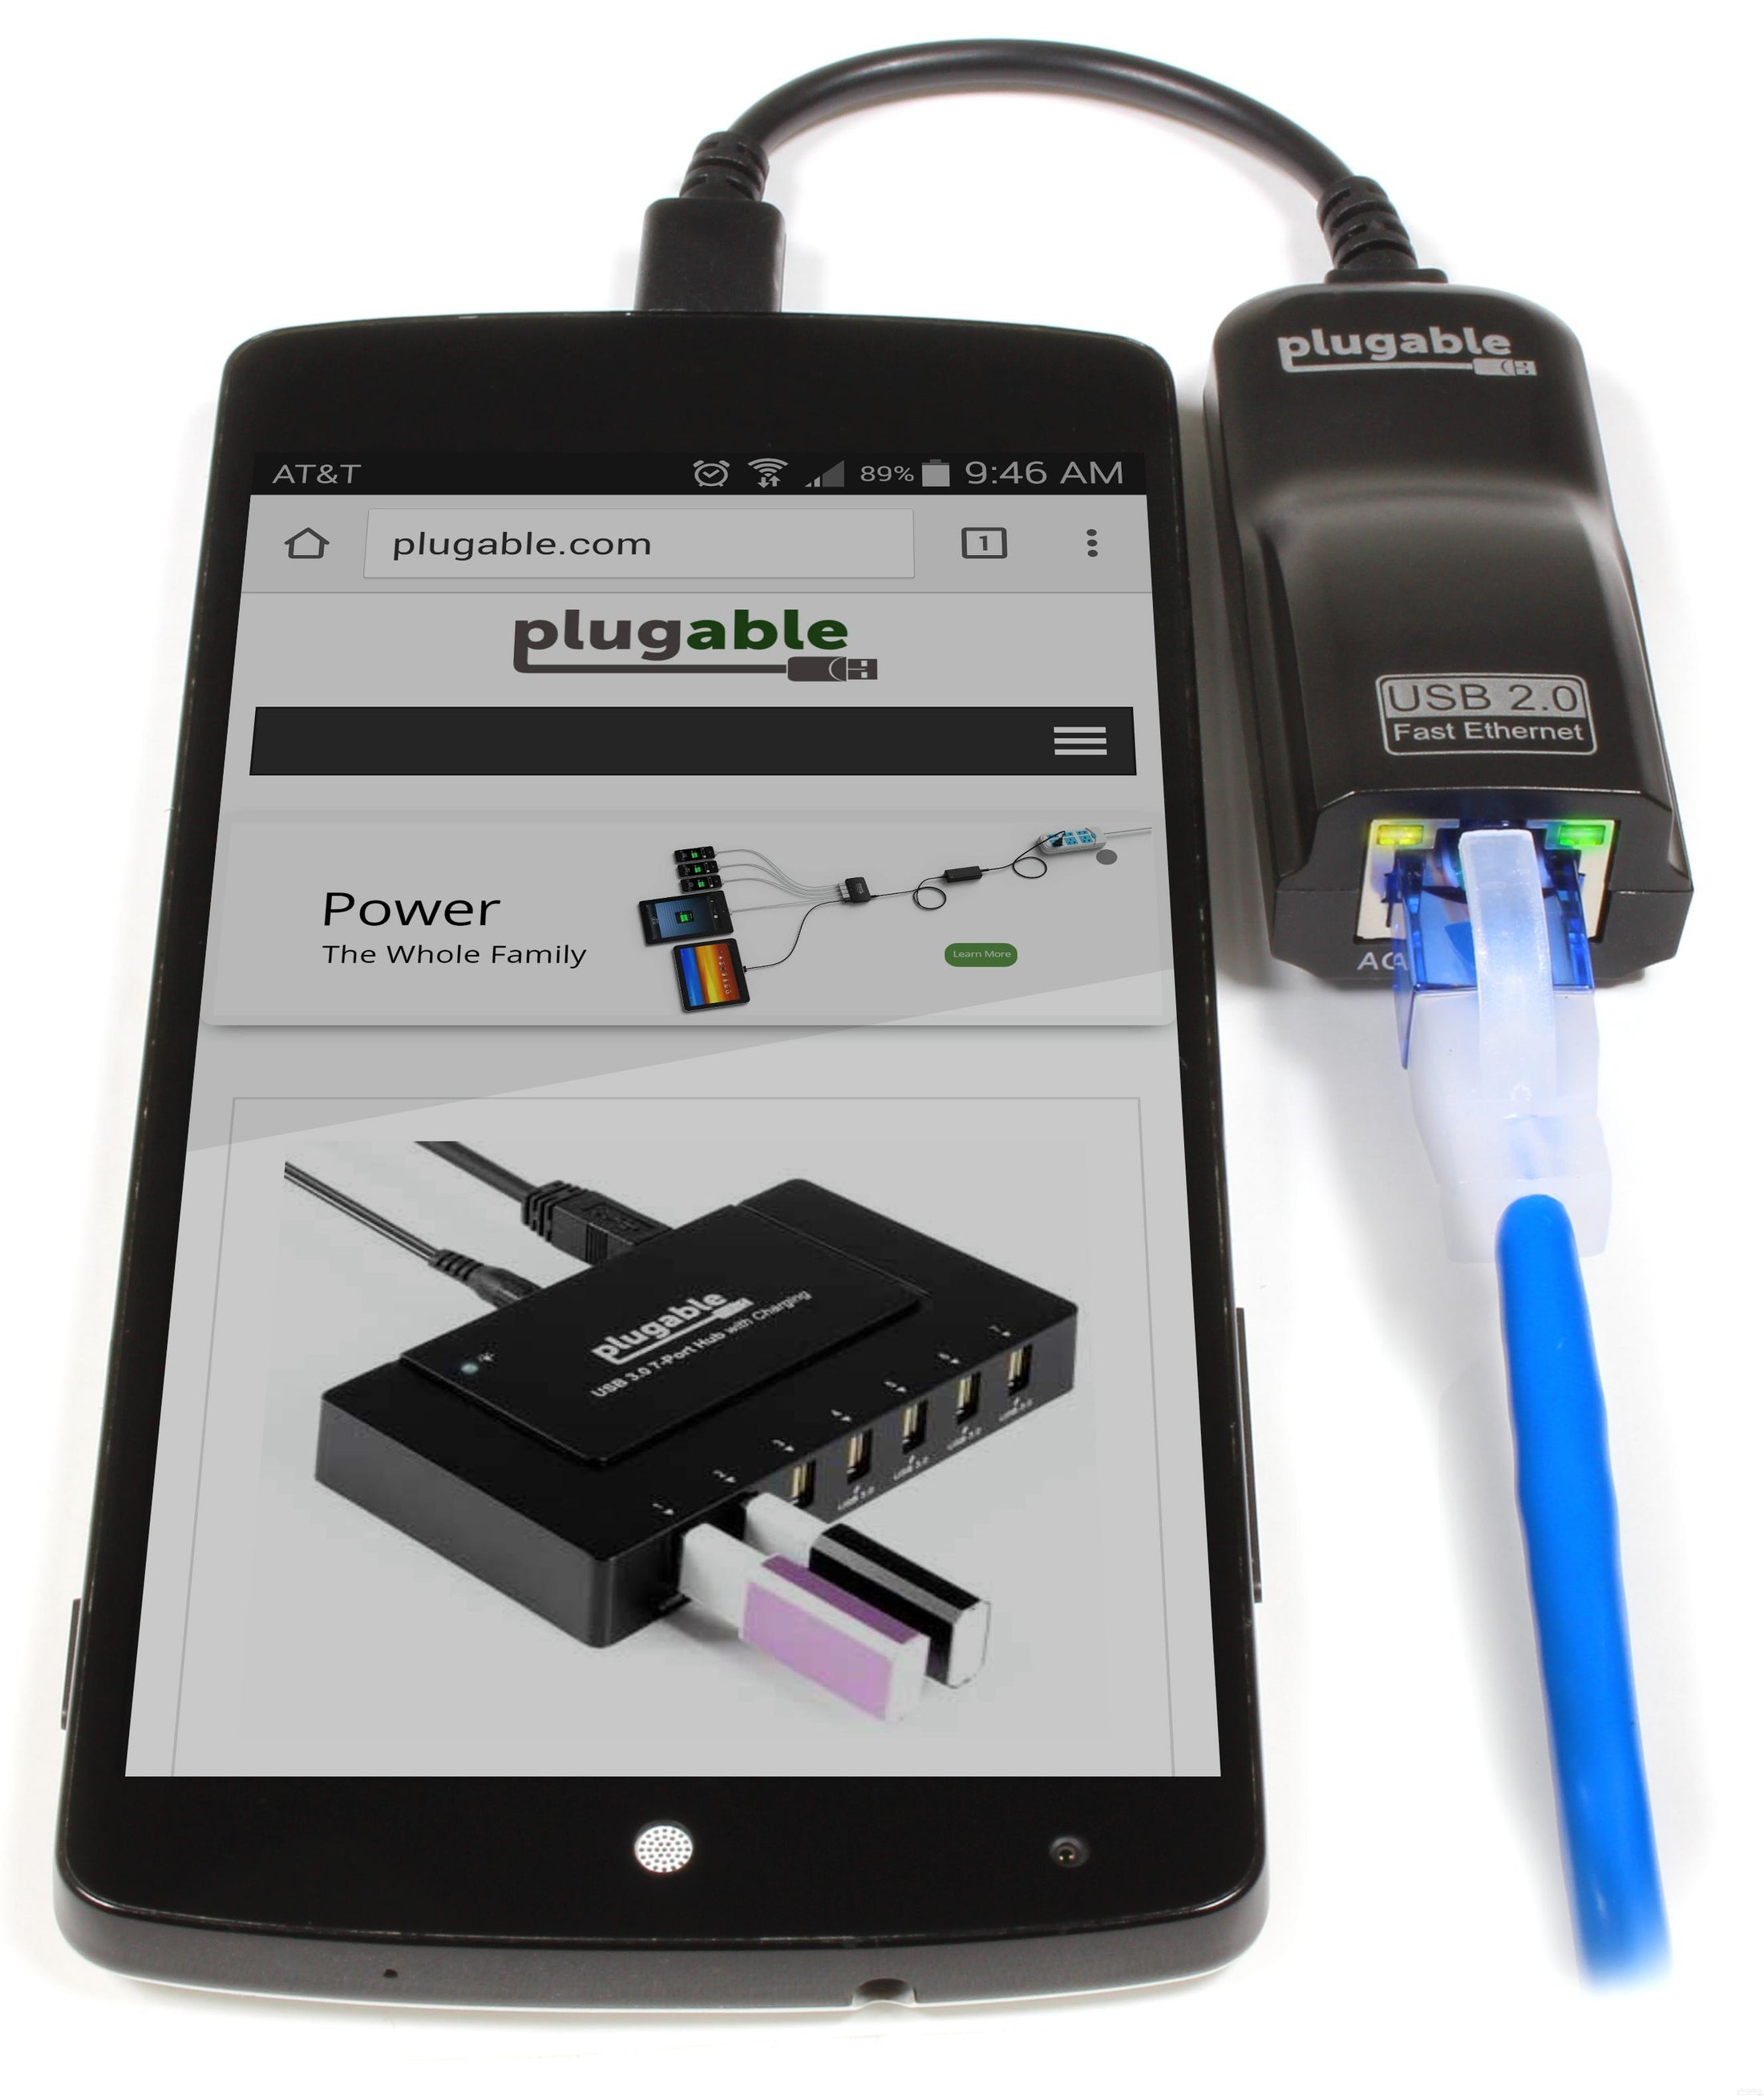
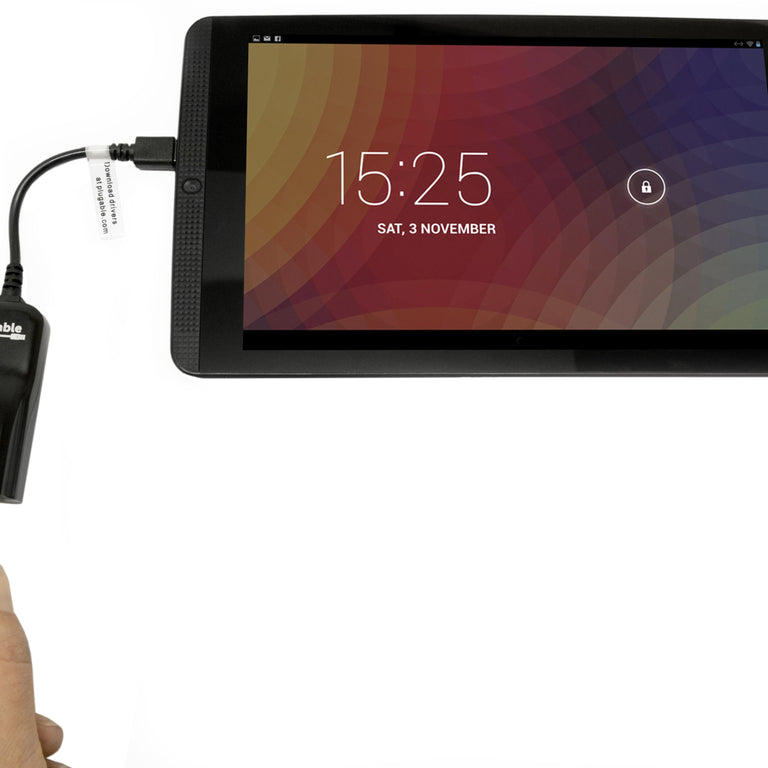
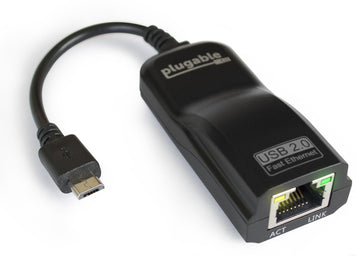
- 高速イーサネット - MicroUSB ポート搭載の Windows タブレットや一部の Android スマートフォン、タブレットを、高速な有線イーサネットに簡単に接続できるようになります。 通常のフルサイズ USB ポートのない機器で使用してください。OTG ケーブル付の製品のため、ケーブルを別に持ち運ぶ必要はありません。実績が長く、様々な機器で採用されている ASIX 社製 AX88772 チップセットを使用しています。
- 簡単に接続可能 - Windows 11、10、8.x の microUSB ポート搭載タブレットで使用できます。Windows システムには必要なドライバがプリインストールされているため、ドライバを導入する必要はありません。USB 2.0 480Mbps バス経由で、10/100 Mbps の高速イーサネット接続ができます。
- 互換性 - Android 機器は、製品によってこのアダプタを使えることも使えないこともあります。ご使用のタブレットやスマートフォンと互換性があるかどうかを確認してから購入してください。対応機種については下記「互換性」タブ内にある情報一覧表をご参照ください。Raspberry Pi OS で使用する場合は、OS を更新し、ドライバ構成を変更する必要があります。
- 互換性のないシステム - 一部の Android 機器、iPhone や iPad などの Apple 社 iOS 製品、Samsung 社の一部のスマートフォン、Amazon および LG、HTC 社製の Android タブレットやスマートフォンなどでは使用できません。
- 2 年の品質保証 - Plugable は 2 年間の品質保証およびメールでのサポートをご提供いたします。正規販売元の Plugable Japan よりご購入ください。製品について質問がございましたら、Plugable Japan サポートまでお気軽にご連絡ください。
有線イーサネットが、Windows タブレットや一部の Android スマートフォン、タブレットで使用可能に

この Plugable USB 2.0 OTG Micro-B10/100 高速イーサネットアダプタ(USB2-OTGE100)を使用すると、ワイヤレスより高速で信頼性の高い有線ネットワークに、ネットワークポートを持たないタブレットやスマートフォンを簡単に接続することができます。
当アダプタは、OTG 機能に対応した Micro-B USBポートがあり、かつ ASIX 社製 AX88772 チップセット用ドライバが用意または既に導入されているタブレットやスマートフォン、Raspberry Pi Zero などで使用することができます。
このアダプタを介した有線イーサネットは、高速で安定したストリーミング、ネットワーク、インターネット接続を提供することができます。
用途:
- 既存の有線のイーサネット接続の交換、または追加
- Wi-Fi が利用できない環境で、タブレットやスマートフォンをイーサネットケーブルでネットワークに有線接続
- WiFi 接続が不安定だったりスピードが非常に遅いような場合の、有線 LAN 接続による問題解消
- 無線 LAN のみ内蔵のタブレットやスマートフォンなどに、有線ネットワーク機能を追加(ただし、デバイスドライバが内蔵されている機器)
すべての Android 機器でこのアダプタが機能するわけではありません。このアダプタを使用するには、ホスト・システム側で AX88772 チップ用のドライバが稼働している必要があります。Android には、一般ユーザがドライバを導入する仕組みがないないため、Android 機器側に必要ドライバが「製品出荷時に、製造メーカーによって」事前導入されていなければなりません。

チップセット
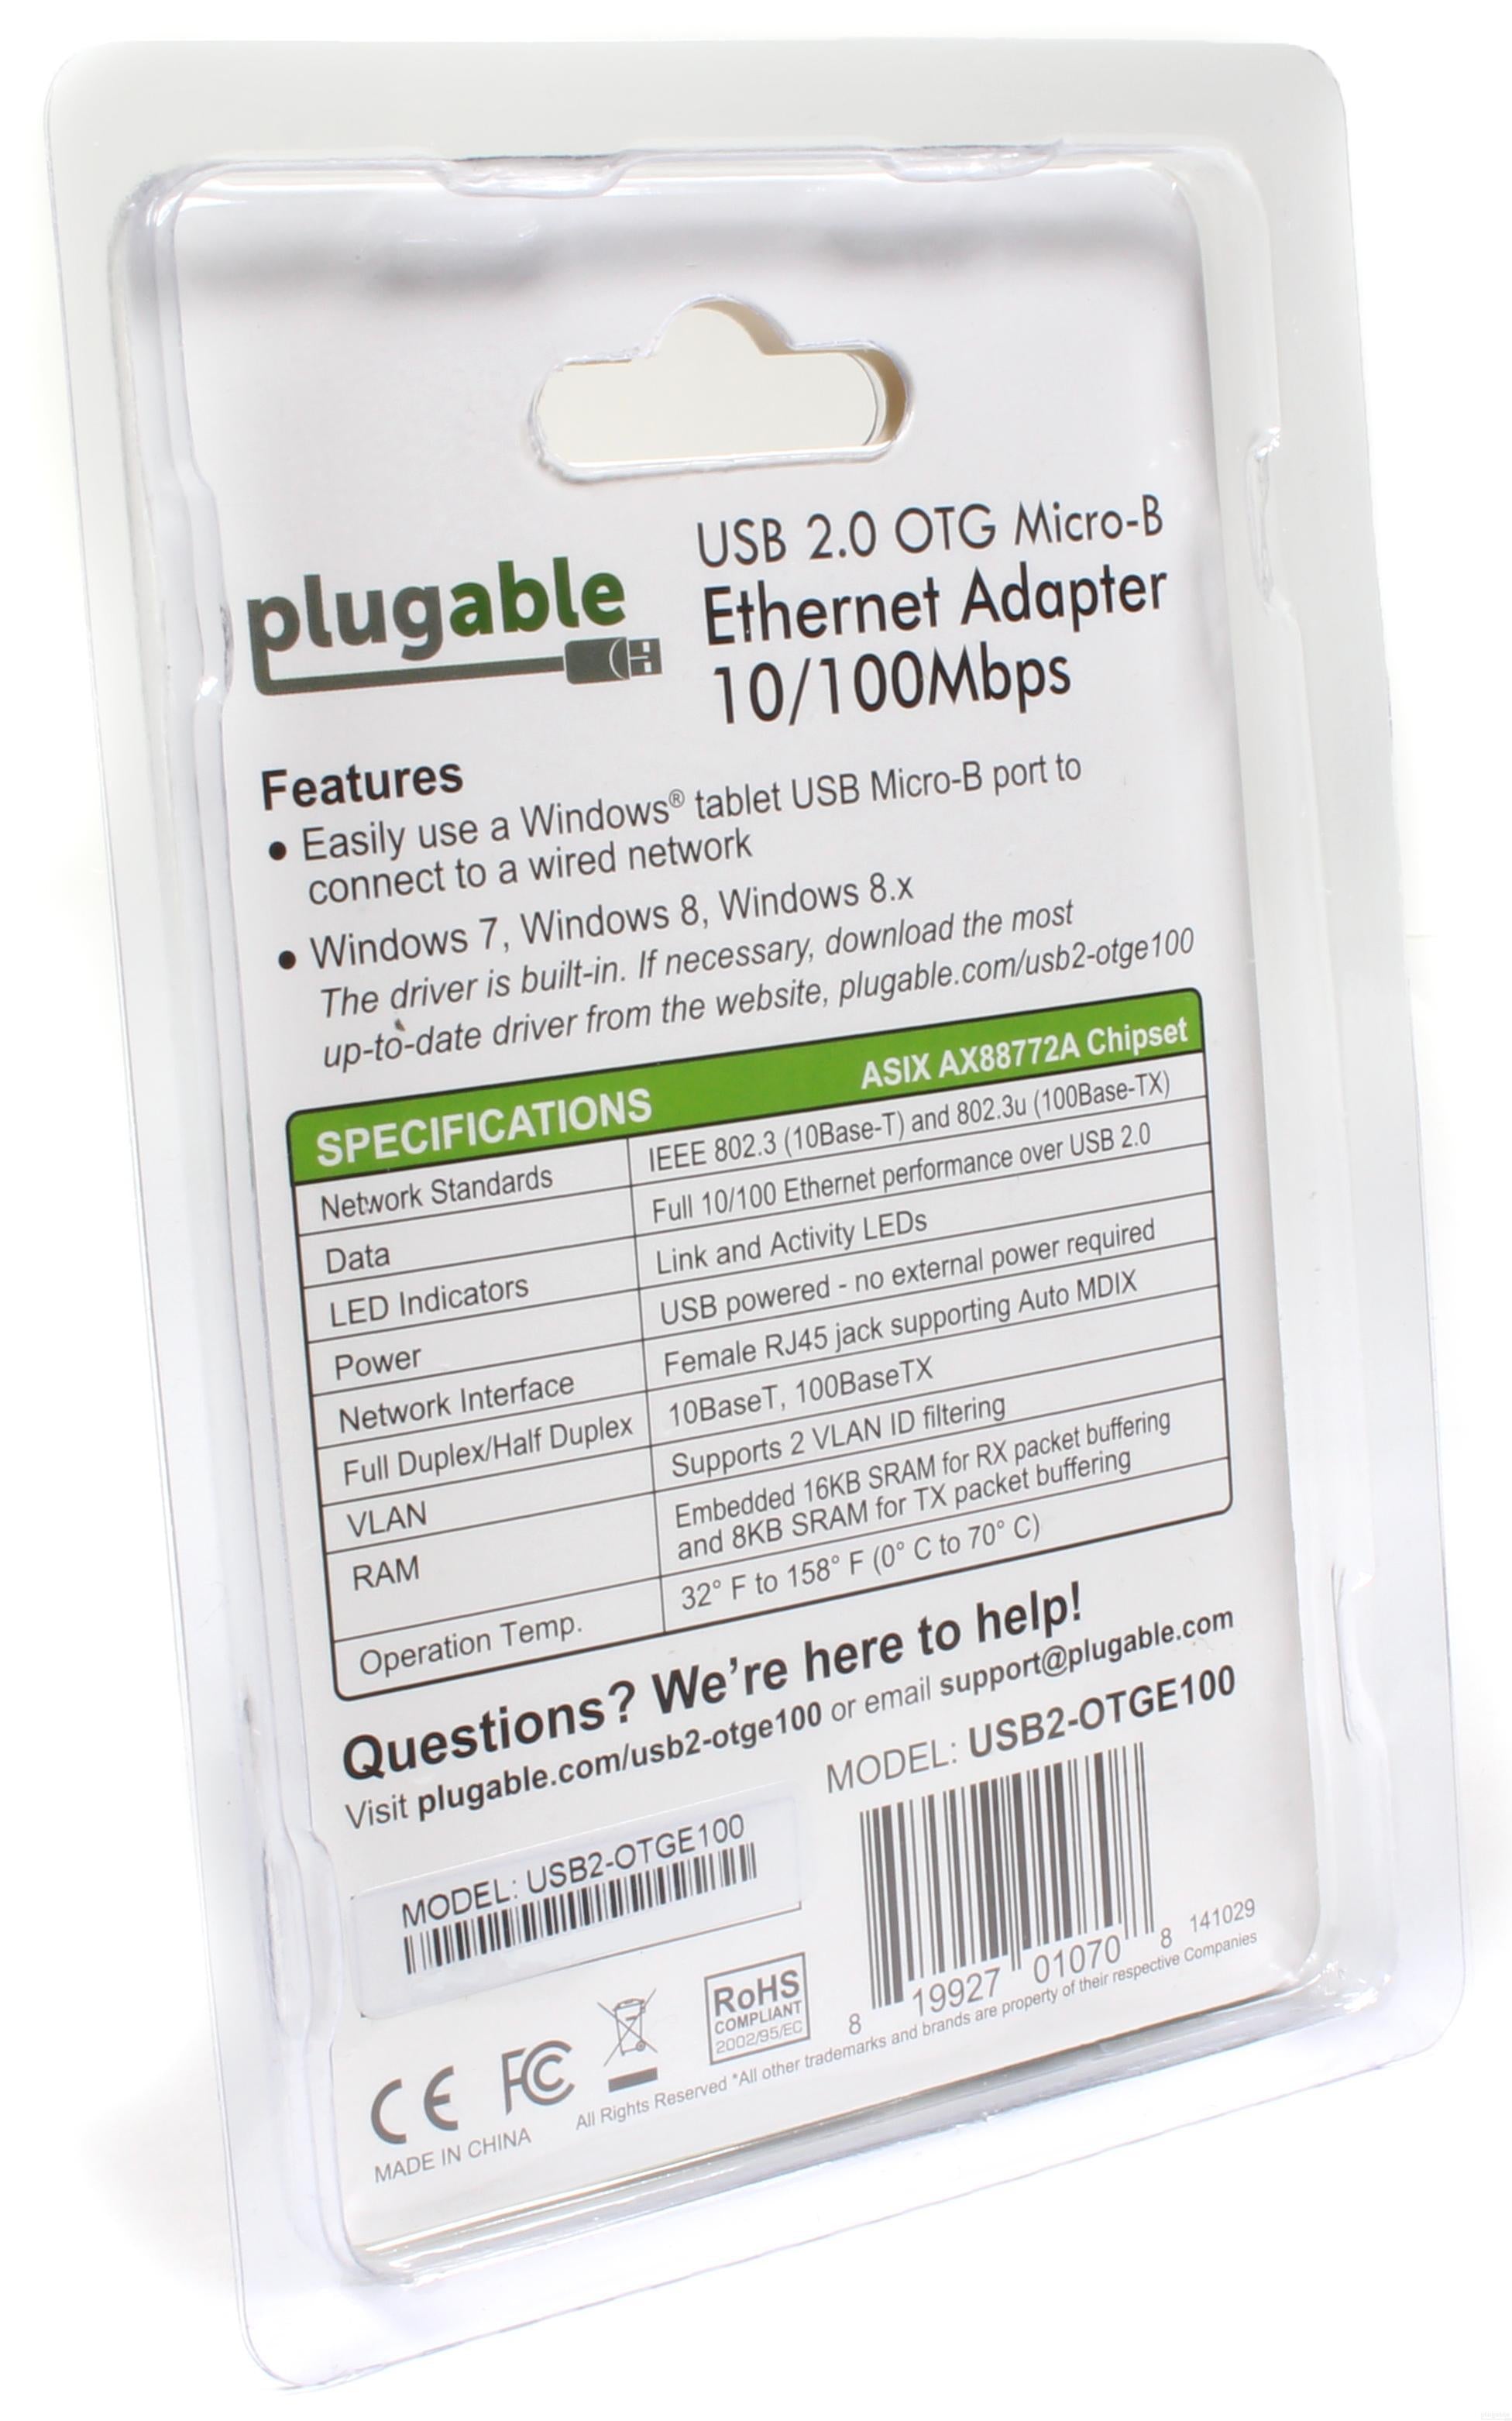
このアダプターは、このアダプターは、ASIX 社製 AX88772A USB 2.0 高速イーサネット・チップセットを使用しています。10/100Mbps の高速ネットワークを実現するとともに、Micro-B USB 2.0 ポートを搭載した機器で使用できます。

互換性

パッケージ内容
注意:ドライバ CD は同梱されていません。PC 環境でで必要な場合は、ネットワークからダウンロードすることができます。
パッケージ内容
内容物と数量 | 注記 |
---|---|
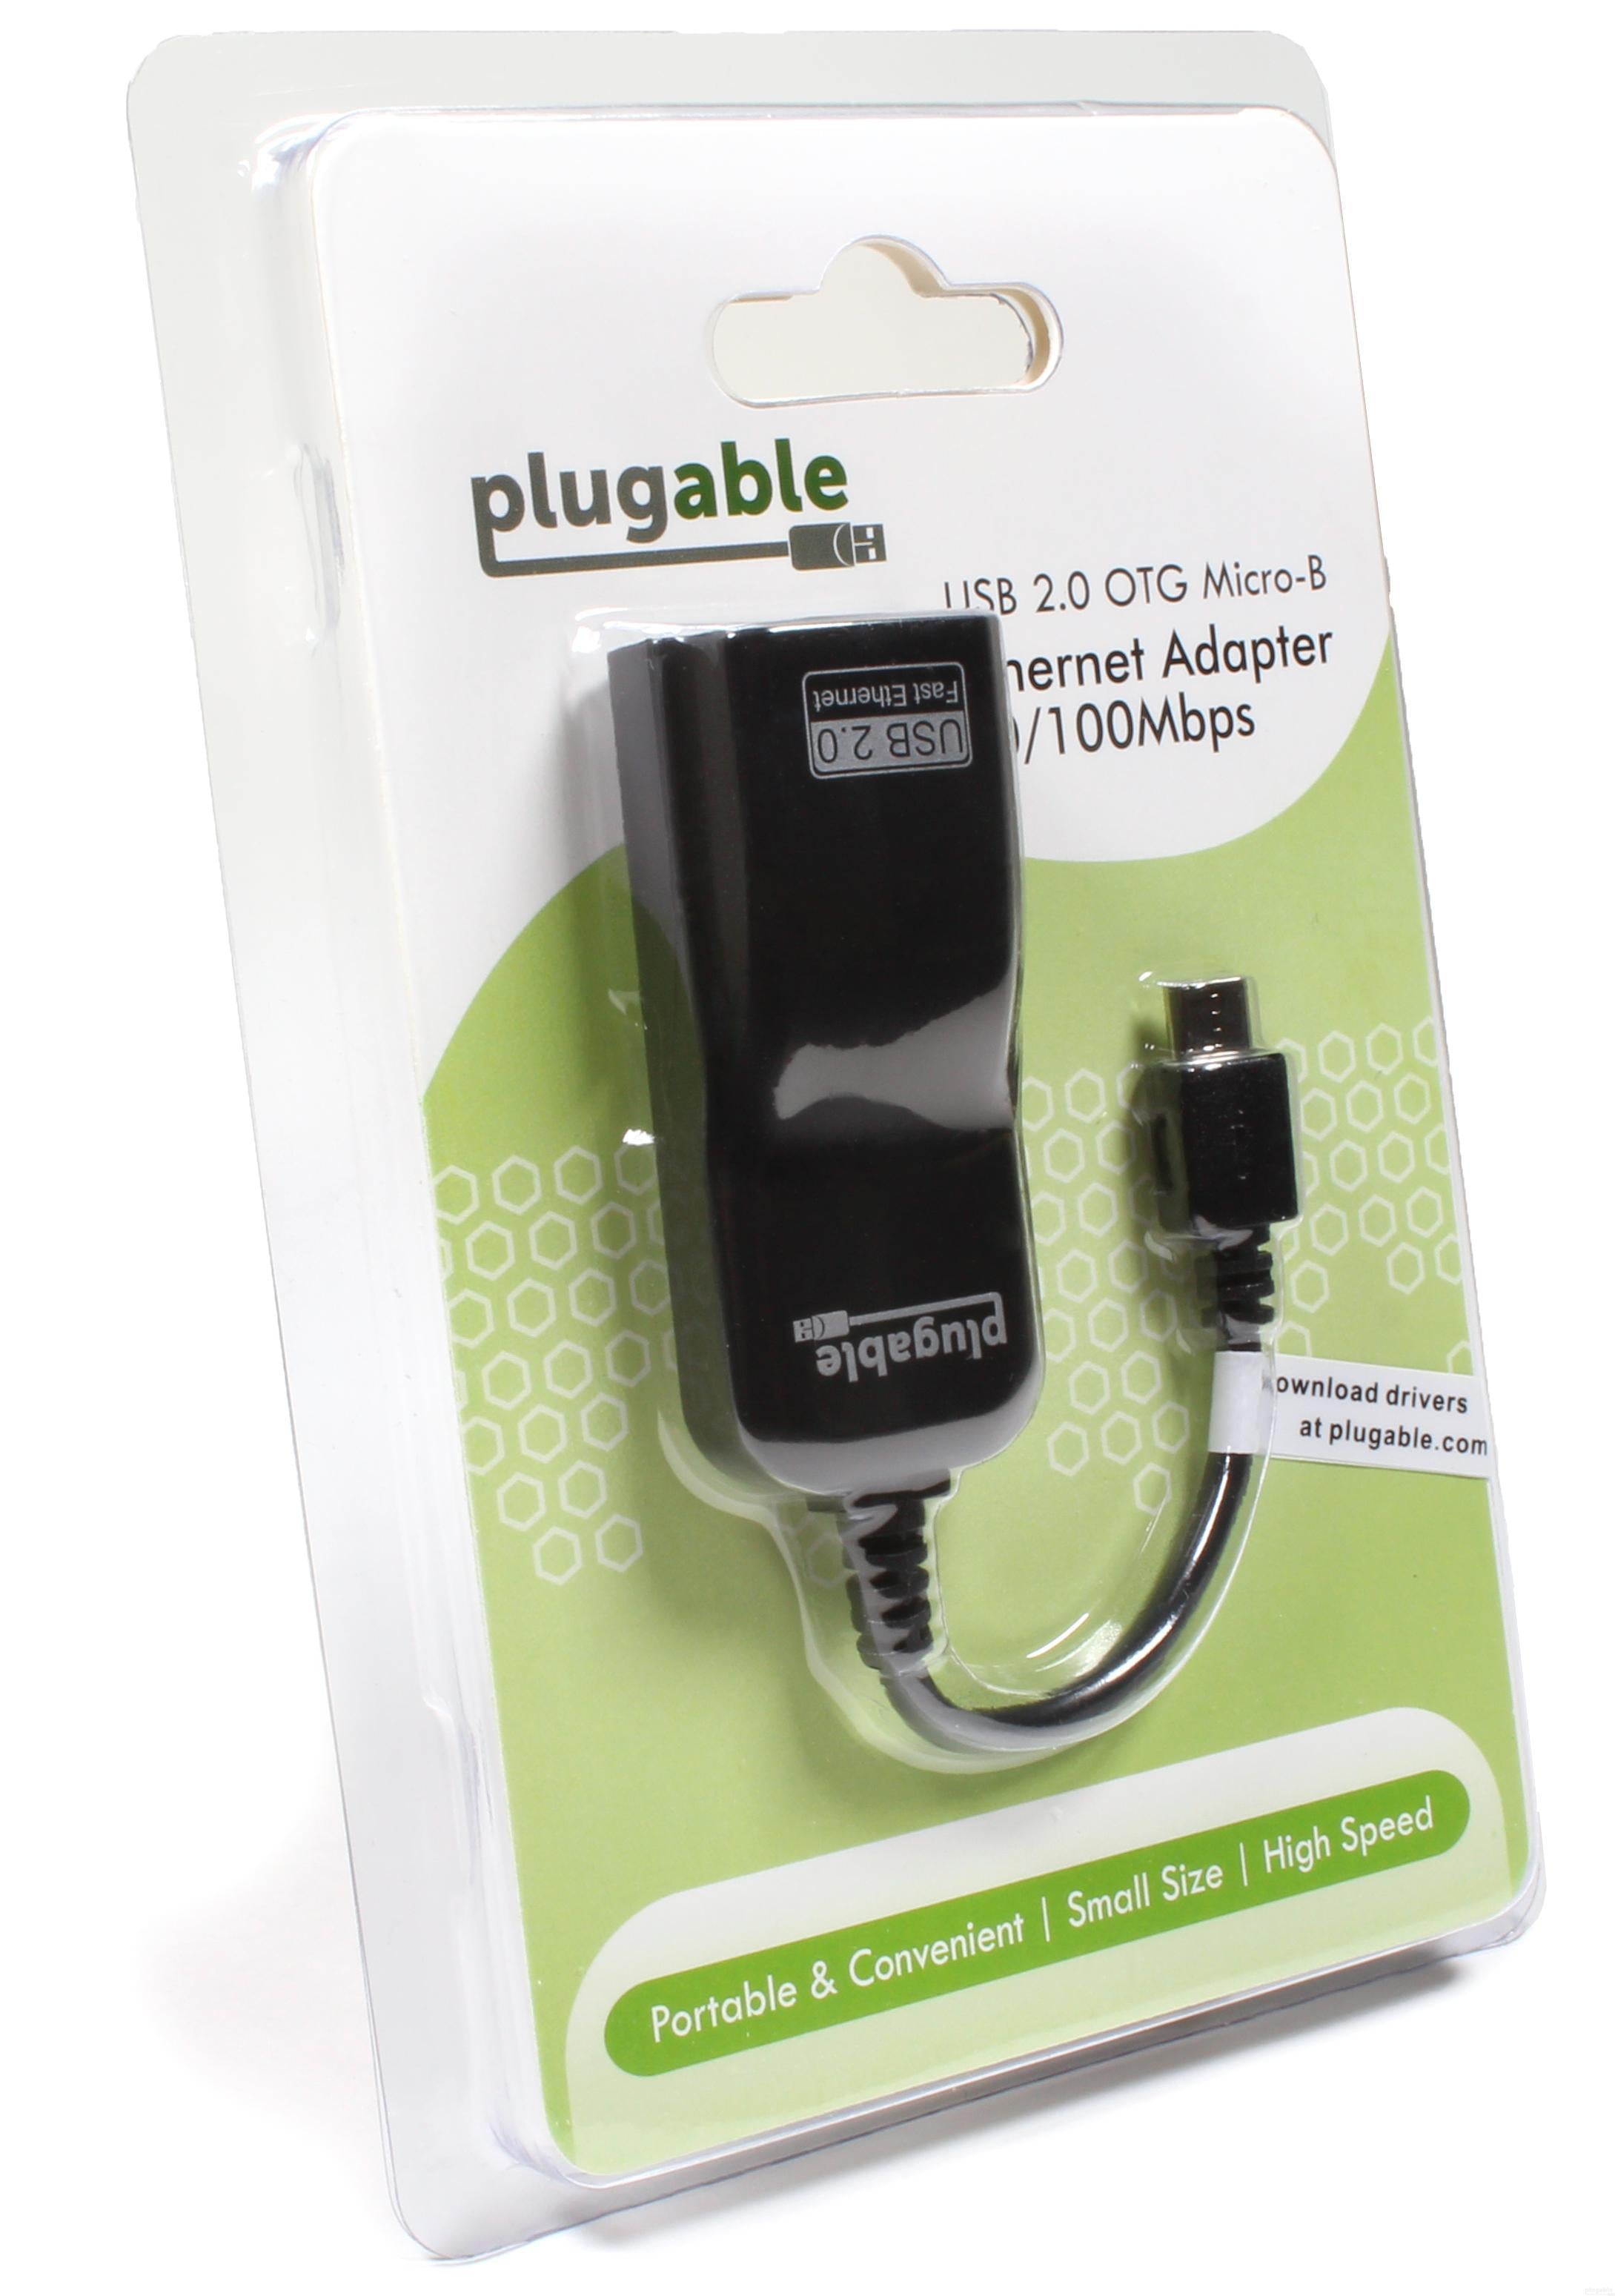
1x Plugable USB2.0 OTG MicroB 10/100 高速イーサネット・アダプター | |
1x クイックスタートガイド |
電源
ポート | 場所 | 電源 ホスト/デバイス | 接続タイプ | 備考 | 電圧 | アンペア | ワット数 |
---|---|---|---|---|---|---|---|
ケーブル・コネクタ | 周辺機器 | USB バスパワー(電源アダプタ不要) | 3.3V | 240mA | 0.79W |
ホストへの接続
ポート | 場所 | バージョンとリンクレート | 機能 |
---|---|---|---|
1x USB Micro-A | ケーブル・コネクタ | USB 2.0 (480Mbps) | USB On-The-Go |
有線 LAN ネットワーク
ポート | 場所 | バージョンとリンクレート | 機能 | チップセット |
---|---|---|---|---|
100 Mbps イーサネット | 前面 | 100BASE-TX | AX88772 ASIX |

互換性
- MicroUSB ポートを備えた Windows 11、10、8.x タブレットで使用可能。デバイスドライバーは、OS に内蔵されています。
- Android 機との互換性は機種によって異なり、その機器の製造元によって決定されています。下記の対応表を参照してください。
- Raspberry Pi OSにも対応しており、Raspberry Pi Zero で使用できます。(ただし、Plugable はこのアダプターを Raspberry Pi 公式 OS でのみ動作確認を行っています。他の OSや物理的なハードウェア・アドオンなどとの互換性は確認されておらず、サポートされていません。)
- Apple(iPhone や iPad)、Amazon、HTC、LG 社製の機器では使用できません。
Android の一部のバージョンでは、イーサネット接続が成功したかを示す外部表示がありません。これを確認する唯一の方法は、スマートフォンやタブレットを機内モードにしてからウェブページを表示してみることです。これが成功すれば、当アダプターによるイーサネット接続が正常に機能していることがわかります。

パフォーマンス
- USB 2.0(480Mbps)のバス上で 10/100 Mbps の高速イーサネットを実現
- 標準的な 8P8C の有線イーサネット接続
- コンパクトで携帯に便利
- 旅行にも最適
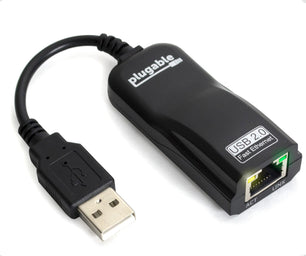
注意: お使いのコンピュータやタブレットにフルサイズのUSBポートがあり、Micro-B USBポートがない場合は、Plugable USB2-E100 イーサネットアダプターをご利用ください。
このアダプターは、プリンターやハードドライブなどの USB 機器をネットワークに接続するためには使用できませんのでご注意ください。またこのアダプターは、イーサネット、Wi-Fi、複数のデバイス間のデータ共有には使用できません。
Android タブレットやスマートフォンで使用する際の注意点:
以下の互換性表から、自分の機器が掲載されているかどうかを確認してください。
Plugable 社は、弊社による検証や報告を受けていない機器の互換性についてお答えすることはできません。たとえ「はい」と表示されている機器であっても、正式な情報は Android 機器メーカーに確認することをお勧めします。
有線 LAN の使用可否や、弊社アダプタに搭載されている ASIX AX88772A チップセットとの互換性については各メーカーによって対応が異なり、予告なく変更される可能性もあります。
ご質問、ご不明な点、互換性情報のご報告などは、nihongo@plugable.com までお問い合わせください。
ドライバのインストール
- Windows 8.x、10、11、Linux Kernel 2.6.35以降:ドライバーは内蔵されています。手動導入が必要な場合は、ウェブサイトのドライバーページから最新のドライバーをダウンロードしてください。
- Raspberry Pi Zero 用の Raspberry Pi OS にドライバーが組み込まれています。アダプターを接続する前に apt-get update と apt-get upgrade の処理を行い、システムを最新の状態にしておくことを強くお勧めします。
- その他の機器については、「互換性」タブ欄にある表を参照してください。
Questions? We're here to help! Please reach out to us directly at: support@plugable.com
Filter Help Articles and Frequent Questions by Category
Articles
Well how about that, it looks like we don't have any articles matching your filters! Try removing one of your choices or clear the filters to show all articles.
You can always contact support if you need help too!
Understanding and Troubleshooting Network Performance
Computer networking is a complex topic. In this article, we'll be taking a deep dive on the nuances of network performance for those who need some additional explanation while striving to be concise, and to educate users of various experience levels relating computer hardware and computer networking.
If you just need to know how to perform a network performance test/benchmark, jump down to configuring iPerf.
Core Network Concepts
LAN vs WAN
With regards to network performance, it is crucial to first separate whether an issue is with Wide Area Network (WAN) performance, or if the issue is with Local Area Network (LAN) performance.
Your LAN is essentially the network inside your home or business. Many homes use a combination modem/router device provided by their Internet Service Provider (ISP). In some cases, especially in businesses, you may have a separate modem and router, along with other equipment connecting to the router such as a network switch.
Your modem, and the connection it establishes to your ISP—whether through coaxial cable, fiber, phone lines, or long-range wireless—essentially marks the point between the WAN and the LAN. The connection your modem makes to your ISP is the WAN, and any devices you connect through your router behind that modem belong to the LAN.
Link Rate
Almost every type of connection your computer makes to any piece of hardware will have a link rate of some kind. The link rate establishes how fast data can possibly be transferred across any given connection, but it does not guarantee how fast the hardware on either end of the connection will actually transfer data.
The concept of link rates, and their related bottlenecks, is likely best conveyed by giving an example of what connections might be involved in transferring a file from one computer on your LAN to another.
- 800Mbps—The file source is a USB 3.0 thumb drive capable of 100MB/s (800Mbps) read/write.
- 480Mbps—The USB 3.0 thumb drive is plugged into a USB 2.0 port on the PC, which has a maximum throughput of 480Mbps
- 1000Mbps—PC1's Ethernet connection establishes 1Gbps (1000Mbps) link to the router via Ethernet
- 300Mbps—The router connects to a second PC (we'll refer to this as PC2) via Wi-Fi, and it has established a 300Mbps link to the Wi-Fi adapter on PC2
- 480Mbps—The Wi-Fi adapter on PC2 is connected via a USB 2.0 port. The link rate of the USB connection to PC2 is at 480Mbps
- 6000Mbps—PC2 is going to store the file on an internal hard drive with a link rate of 6Gbps
- 1600Mbps—File Destination: SATA hard drive capable of 200MB/s (1600Mbps) read/write.
Following this chain, we see that 300Mbps is the slowest link rate established. This means that, regardless of the link rates established elsewhere, the absolute maximum the data can possibly be transferred is 300Mbps.
if we were to change the Wi-Fi connection to a wired Ethernet connection capable of 1Gbps, our performance bottleneck would then become the USB 2.0 connection to the USB drive where the file is stored.
Ports and Interfaces
Interfaces
A network interface represents connections, whether wired or wireless, that are made to form a network between devices.
Ports
Some may refer to physical hardware connections as "ports". For the purposes of networking, ports are logical constructs that can also be referred to as "network ports". Each network interface has 65,535 of these logical ports. Each port on a network interface is a separate data connection.
Benchmarking Network Adapter Performance
To properly benchmark network adapter performance, we need to:
- Use a simple LAN configuration
- Eliminate bottlenecks, especially link rate bottlenecks
Websites like speedtest.net, fast.com, and other performance tools in your web browser are going to use your WAN connection, and are not appropriate for determining if a network adapter is working well.
Transferring files from one computer to another on your LAN is typically not the best way to benchmark a network adapter. File transfers are bottlenecked by a number of things, including performance limitations of the disk the data is on, and often times a lack of establishing parallel network connections to perform the task.
One of the most accurate ways to benchmark network performance on a LAN is by using iPerf . To more effectively benchmark network adapter performance, it is best to establish a point-to-point connection between two PCs, rather than connecting through a router or switch.
Configuring iPerf
To test a connection using iPerf, you'll need at least two network interfaces, and preferably two computers. You'll also need to know the IP (Internet Protocol) address assigned to each network interface . One network interface will function as an iPerf server, and the other network interface will function as an iPerf client. Lastly, you'll need to download the version of iPerf 3.x that's appropriate for your computer's operating system and extract/install it .
Windows
- Make sure the drivers for both network interfaces involved in the test are using up-to-date drivers. Drivers for Plugable products can be found here.
- Download and extract iPerf for Windows
- Open Command Prompt
- Press Windows Key + R or + R, then enter
cmd
in the window that appears - Search the Start Menu for
Command Prompt
, and open it
- Press Windows Key + R or + R, then enter
- Navigate Command Prompt to the directory the directory where iPerf is located
- The
cd
command is for 'change directory'- If you have a folder named 'iperf' on your Windows desktop, you can reach it in command prompt with the command
cd %USERPROFILE%\Desktop\iperf
- If you have a folder named 'iperf' on your Windows desktop, you can reach it in command prompt with the command
- The
- Run iperf in server mode via Command Prompt
iperf3.exe -s
macOS
- Usually it is best to install iperf on macOS using brew in Terminal
- Make sure the drivers for both network interfaces involved in the test are using up-to-date drivers
- Open Terminal
- Run iPerf in server mode
iperf3 -s
Linux
- Usually it is best to install iperf using the package manager in your Linux distro. For example, in Ubuntu, use
apt
: sudo apt install iperf3
- Make sure the drivers for both network interfaces involved in the test are using up-to-date Drivers
- Open Terminal
- Run iPerf in server mode
iperf3 -s
Next, you'll need to run iPerf in client mode, targeting the IP address of the server/interface where iPerf is running in server mode. Additionally, we'll run the test for 30 seconds using -t 30
and with four parallel connections using -P 4
. Running 4 parallel connections is optimal for saturating a network link.
Windows
- Open Command Prompt
- Press Windows Key + R or + R, then enter
cmd
in the window that appears - Search the Start Menu for
Command Prompt
, and open it
- Press Windows Key + R or + R, then enter
- Navigate Command Prompt to the directory the directory where iPerf is located
- The
cd
command is for 'change directory'- If you have a folder named 'iperf' on your Windows desktop, you can reach it in command prompt with the command
cd %USERPROFILE%\Desktop\iperf
- If you have a folder named 'iperf' on your Windows desktop, you can reach it in command prompt with the command
- The
- Run iperf in client mode via Command Prompt (replace 192.168.0.200 with the IP address of the server/interface where iPerf is running in server mode)
iperf3.exe -c 192.168.0.200 -t 30 -P 4
macOS / Linux
- Open Terminal
- Run iPerf in client mode (replace 192.168.0.200 with the IP address of the server/interface where iPerf is running in server mode)
iperf3 -c 192.168.0.200 -t 30 -P 4
iPerf should start performing a network performance test. If the test fails to start, make sure that iPerf is not being blocked by your PC's/Mac's firewall.
Why iPerf is Ideal for Benchmarking
Unlike a file transfer, iPerf runs in memory on the PC and generates data to send using the CPU directly. This alleviates potential bottlenecks generated by storage devices, and allows you to explicitly control how many parallel connections are being used to transfer data rather than being unsure if parallel network connections are being used by other means.
Conclusion
There's a lot more to networking that isn't covered in this article, but we hope this helps explain enough to get an accurate measure of your network performance.
If you need assistance with your Plugable product that features network connectivity, please contact us for further assistance.
Installing Plugable USB-Ethernet Drivers in Windows 10
**This is a legacy article from 2015. Please see notes for important information on changes.
Update: A Windows 10 driver now exists for the USB2-E1000. However, it will not appear in the CD that comes with the adapter until the next lot of adapters is shipped. The updated driver can be downloaded from this link: Windows 10/8/8.1, 7, Vista, and XP drivers for USB2-E1000.
If you are not able to connect to the Internet without installing the driver, you can download it onto a flash drive on another computer and use that to install it.
In testing Plugable’s USB-Ethernet adapters with Windows 10, we were happy to discover they all work successfully when their drivers are properly installed. However, an installation problem could cause issues with the USB2-E1000.
Drivers are already built into Windows 10 for: the ASIX AX88772 chip in our:
- The ASIX AX88772 chip in our USB2-E100 and USB2-OTGE100 adapters
- The ASIX AX88179 chip in our USB3-E1000, USBC-E1000, and USB3-HUB3ME*.
*Note In 2017, our USB3-HUB3ME was redesigned to include a Realtek RTL8153 chipset and drivers. Windows 10 should automatically configure these drivers when you plug the adapter in.) When you insert these adapters into a USB port, the drivers should automatically install with no need for an internet connection.
However, the driver for the ASIX AX88178 chip in our USB2-E1000 is not pre-installed in Windows 10, and we have discovered a problem with the downloadable driver that keeps it from installing. If this happens, the adapter will show up in Device Manager as “AX88178” with a Code 28 error: “”Drivers for this device are not installed.”
There are several ways to work around this issue, depending on the scenario:
1. Upgrading from Windows 7 or Windows 8.1: If you have already installed the driver for the USB2-E1000 in Windows 7 or 8.1 and upgrade directly from that version to Windows 10, the currently installed driver will be available to Windows 10, and your adapter should work without any further effort. If you haven’t yet installed this driver, please install it before upgrading.
The easiest way is to establish an internet connection, either wirelessly or through another Ethernet port, then plug in the USB2-E1000. Windows Update should see it and automatically download the correct driver. You can also download and install the driver from our website or from the disk that came with your adapter.
2. Doing a clean install of Windows 10 or using the USB2-E1000 on a new Windows 10 computer: Since the previous Windows 7 or 8.1 driver will not be carried over to a clean install of Windows 10, it must be freshly installed. The only way to accomplish this is to have an internet connection available when you first plug in the USB2-E1000.
That will allow Windows Update to download and install the driver. If you are in a situation where this is not possible, we recommend delaying the update until an internet connection is available, or until this issue has been fixed. Currently, the driver on the Plugable and ASIX websites is not working with Windows 10.
If you’re a user of a Plugable USB-Ethernet adapter and are experiencing issues, we’re here to help! If support is needed, please run our PlugDebug tool found HERE to collect system logs, and send the resulting file to support@plugable.com along with a description of the behavior you’re experiencing and any additional details you feel are relevant.
How to add wired Ethernet to Raspberry Pi Zero 2 W with Plugable's USB2-OTGE100 Ethernet adapter
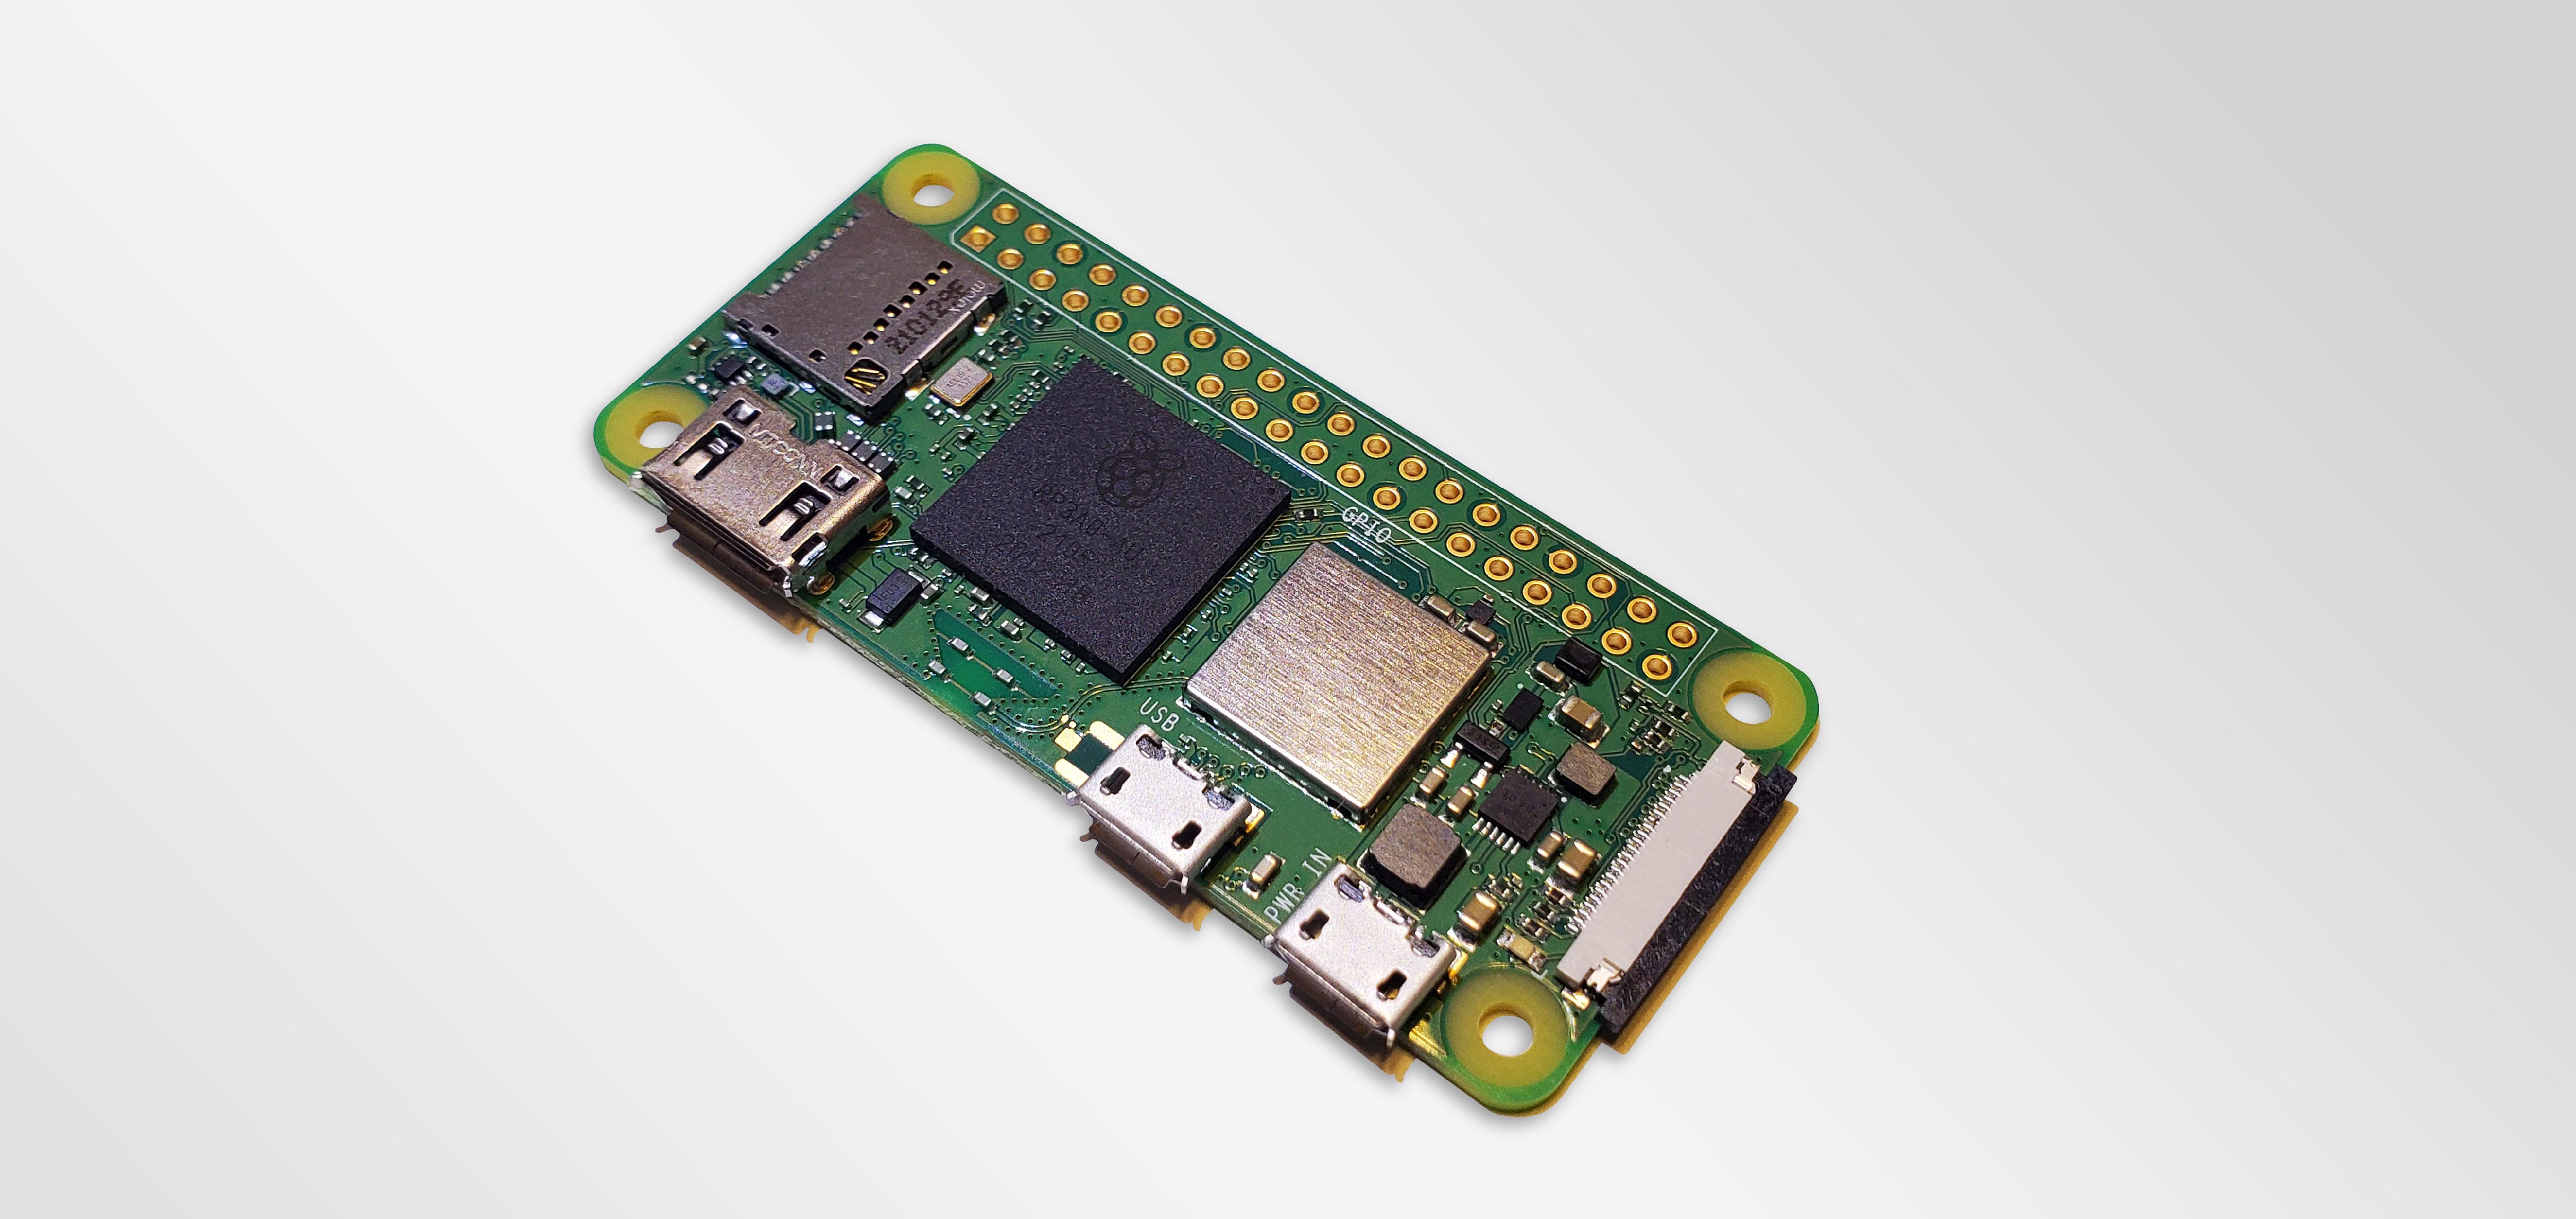
The Raspberry Pi Zero 2 W is a versatile single board computer that can be used for a variety of projects, and by people of varying skill levels. The compact form factor and ability to use open source operating systems and software makes for a great learning tool, and we were able to pick one up!
This guide will show you how to set up a headless wired Ethernet connection on your new Raspberry Pi Zero 2 W (and legacy Raspberry Pi Zero) computers with our Plugable USB2-OTGE100 wired Ethernet adapter.
Why use Wired Ethernet?
Adding a wired Ethernet adapter may help improve data transfer speeds, should improve device connection stability, and can reduce wireless traffic. Whatever the goal, our 10/100mbps USB2-OTGE100 adapter can provide wired Ethernet access to Raspberry Pi Zero boards via USB Micro. The adapter uses an ASIX AX88772A chipset with drivers that are included in Raspberry Pi OS which can make the setup process easier. With that said, we still need to do a little work to get things going, so let's get started!
Note
All steps and tests were completed using:
- A Raspberry Pi Zero 2 W board
- The official Raspberry Pi Lite OS
- Our Plugable USB2-OTGE100 wired ethernet adapter
We cannot guarantee compatibility with other operating systems or add-on equipment. Check with the developer/manufacturer of your operating system/add-on equipment for help with additional setup. The Raspberry Pi Forums are a great source of information and community!
Step 1 - Download the operating system image
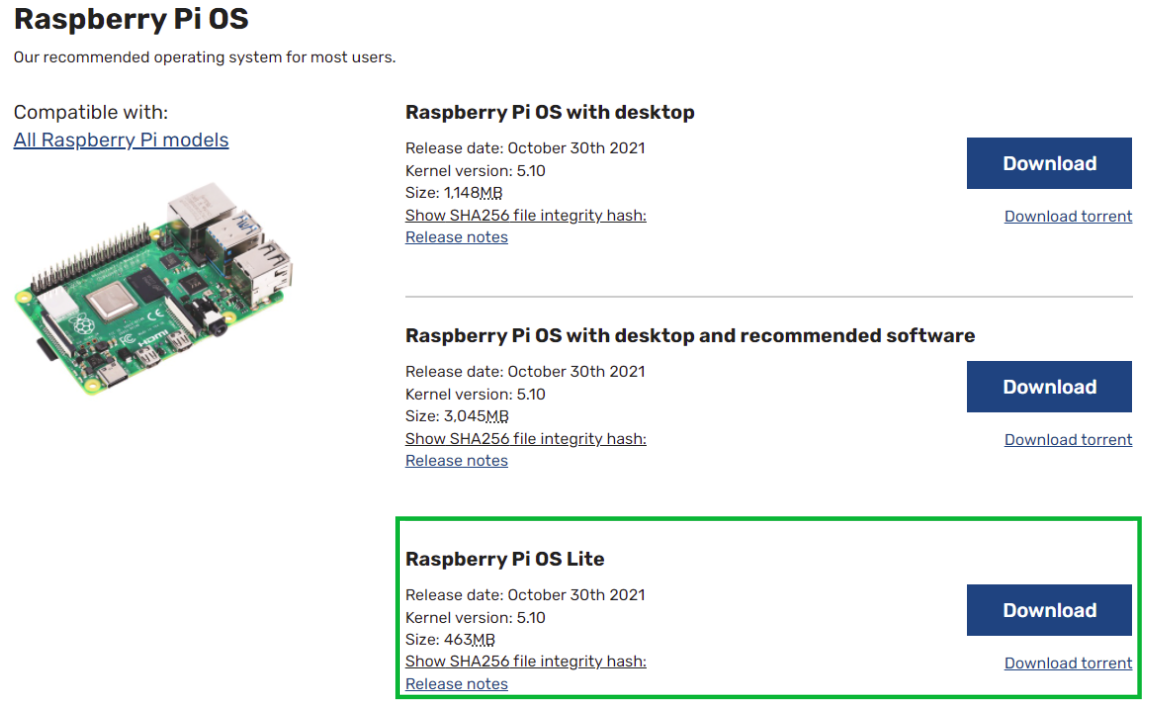
First, we need to download the Raspberry Pi OS image, which you can get from this link: Raspberry Pi Operating system images. We're going to use the Raspberry Pi OS Lite version for these steps, but, you can also use the full Desktop versions as well. Download the image and get ready for the next step.
Step 2 - Flash the image onto the card
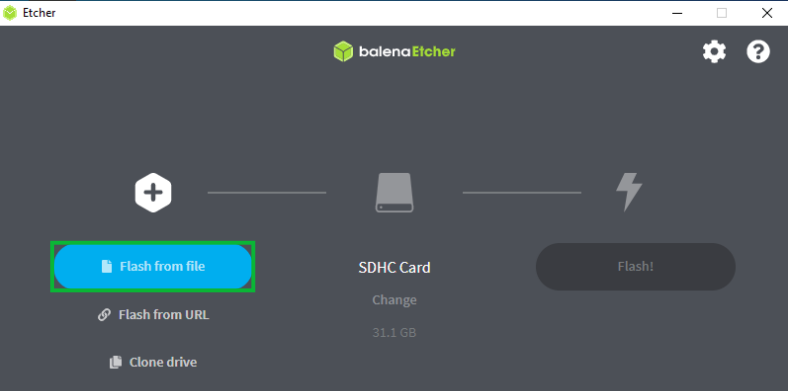
Now, we need flash the image to the Micro SD Card. Let's use Etcher, which is an open source tool for creating bootable drives and is available on Windows, Mac and Linux! You can get official information and download Etcher from this link: Official Etcher information and Download.
After you've installed Etcher
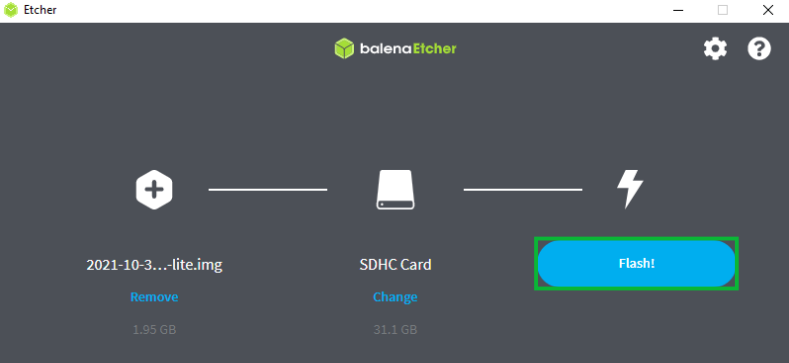
- Open Etcher and click Flash from file, which will open a file explorer window.
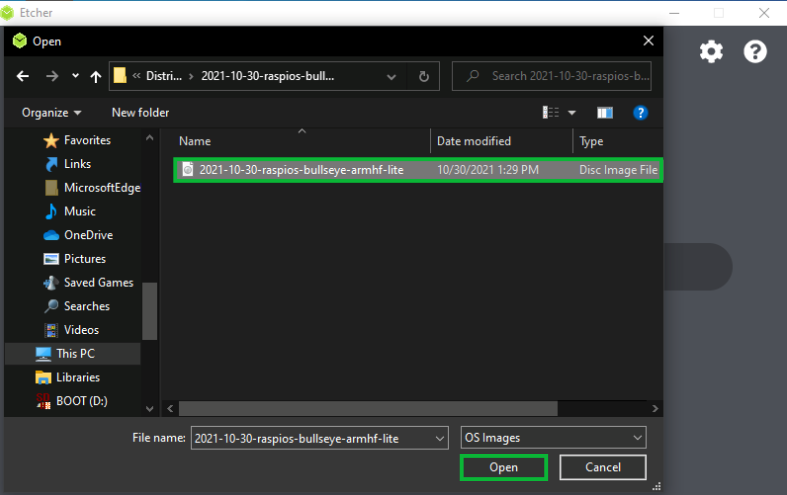
- Then, click on the operating system image that you downloaded, and then click Open to move on.
- Now, we can see that we have the image picked and ready to be flashed onto the SD Card, so go ahead and click Flash! to begin.
-
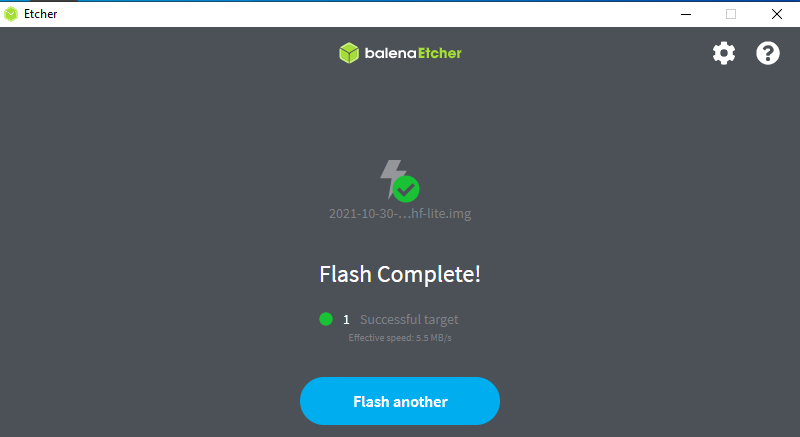
Flash Complete! Great, now let's close out of Etcher, and get ready for the next step.
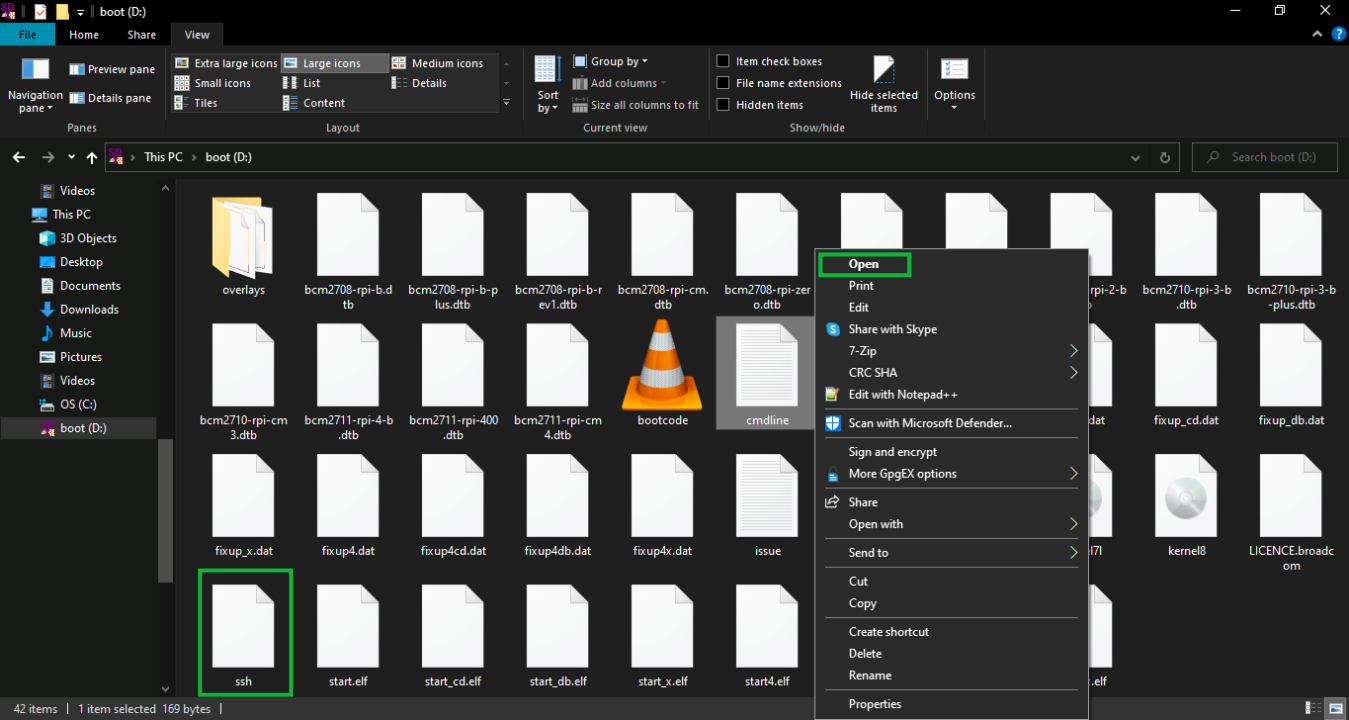
Step 3 - Create the SSH file, and copy it to the card
Now that we've finished flashing the image to the card we need to give the Raspberry Pi instructions to use SSH (Secure Shell) automatically when it boots up.
Secure Shell is a network protocol that will allow us to remotely access the Raspberry Pi Command Line Interface (CLI). This is very helpful for our initial setup, and can be used to access the Pi on a regular basis without having to set the Pi up with a mouse, keyboard and monitor.
We'll be using PowerShell here as the program is likely already installed on your Windows computer.
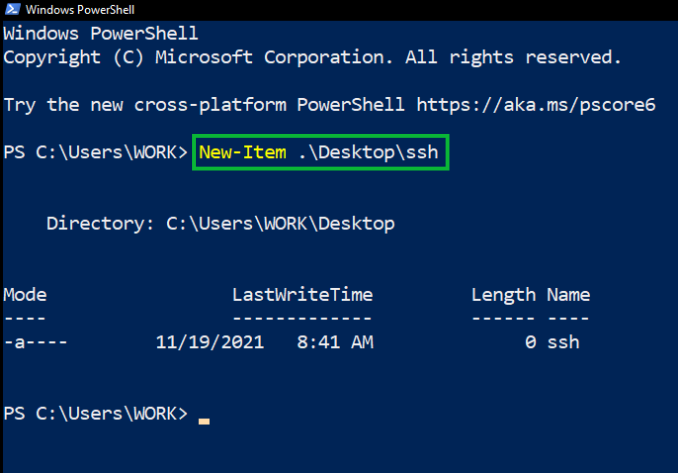
- Open Windows PowerShell, and enter
New-Item .\Desktop\ssh
into the terminal. This will create a blank file named "ssh", on your Desktop view which we'll copy over to the card.Note
For macOS and Linux, open up a Terminal window, and enter
sudo nano Desktop/ssh
. This will open up a blank file for editing on the Desktop. Press Ctrl and X to save and exit. This will put a blank file named ssh without a file extension on your Desktop view.
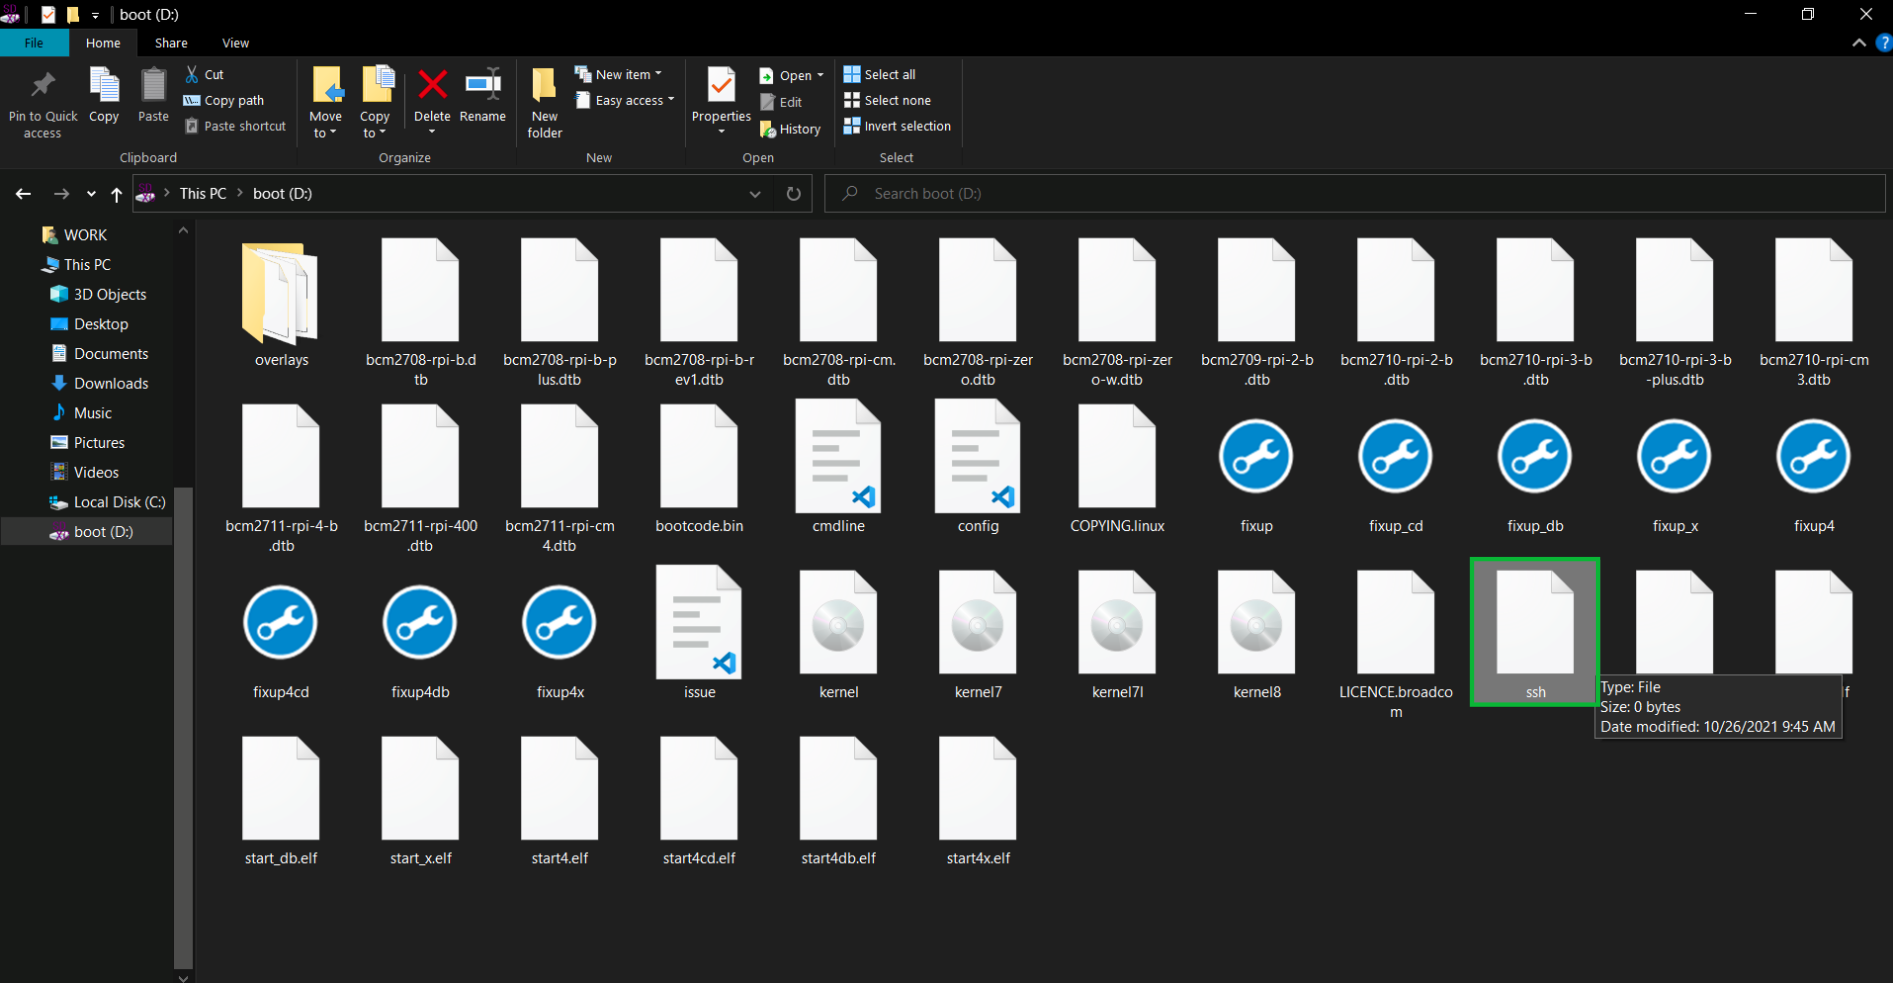
- Copy the file on to the card, which will run on boot up and enable SSH automatically.
Step 4 - Edit the cmdline.txt file on the Micro SDCard
The next thing that we need to do is to edit the cmdline.txt file on the Micro SDCard itself. This will let us create a special IP address for the Raspberry Pi to make setup easier. Here's how:
- Open up the SD Card, and right click on the cmdline.txt file and choose Open. This will open up your default text editing program where we can edit the file. For this example, we're using NotePad on Windows.
- You'll see a string of text at the top which we should leave as it is. Go down to the next line, and type in ip=raspberrypi.local. Then, save and close the document.
Step 5 - SSH into the Raspberry Pi
Now, we are ready to communicate with the Raspbery Pi using ssh! We're going to use PowerShell on Windows, and the default terminal on macOS and Linux to get this job done. There are many other ssh clients available such as PuTTY and Termius, and more. You may want to take some time later to find the best program for you.
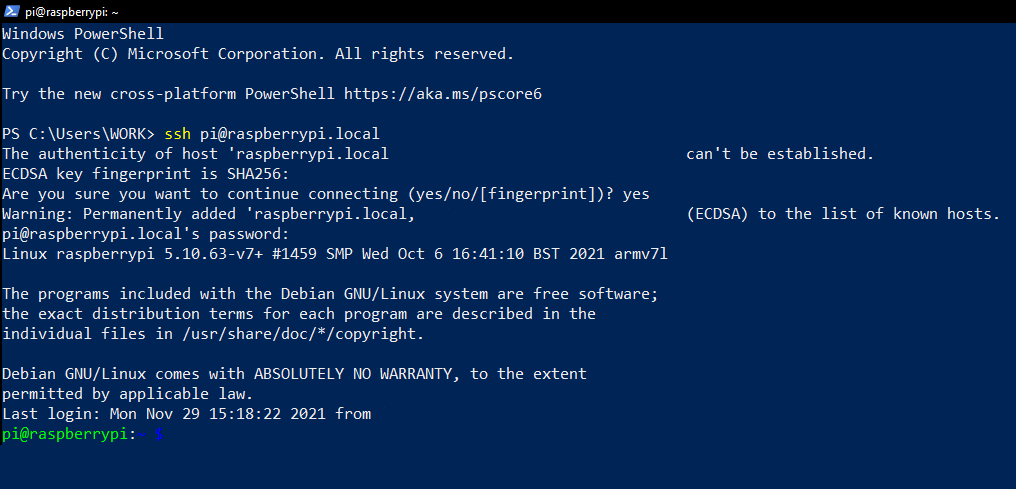
- Open PowerShell, and enter
ssh pi@raspberrypi.local
into the terminal. - A message will pop up stating that the authenticity of the host can't be established. This is normal when you try to make a new connection, and will happen the first time you connect to the Raspberry Pi.
- You'll be asked if you want to continue connecting. Type yes into the terminal, and press enter. This will add the Raspberry Pi to the list of known hosts for your computer.
- Finally, type the default password in which is
raspberry
and press enter to login. (NOTE - the password won't actually show up here for security)
Start using your Raspberry Pi
Now that you're logged in you can start using your Raspberry Pi! Here's a few suggestions of things you'll likely want to do to complete your setup:

-
Change your password. Enter
passwd
into the terminal (no, that's not a typo!). This command will let us change our password. NOTE - by default, you will not see the password characters as you type.- You'll be asked to enter the current password, which is
raspberry
- Then, enter a new password, you'll have to re-type it to make sure it matches. Once you have a match you'll have successfully changed the password
- You'll be asked to enter the current password, which is
-
Use the Raspi-Config tool for further system setup. Enter
sudo raspi-config
into the terminal and you will be taken to the Raspberry Pi Software Configuration Tool menu.
-
Edit the cmdline.txt file if you'd like so you can use an actual IP address. Enter
sudo nano /boot/cmdline.txt
into the terminal. Delete the line that says ip=raspberrypi.local, or comment it out by putting a # before the line, like this,#ip=raspberrypi.local
This will change the color of the text and comment it out, or essentially disabling it without having to delete. Then, press Ctrl and x at the same time to save and exit the file.
-
Set a static IP address. You may want to set a static IP address that doesn't change, which will make it easy to identify your Raspberry Pi. Enter
sudo nano /etc/dhcpcd.conf
into the terminal which will open the configuration file for our Dynamic Host Configuration Protocol (DHCP) settings. Follow the sample instructions in the file to create static information for your Raspberry Pi.
Testing the network performance
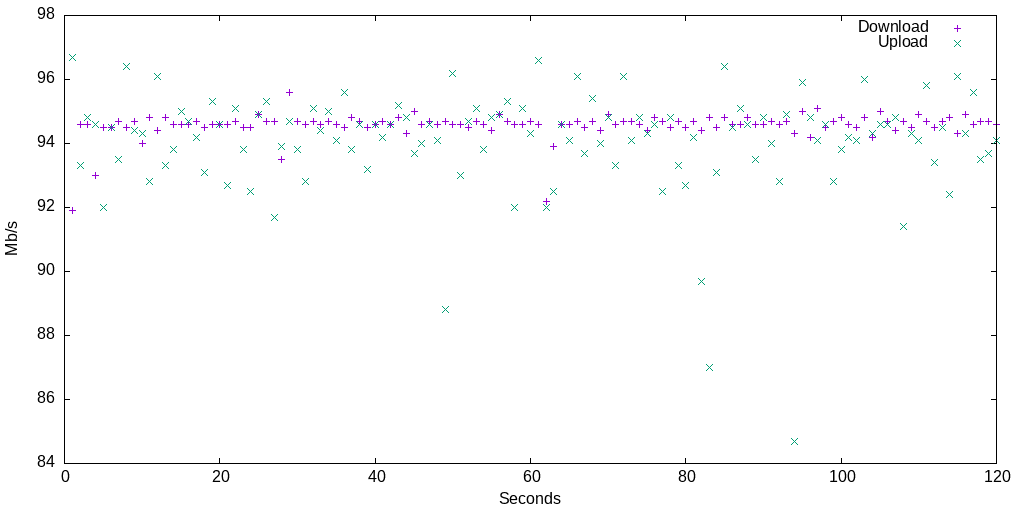
An Iperf test will help us test the network throughput of the connection to see where our speeds rate. We see an average of 94.5mbps for download speeds, and 94mbps for upload speeds. These results were taken from a 2-minute test registering the speed at every second, which is definitely on target for 10/100mbps! Here's a handy chart for visualization.
Your speeds may vary

If you'd like more information on setting up an Iperf test of your own please see our blog post about Understanding and Troubleshooting Network Performance.
We hope this was helpful, and fun! Feel free to reach out to us directly at support@plugable.com. We'd love to see what Raspberry Pi projects you're working on!
My Plugable product with wired Ethernet is no longer working on macOS. What can I do?
Please Note
The below guide is an advanced troubleshooting step, and we do not recommend doing so unless you are comfortable manually altering files on your Apple product running macOS. You may not be able to perform the below troubleshooting step if you are unable to execute administrative credentials on your laptop. Please reach out to our support first if you do not wish to attempt the below instructions. You can do so at Plugable.com/Support
How to delete a specific Ethernet adapter from your Network devices on macOS
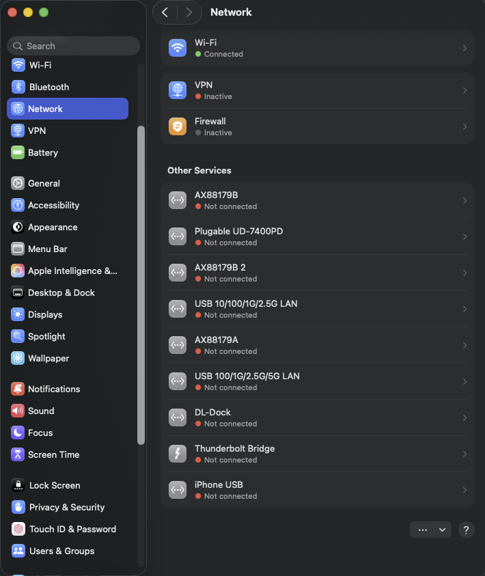
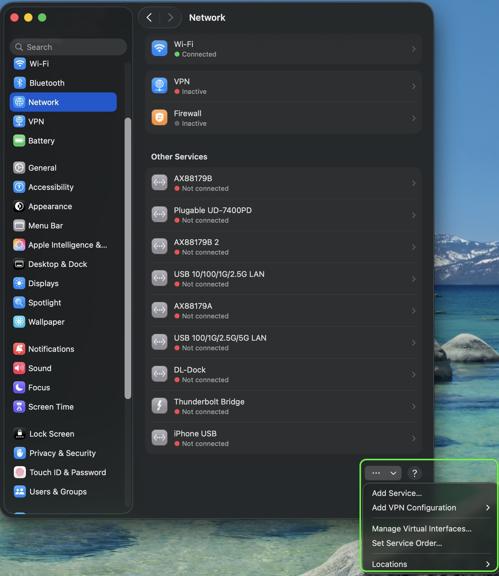
- Click on the Apple logo in the top left corner of your primary monitor, and select ‘System Preferences’
- Next select ‘Network’ in the ‘System Preferences' window.
- In the now visible list, please select the Plugable Ethernet, or Thunderbolt Ethernet device that may not be working as expected.
- Once selected click on the minus button in the bottom left of the network window.
- Click on Apply in the bottom right.
- Next click on the plus button in the bottom left of the network window, and add the previously removed device.
- Click on Apply in the bottom right.
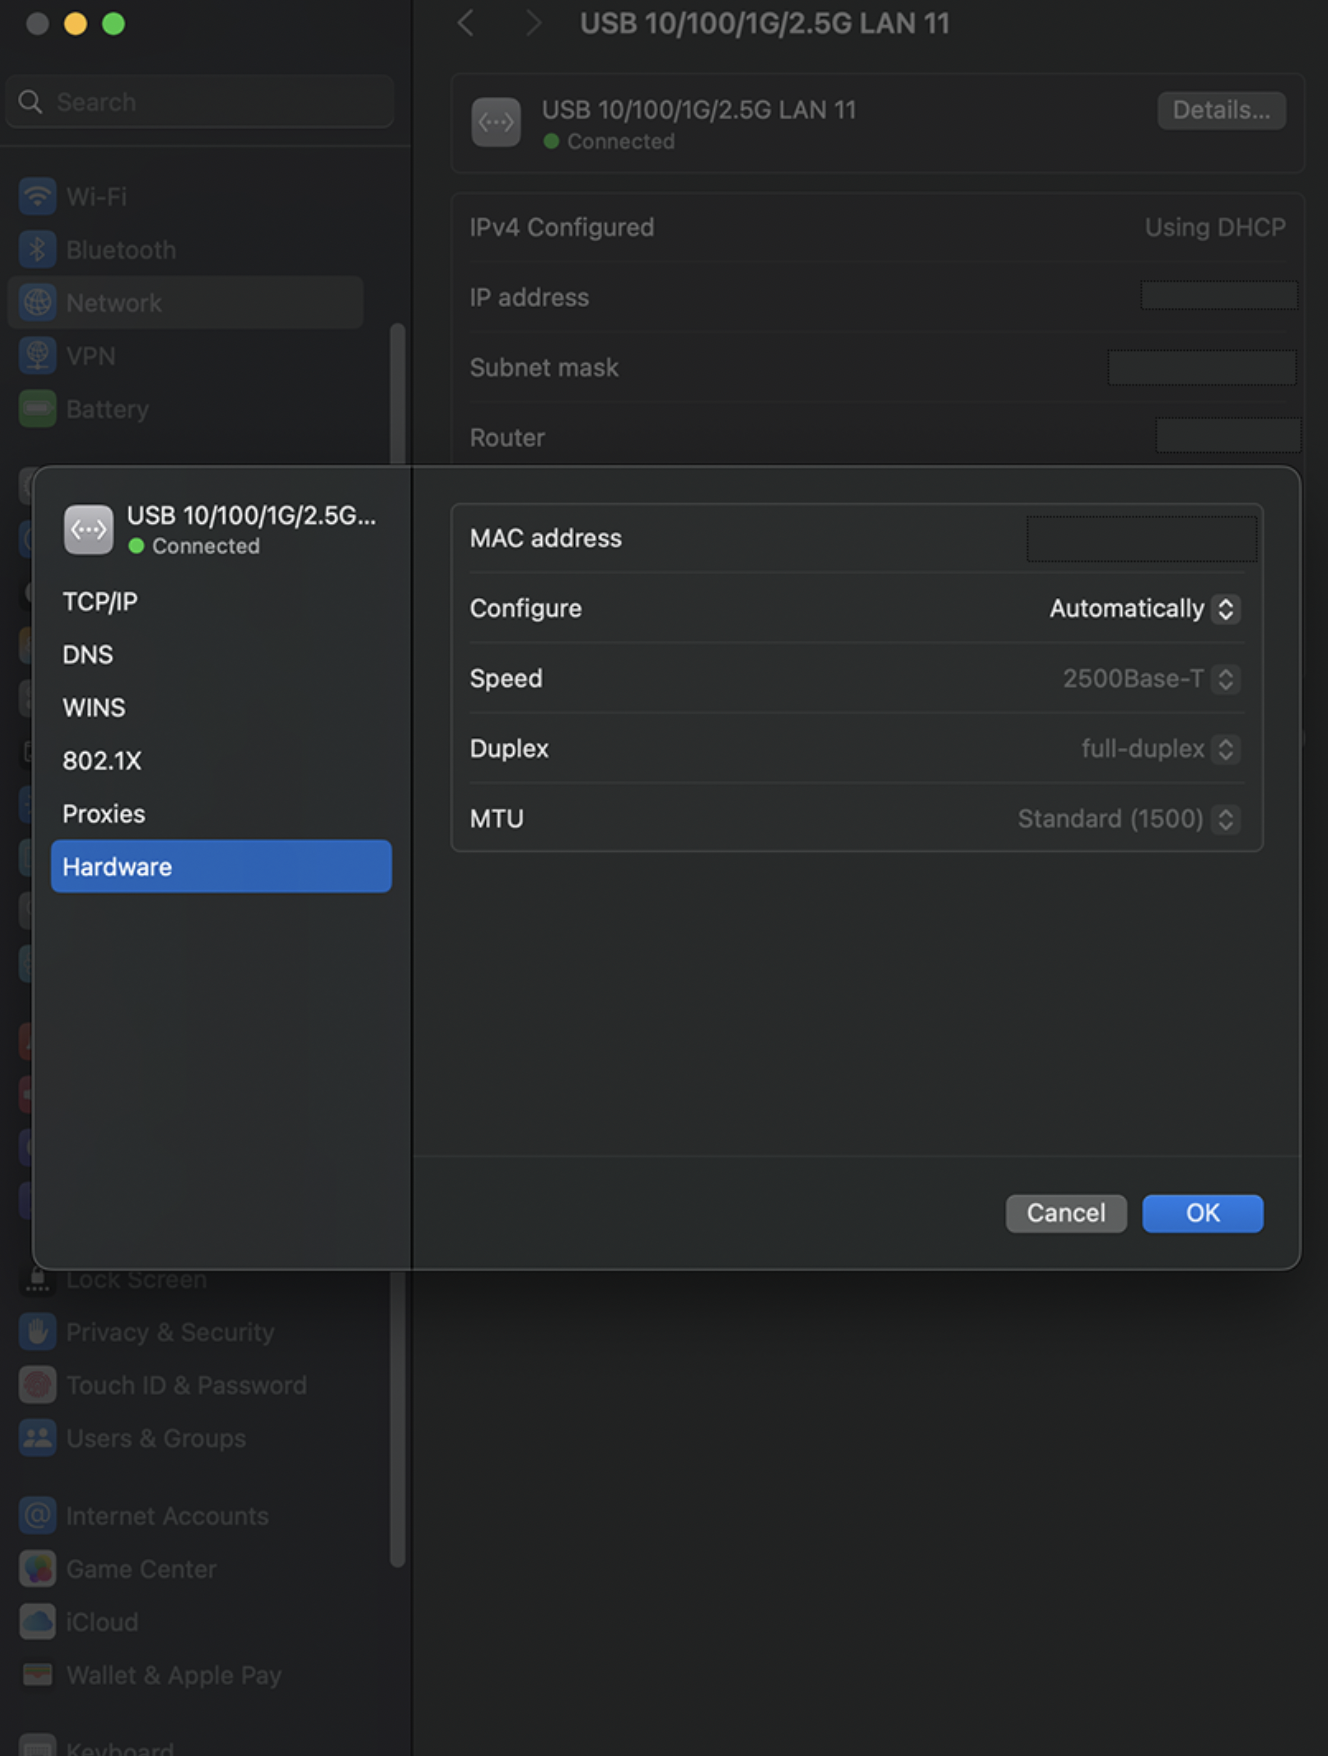
- Test to see if this has resolved the unexpected behavior, and assure that your Ethernet is now working.
- If this does not resolve the problem, please proceed to the next section (As noted previously the next section is for advanced users only!)
Manually erase your macOS Network Settings to fully reset the Network configuration
(Advanced! Click to reveal)
Warning!
This will fully erase all of your Network configuration! Do not skip any steps, and proceed only if you are comfortable with each step!
- Open the ‘Finder’ app, then in the ‘Go’ menu at the top of your screen select ‘Computer’
- Click on ‘Macintosh HD’ then Library, Preferences, SystemConfiguration
- Copy the file named ‘NetworkInterfaces.plist’ to your desktop as a backup of your current configuration.
- Delete the original version of the ‘NetworkInterfaces.plist’ located in the SystemConfiguration directory.
- Restart your Mac
- Login to your Mac, and return to System Preferences → Network
- If the list is now empty, please re-add the Plugable or Thunderbolt network adapter by clicking on the plus button in the bottom left of the Network window. Once done click on 'Apply'.
- Test to see if this has resolved the unexpected network behavior
I am still unable to get my Ethernet connection working on my Mac
If this is the case please reach out to our support team. When you do please include a diagnostic log gathered using our PlugDebug tool (instructions are provided on the PlugDebug page). If you are not able to gather the PlugDebug diagnostics do not worry we are still here to help! Please reach out to our support team at support@plugable.com or Plugable.com/Support with a detailed description of your problem, and the model of Plugable product you are using.