Hassle free, 2-Year Warranty
Fast, Free Shipping on Orders $35+
Lifetime Technical Support
30-Day Money Back Guarantee
Plugable USB-C - HDMI 変換アダプター
$23.95 USD
SKU: USBC-THDMIAmazon Rating : (161 Reviews)
機能
- 4K 解像度対応 - DisplayPort 代替モード対応の USB-C および Thunderbolt 3 ポートを、HDMI 出力ポートに変換します。4K@30Hz までの解像度に対応しており、2560x1440@60Hz、1920x1080@60Hz など、その他の一般的な解像度でも使用できます。
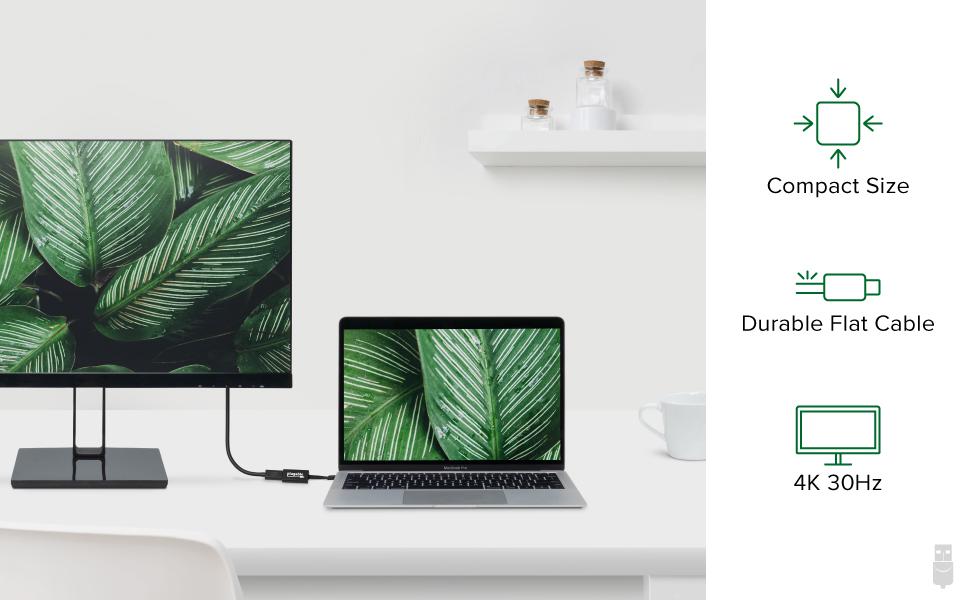
- 作業エリアを簡単に拡張 - この変換アダプターは、DisplayPort 代替モード対応の USB-C および Thunderbolt 3 ポートを HDMI 出力ポートに変換します。HDMI モニターやテレビを拡張または複製モードで接続できます。
- 互換性 - USB Type-C および Thunderbolt 3 ポートを搭載した Windows PC、Mac システム、Chromebook で使用できます。2018 年以降の iPad Pro、MacBook Air、MacBook Pro、iMac、Dell XPS、Lenovo Thinkpad、HP Spectre x360 などの USB-C DisplayPort 代替モード対応の タブレット、ノートPC、デスクトップ PC などで使用できます。
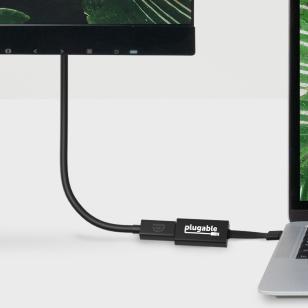
- 高い柔軟性 - 平面的で柔軟性のある丈夫なフラットケーブルを採用しており、持ち運びや設置に非常に便利です。小型・軽量なため持ち運びにも便利で、さまざまな用途に対応しかつ高い耐久性を提供します。
- 2 年の品質保証 - Plugable は 2 年間の品質保証およびメールでのサポートをご提供いたします。正規販売元よりご購入ください。製品について質問がございましたら、Plugable Japan サポートまでお気軽にご連絡ください。
35 ドル以上のご注文で米国内送料無料
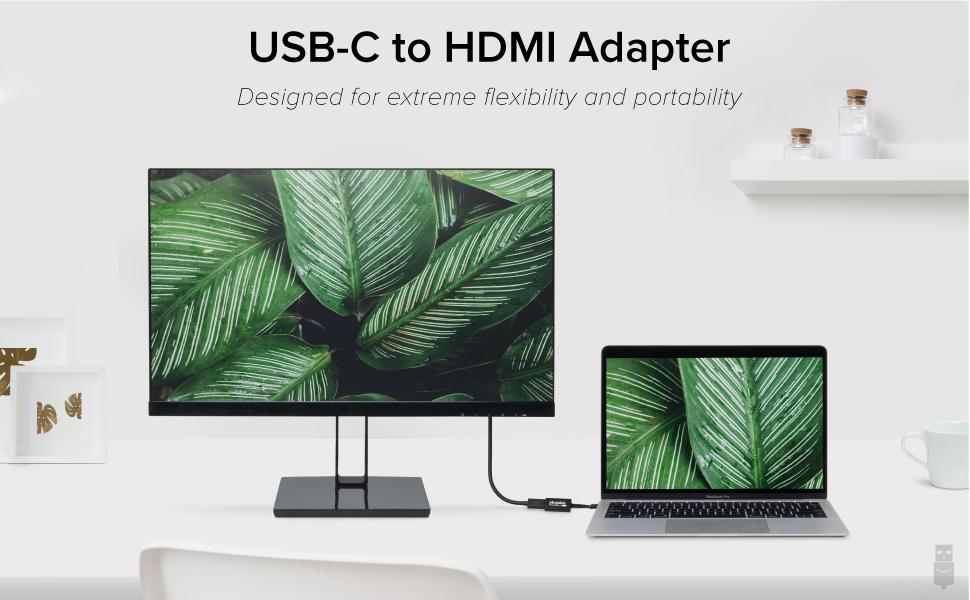
4K 解像度までの HDMI モニタを、拡張または複製モードで接続
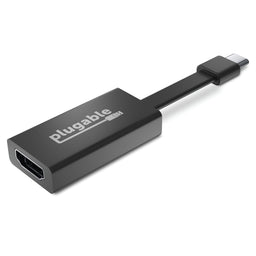
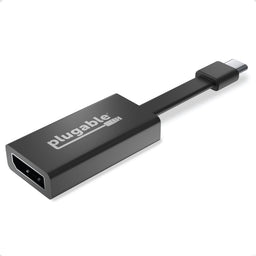
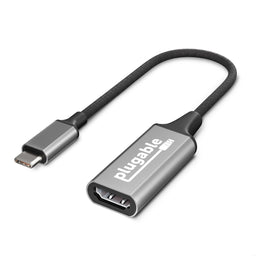
この「Plugable USB-C - HDMI 変換アダプター(USBC-THDMI)」を使うと、USB-C DisplayPort 代替モードに対応したラップトップ PC、タブレット、デスクトップ PC などに、外部 HDMI モニタやプロジェクター、テレビを接続できます。
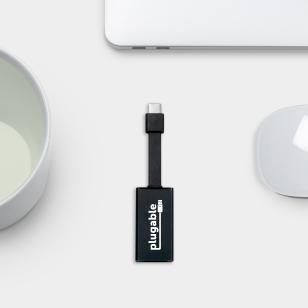
約 5 cm ほとのサイズで非常に軽量コンパクトのため、持ち歩きにも適しています。平面的で柔軟性のある丈夫なフラットケーブルを採用しており、狭い場所などでの設置にも便利です。この変換アダプターは HDMI 1.4 に対応しており、DisplayPort 代替モード対応の USB-C および Thunderbolt 3 ポートを搭載したシステムに、最大解像度 3840x2160 @ 30Hz(4K 30Hz)までのモニターを接続できます。
プラグ&プレイ
「USB Type-C DisplayPort 代替モード」 に対応したシステムを使っている場合、代替モードに対応したアダプタやケーブルによって、追加の外部モニタを簡単かつ安価に接続することができます。追加のドライバ導入などは必要ありません。
この「DisplayPort 代替モード」 ではシステムの GPU に直接アクセスするため、代替モード対応アダプタを使用して接続した外部モニタは、システムのマザー・ボード付属のグラフィックス・ポートに直接接続したモニタと同じ様なパフォーマンスを提供できます。
ビデオやイメージ編集、ゲーム、その他のシステム・リソースを多く要求するタイプのアプリケーションでも、システム自身が搭載している GPU の能力が十分である場合には、このアダプタ経由の外部モニタ上で問題なく使用することができます。
4K パフォーマンス
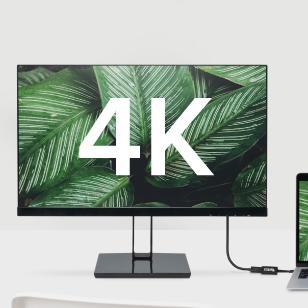
HDMI 入力があるモニタに、3840x2160@30Hz (4K 30Hz) までの解像度で接続できます。
3440x1440、2560x1440、 1920x1200、1920x1080 およびそれ以下の一般的な解像度にも対応します。
注意:DisplayPort モニターでは使用できません。HDMI 入力ポートのあるモニタで使用してください。
柔軟性のあるフラットケーブル
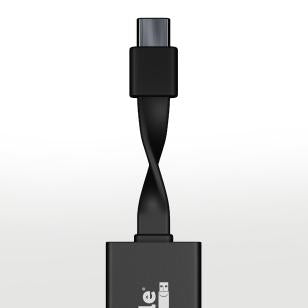
平面的で柔軟性のあるフラットなプリント回路ケーブルを採用しており、既存の丸い同ケーブルよりも日常遣いによる破損が起こりにくい構造になっています。フラットケーブルは狭い場所にも設置しやすく、ケーブルの混乱が起こりにくい構造だと言えます。
コンパクトで使いやすいフラットプロファイルにより、アダプターは表面に密着し、狭いスペースを活用することができます。この柔軟性により、スペースを節約し、ケーブル類による机上の混乱を削減できます。
コンパクトで軽量
4.3cm x 2.3 cm x 1.1 cm のサイズで、狭い場所にも設置できます。
非常に軽量かつコンパクトなので持ち運びに適しておりスペースをとることもありません。
互換性
互換性のあるシステム | 「DisplayPort 代替モード」に対応した USB-C または Thunderbolt 3 ポートを搭載した Chromebook、Windows、Mac、Linux システム。 当アダプターは、2018+ iPad Pro(ミラーリングのみ)) / MacBook Air / iMac and iMac Pro / MacBook and MacBook Pro / Google Pixelbook / Dell XPS 13 & XPS 15 / Lenovo Thinkpad / HP Spectre x360 / Samsung DeX 対応機器 で、機能確認されています。 |
- | HDMI 入力ポートのある TV や、スピーカー付きのモニタでは音声出力に対応します。 |
互換性のないシステム | 現在の USB-C ポート搭載のスマートフォンやタブレットの多くは、「DisplayPort 代替モード」に対応していません。 ASMedia 社の USB 3.1 コントローラは、現時点で「DisplayPort 代替モード」に対応していません。 このケーブルは両方向変換はできず、HDMI 入力ポートのあるモニターでのみ使用できます。 |
- | 複数の USB-C または Thunderbolt 3 対応ポートを搭載したシステムの場合、その多くはそのうち1つだけが大体も対応ポートを搭載したシステムの場合、その多くはそのうち1つだけが代替モードに対応していますのでご注意ください。 |
パッケージ内容
パッケージ内容と数量 | 注記 |
---|---|
1x USBC-HDMI 変換アダプタ |
グラフィック
ポート | 場所 | 仕様 | 最大解像度とリフレッシュレート | HDCP | チップセット |
---|---|---|---|---|---|
1x USB-C (入力) |
ケーブル・コネクタ | PC により異なる | 3840x2160 @ 30Hz 3840x2160 @ 30Hz3840x1600 @ 30Hz 3440x1440 @ 30Hz 2560x1440 @ 60Hz 1920x1200 @ 60Hz 1920x1080 @ 60Hz 1600x900 @ 60Hz 1280x1024 @ 60Hz 1280x800 @ 60Hz 1280x720 @ 60Hz 1152x864 @ 60Hz 1024x768 @ 60Hz 800x600 @ 60Hz 640x480 @ 60Hz |
対応 | |
1x HDMI 4K (出力) |
ケーブル・コネクタ | HDMI 1.4 | 3840x2160 @ 30Hz 3840x2160 @ 30Hz3840x1600 @ 30Hz 3440x1440 @ 30Hz 2560x1440 @ 60Hz 1920x1200 @ 60Hz 1920x1080 @ 60Hz 1600x900 @ 60Hz 1280x1024 @ 60Hz 1280x800 @ 60Hz 1280x720 @ 60Hz 1152x864 @ 60Hz 1024x768 @ 60Hz 800x600 @ 60Hz 640x480 @ 60Hz |
対応 | RTD2171U-CG Realtek |
グラフィック出力モード
ホスト出力技術仕様 | システム側ポートタイプ | 接続可能ディスプレイ数 | ディスプレイ毎の最大解像度 |
---|---|---|---|
DisplayPort 1.2 | Thunderbolt™ 3 または USB-C | 1 | 3840x1600 @ 60Hz 3840x2160 @ 60Hz3440x1440 @ 60Hz 2560x1440 @ 60Hz 1920x1080 @ 60Hz 1600x900 @ 60Hz 1280x1024 @ 60Hz 1280x800 @ 60Hz 1280x720 @ 60Hz 1152x864 @ 60Hz 1024x768 @ 60Hz 800x600 @ 60Hz 640x480 @ 60Hz |
オーディオ
ポート | 場所 | 接続方法 | 最大ビット深度とサンプルレート | 信号出力 | チャネル | チップセット |
---|---|---|---|---|---|---|
HDMI (出力) |
前面 | HDMI | PC により異なる | デジタル | PC により異なる | DP 代替モード |
物理仕様
項目 | サイズ(高さ×幅×奥行き)または長さ | 重量 | 製品番号 |
---|---|---|---|
USB-C to HDMI adapter | 1.1 x 2.3 x 4.4 centimeters 0.4 x 0.9 x 1.7 inches |
10 grams 0.4 ounces |
USBC-THDMI |
使い方
- 当アダプタの USB-C コネクタを、システムの USB-C ポートに接続します。
- HDMI モニターとアダプターを HDMI ケーブルで接続します(HDMI ケーブルは付属していません)。
この製品についてご質問がありましたら、「アマゾン注文番号」を添えて nihongo@plugable.com まで日本語でご連絡ください。
Filter Help Articles and Frequent Questions by Category
Choose one or more filters within each category to narrow down the articles. Each selection will result in only displaying articles that include all of your choices.
Articles
Well how about that, it looks like we don't have any articles matching your filters! Try removing one of your choices or clear the filters to show all articles.
You can always contact support if you need help too!
Does the HDMI 1.4 Port Support 4K Resolution at 60Hz?
No. The port complies with HDMI 1.4, and as such 3840x2160 (4K is only achievable at 30Hz. 2560x1440 and all lower resolutions will display at 60Hz.
Can I Connect a DisplayPort (DP) Monitor to the HDMI Port on This Device Using an Adapter or Cable?
No. Most DisplayPort to HDMI cables and adapters are one-way adapters from a DisplayPort Source (computer or docking station) to a HDMI Sink (television, computer monitor, or projector). These cables do not work in reverse.
DisplayPort uses packet-based data transmission, breaking the video stream into individual packets of data allows for longer cable runs, use in both copper and fiber-optic cables, and allows for higher bandwidth than other video formats. It is relatively easy to convert from DisplayPort to HDMI (computers with HDMI output ports already do this internally) and dual-mode DisplayPort outputs have built-in adapters to output a HDMI signal for use with passive DisplayPort to HDMI adapters.
HDMI uses a video signal, similar to DVI, this requires more power to operate at the same cable lengths as DisplayPort and requires significantly more processing power to create DisplayPort packet-based data.
Externally powered HDMI to DisplayPort adapters do exist, these generally have a USB or small barrel plug for power, and can convert from a HDMI Source to DisplayPort Sink. In most cases they have reduced resolution or refresh rates compared to modern signal sources and can introduce delay in the data connection between the display and computer potentially causing reduced connectivity or display performance problems.
We do not currently recommend using HDMI to DisplayPort adapter with our docking stations. In our testing they have been unreliable compared to a native DisplayPort connection. Many of our newer docking stations include both HDMI and DisplayPort outputs to reduce the need for additional adapters or adapter cables.
No Sound? How to Change Your Default Audio Device to Your Plugable Product
Whether you're on Windows, macOS, or Linux, it's common to add new audio devices to your computer.
Some examples of additional audio devices you may want to switch to include:
- Bluetooth headsets, headphones, and speakers
- Speakers built into a display, such as a TV or monitor
- A USB sound card, digital audio converter (DAC), or analog to digital converter (ADC)
- USB microphones
- Audio jacks on a docking station
These steps don't apply to the Plugable Performance NIX HDMI Capture Card (USBC-CAP60).
Here are the steps that you need to set a new default audio recording or output device on different operating systems.
Set Audio Output Device
Set Audio Recording Device
Set Default Playback Device in Windows
- Check that your device is properly connected, and that any necessary drivers are installed
- It is also a good idea to make sure that your sound device is turned on, and that the device's volume control is not at the absolute minimum setting
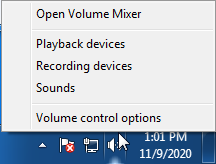
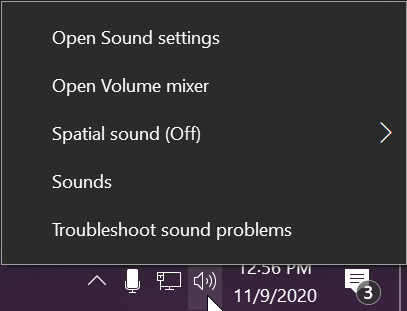
- Right-click on the speaker symbol in the Windows taskbar/system tray
-
Windows 7/8.x—Select Playback Devices. The Sound window will open with the Playback tab highlighted
-
Windows 10/11—Select Open Sound Settings then click the link under 'Related Settings' for Sound Control Panel, then click the Playback tab
- Alternatively, after selecting Open Sound Settings, use the dropdowns under the Output header
-
Windows 7/8.x—Select Playback Devices. The Sound window will open with the Playback tab highlighted
- Find your device in the window
- A Plugable USB 3.0 docking station or sound-enabled display adapter will appear as Plugable Audio
- A Plugable USB 3.0 Silicon Motion docking station or sound-enabled display adapter will appear as SMI USB Audio
- A Plugable USB 2.0 docking station will appear as USB Multimedia Audio Device
- A Plugable USB Audio adapter will appear as USB Audio Device
- Right-click on the device you found in step 3 and select Set as Default Device. A check mark should appear next to your device, and sound should now play through it
- Click OK to exit the window
Additional Configuration for Bluetooth
Please see our pairing and configuration guide for Bluetooth devices.
Set Default Playback Device in macOS
- Open System Preferences
- Click Sound
- Select Output
- Select the most appropriate device
- A Plugable USB Audio adapter will appear as USB Audio Device
Set Default Playback Device in Linux
- Ensure that you audio device is connected to the PC
- If the audio device is self-powered, it is a good idea to make sure that it is powered on, and that the device's volume control is not at the absolute minimum setting
- Launch the 'Settings' application in your distro
- Go to the 'Sound' option
- Find the dropdown for your 'Output Device', and change it to your preferred output device
- For additional sound device controls, you may want to consider using Pulseaudio Volume Controls (package name pavucontrol)
Set Default Recording Device in Windows
- Check that your device is properly connected, and that any necessary drivers are installed
- It is also a good idea to make sure that your sound device is turned on, and that the device's volume control is not at the absolute minimum setting
- Right-click on the speaker symbol in the Windows taskbar/system tray
-
Windows 7/8.x—Select Recording Devices. The Sound window will open with the Recording tab highlighted
-
Windows 10/11—Select Open Sound Settings then click the link under 'Related Settings' for Sound Control Panel, then click the Recording tab
- Alternatively, after selecting Open Sound Settings, use the dropdowns under the Input header
-
Windows 7/8.x—Select Recording Devices. The Sound window will open with the Recording tab highlighted
- Find your device in the window
- A Plugable USB 3.0 DisplayLink docking station or sound-enabled display adapter will appear as Plugable Audio
- A Plugable USB 2.0 docking station will appear as USB Multimedia Audio Device
- A Plugable USB Audio adapter will appear as USB Audio Device
- Right-click on the device you found in step 3 and select Set as Default Device. A check mark should appear next to your device, and sound should now play through it
- Click OK to exit the window
Additional Configuration for Bluetooth
Please see our pairing and configuration guide for Bluetooth devices.
Set Default Recording Device in macOS
- Open System Preferences
- Click Sound
- Select Input
- Select the most appropriate device
- A Plugable USB Audio adapter will appear as USB Audio Device
Set Default Recording Device in Linux
- Ensure that you audio device is connected to the PC
- If the audio device is self-powered, it is a good idea to make sure that it is powered on, and that the device's volume control is not at the absolute minimum setting
- Launch the 'Settings' application in your distro
- Go to the 'Sound' option
- Find the dropdown for your 'Input Device', and change it to your preferred input device
- For additional sound device controls, you may want to consider using Pulseaudio Volume Controls (package name pavucontrol)
My Docking Station/Adapter Works Well With My Windows Laptop, but When I Close the Lid the Displays and Laptop Turn Off or Sleep. How Do I Fix This?
Most Windows notebook computers power management settings will default to putting the computer to sleep with the lid closed, regardless of any external displays, keyboard, or mouse connected to the computer. If this is happening but you would prefer the system to remain active with the lid closed utilizing the external display or displays, these settings can be changed by performing the following:
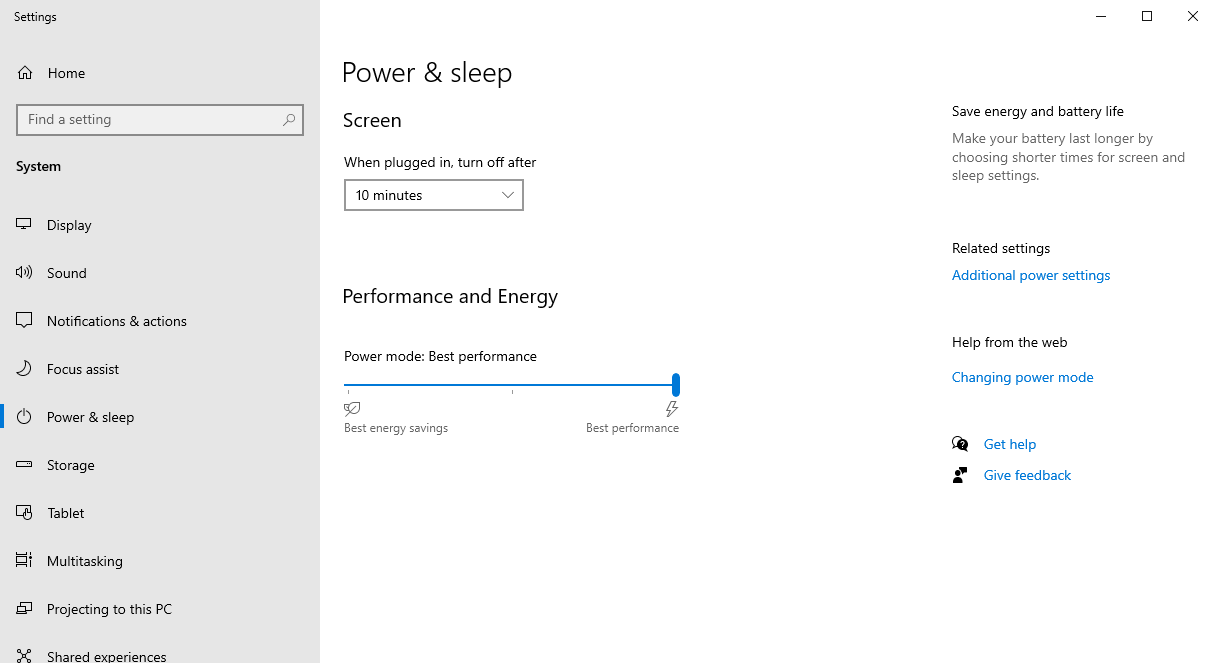
For Windows 10:
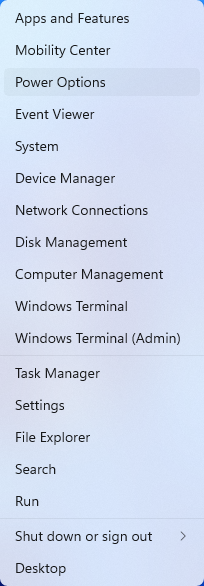
- Start by right-clicking on the Start button and select Power Options from the menu.
- From the right side of the Power Options settings page, select the blue link for Additional power settings
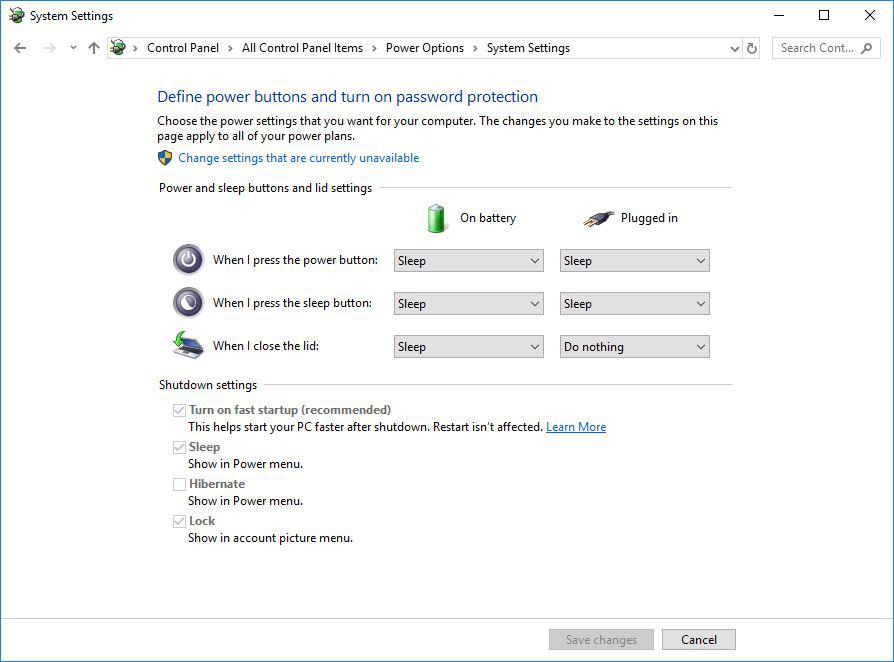
- From the choices present on the left-hand side of the Power Options window, please click on Choose what closing the lid does
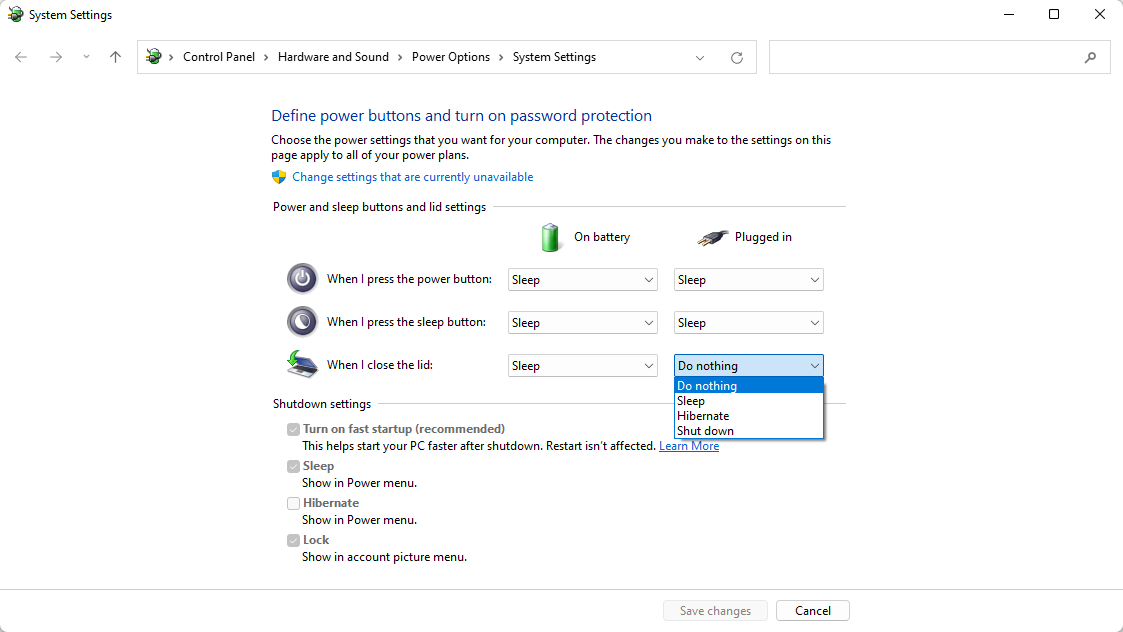
- Make sure the setting for When I close the lid under the Plugged In column is set to Do Nothing
- Click the Save Changes button and restart the system (making sure that the laptop’s power adapter is also connected) and test the behavior again.
For Windows 11:
- Start by right-clicking on the Start button and select Power Options from the menu.
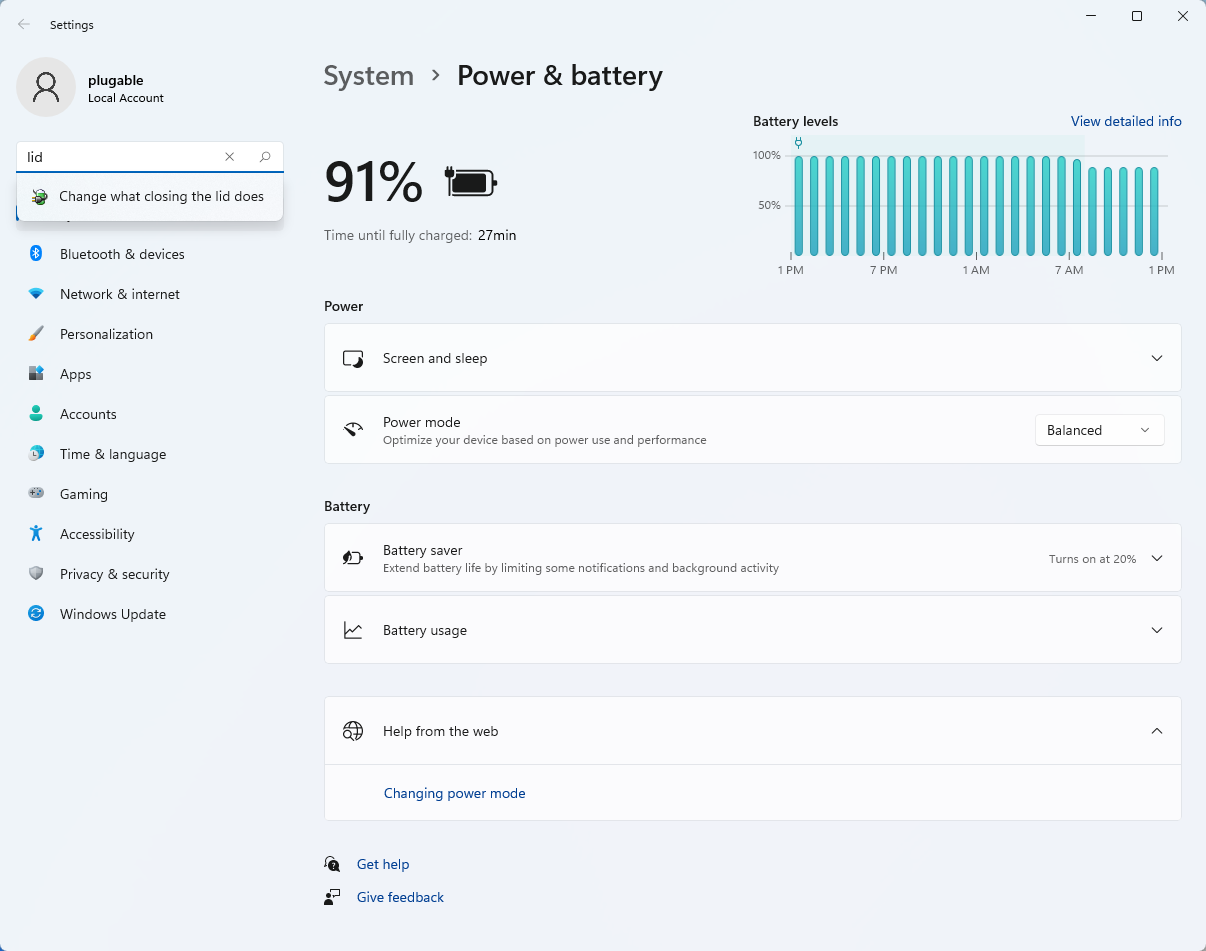
- In the upper left corner of the settings window, in the search box, type "lid" then select Change what closing the lid does from the search results
- Make sure the setting for When I close the lid under the Plugged In column is set to Do Nothing
- Click the Save Changes button to apply the new settings.
Closing the lid should no longer put the computer into sleep mode when an external display and power source is connected, instead one of the external displays should now become the Primary display with the desktop icons instead of the laptop's built-in display.
The lid may still need to be opened to perform the following tasks:
- To power on the computer from a fully powered off state
- To log into the computer if logged out or if the computer is restarted with the lid closed
- To wake the computer from a deep sleep state ( hibernation, or Windows hybrid sleep states )
My System Has Multiple USB-C and/or Thunderbolt 3 Ports. Can I Add Multiple Alt Mode Adapters for Multiple Displays?
If your system supports multiple Thunderbolt 3 or USB-C Alt Mode outputs, then you will be able to use multiple adapters on one system. However, there are some Thunderbolt 3/USB-C Alt Mode systems that limit the video output to one port.