


Hassle free, 2-Year Warranty
Fast, Free Shipping on Orders $35+
Lifetime Technical Support
30-Day Money Back Guarantee
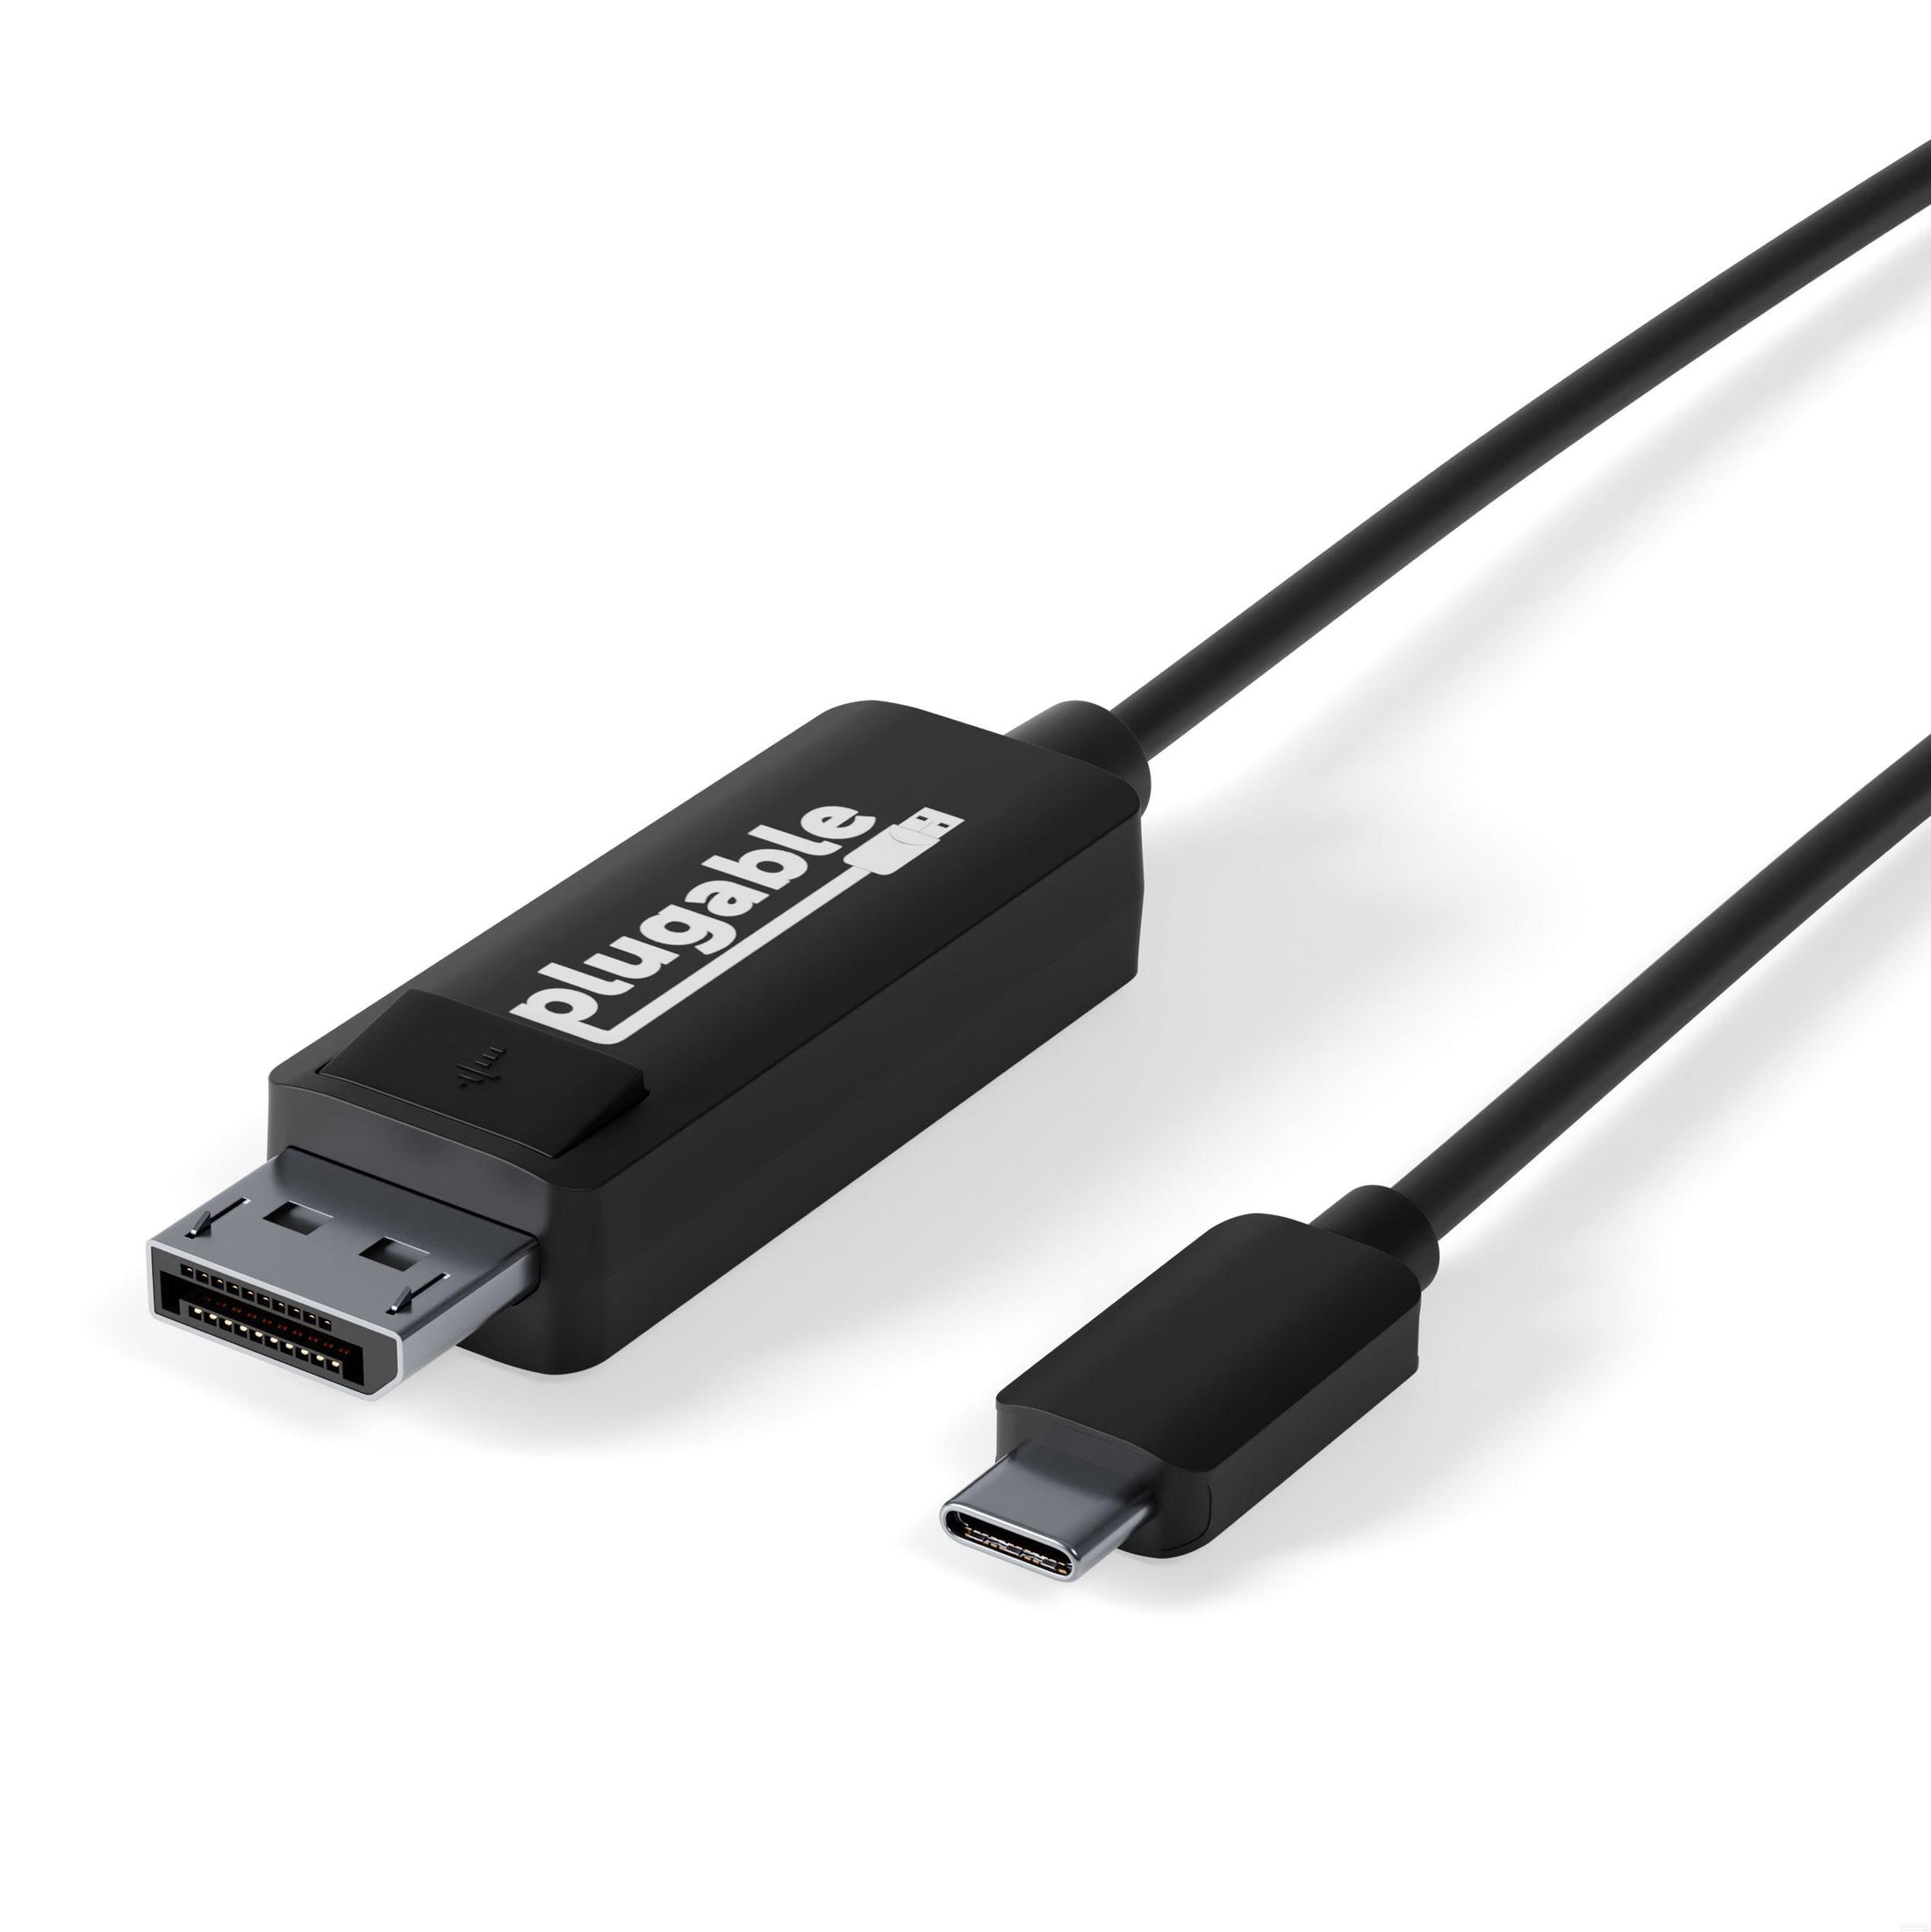
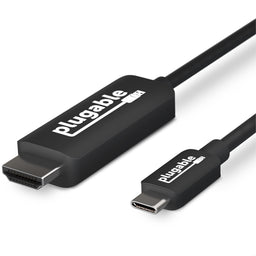
Plugable USB 3.1 Type-C - DisplayPort 変換ケーブル
$17.95 USD
SKU: USBC-DPAmazon Rating : (883 Reviews)
機能
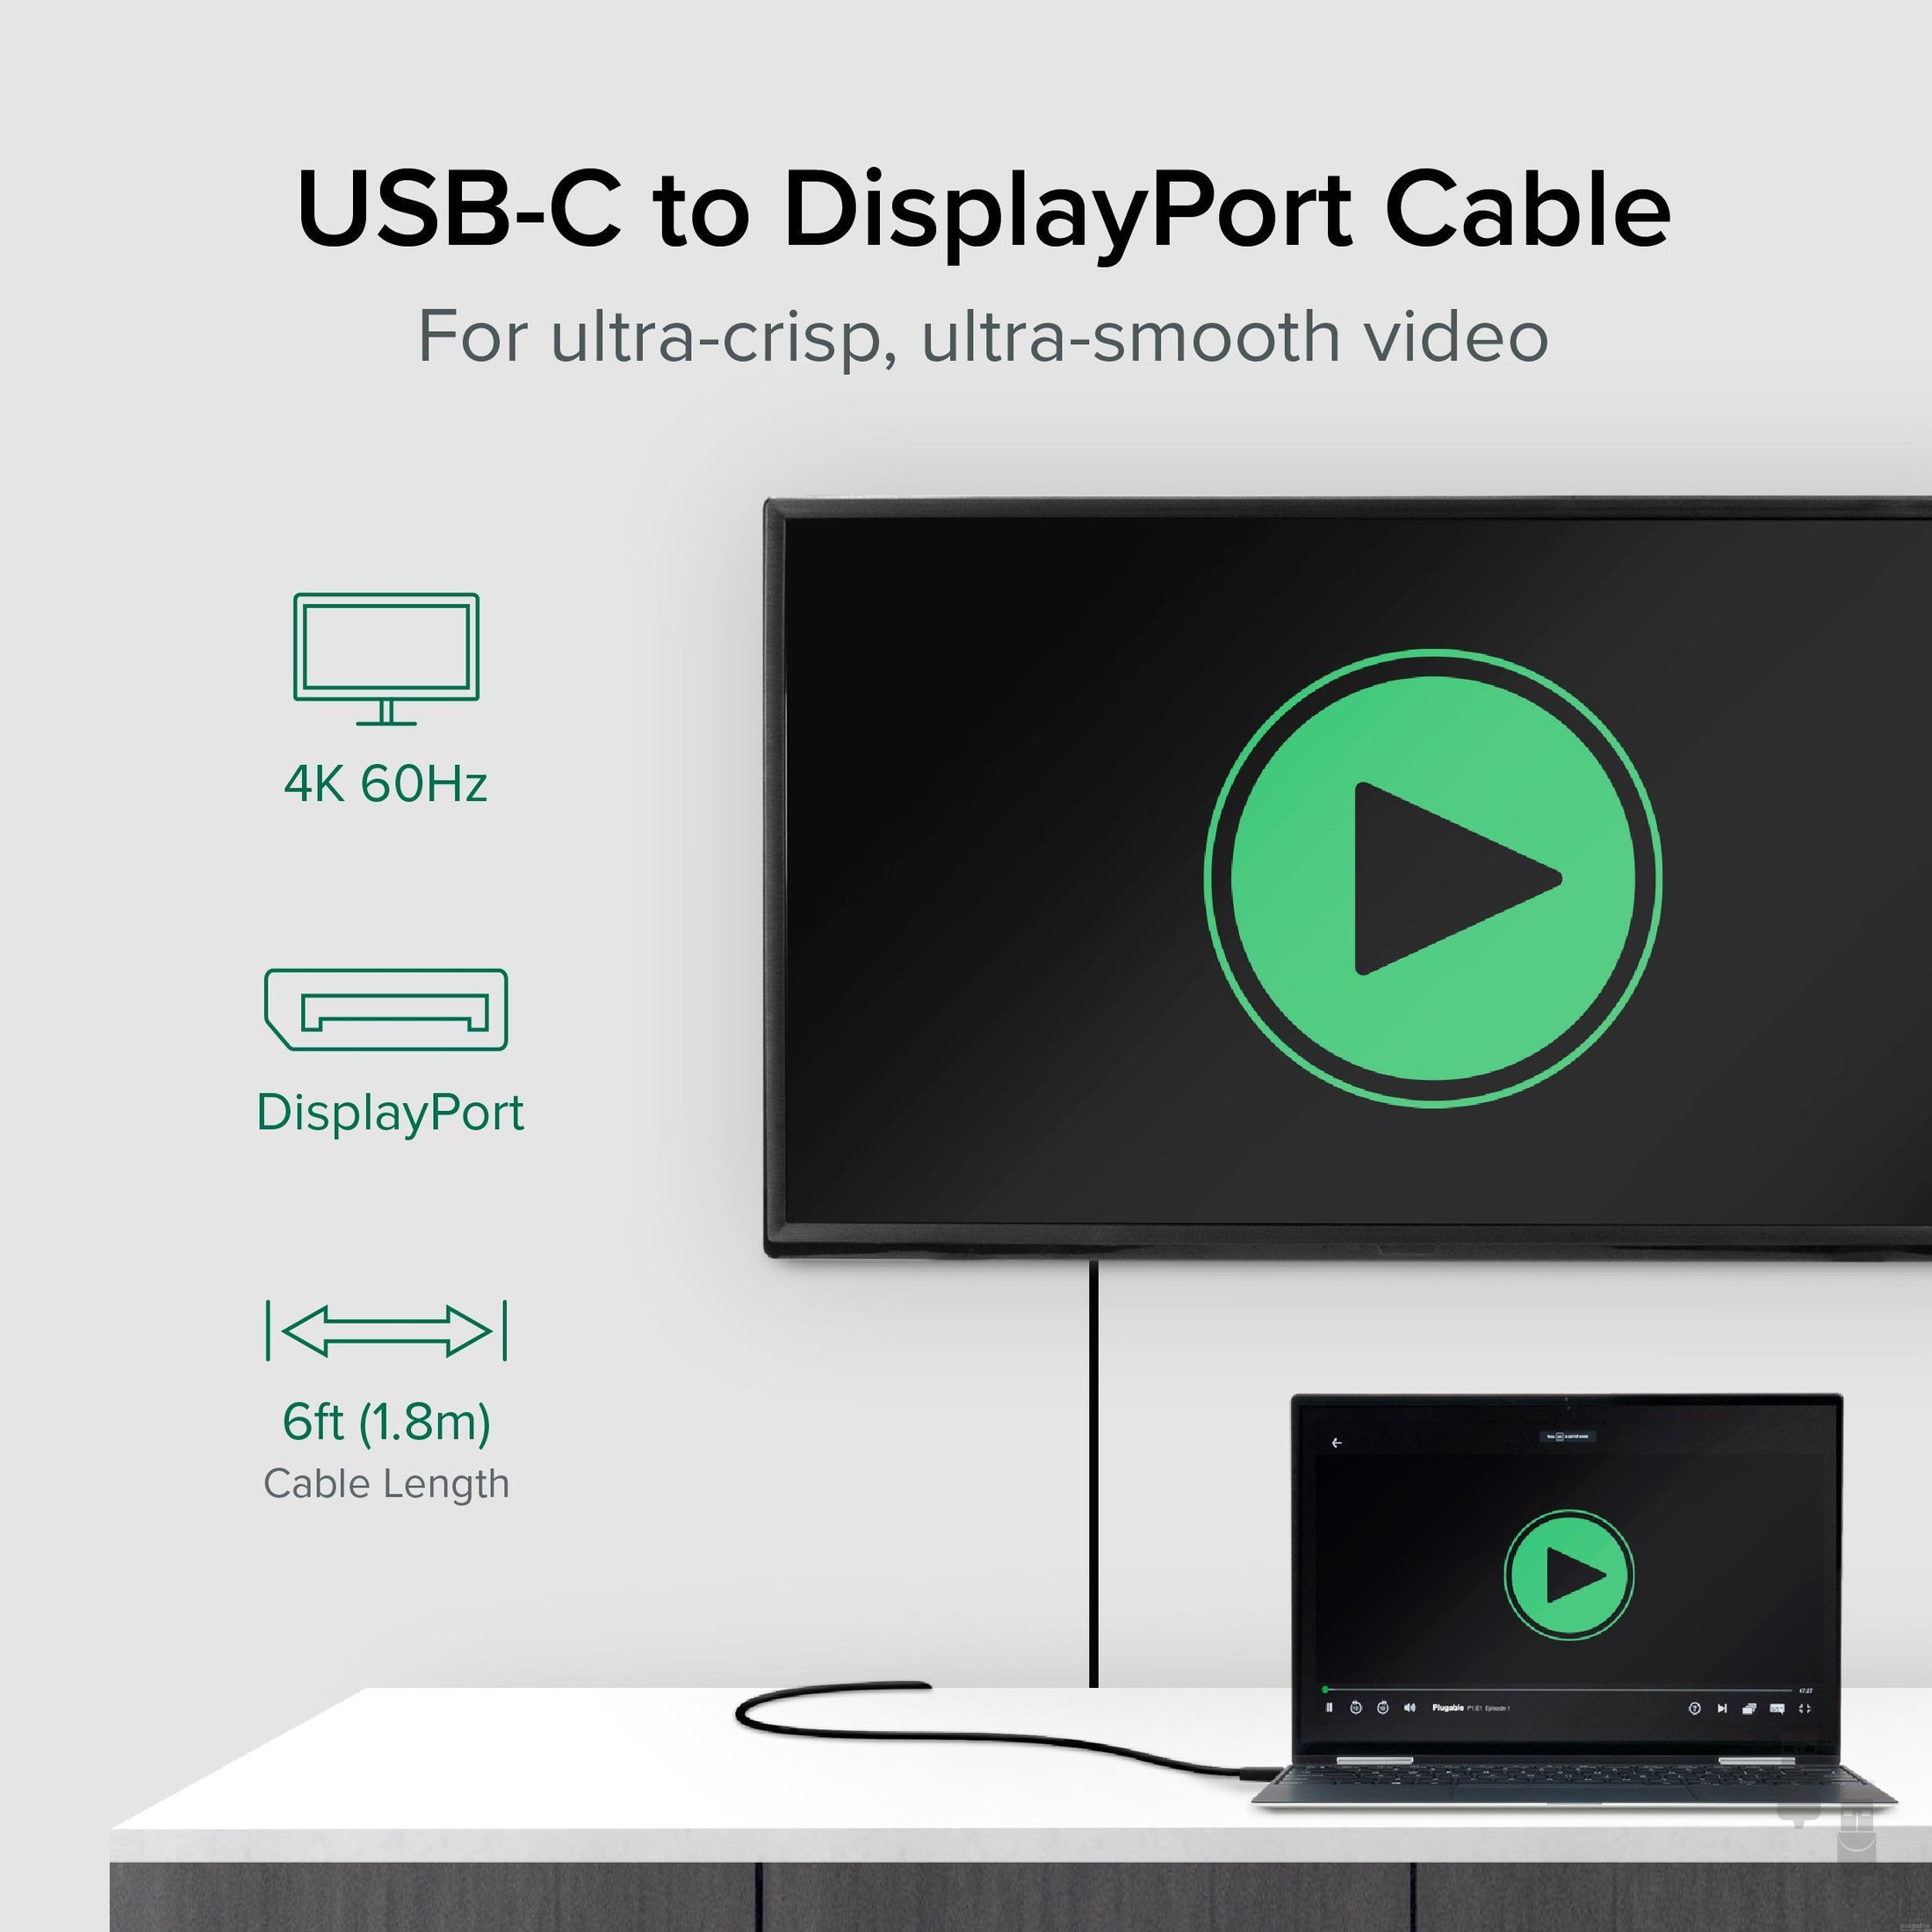
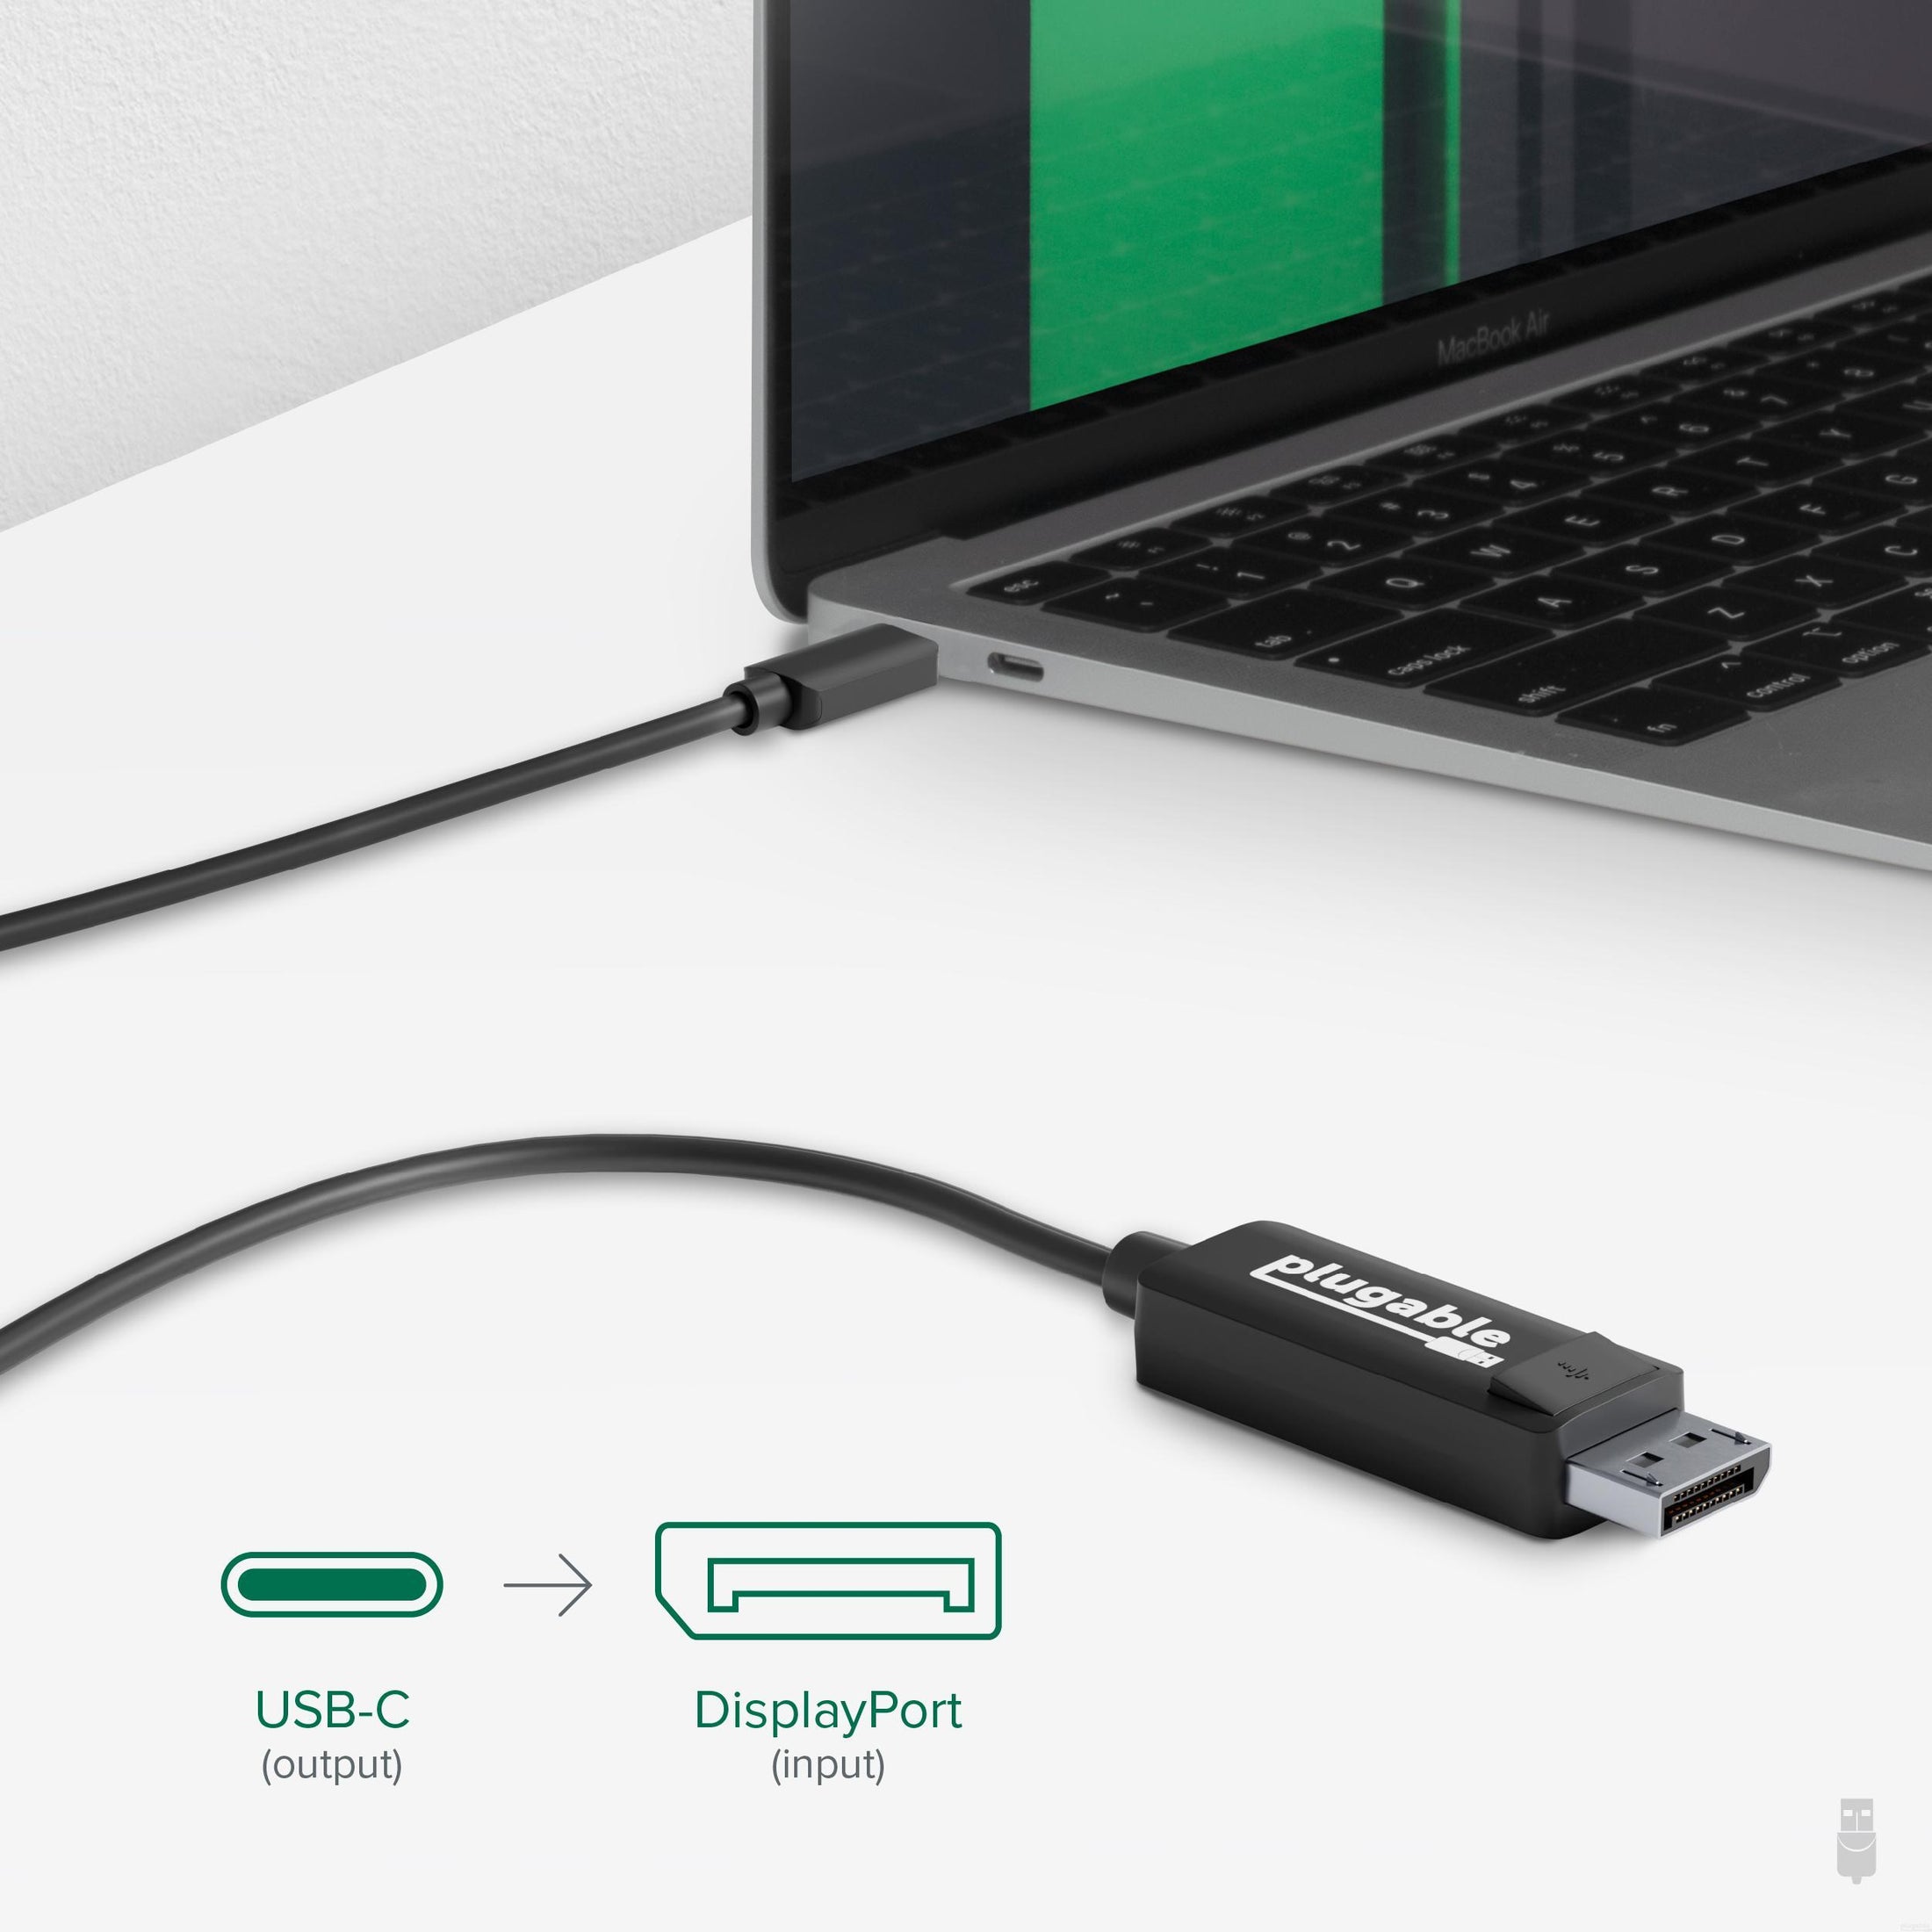
- USB-C ポートを DP に変換- - USB-C 対応システムの DisplayPort 代替モード を利用して、システムの USB-C ポートに DisplayPort モニタを接続できるようにする約 1.8m のビデオ・ケーブルです。最大 3840x2160@60Hz(4K@60Hz)解像度に対応しています。
- 簡単に使用可能 - 非常にクリアな画像と音声を享受できます。動画再生、ゲーム、ビジネス用途に適しています。プラグ&プレイで使用でき、特別なデバイス・ドライバーを導入する必要はありません。
- 互換性 - Windows、macOS、ChromeOS、Linux で、USB-C ポートが搭載され、かつそのポートがグラフィック出力(DisplayPort 代替モード)をサポートしているシステムで使用できます。あるいは、Thunderbolt 3 /4 ポートでも使用できます。
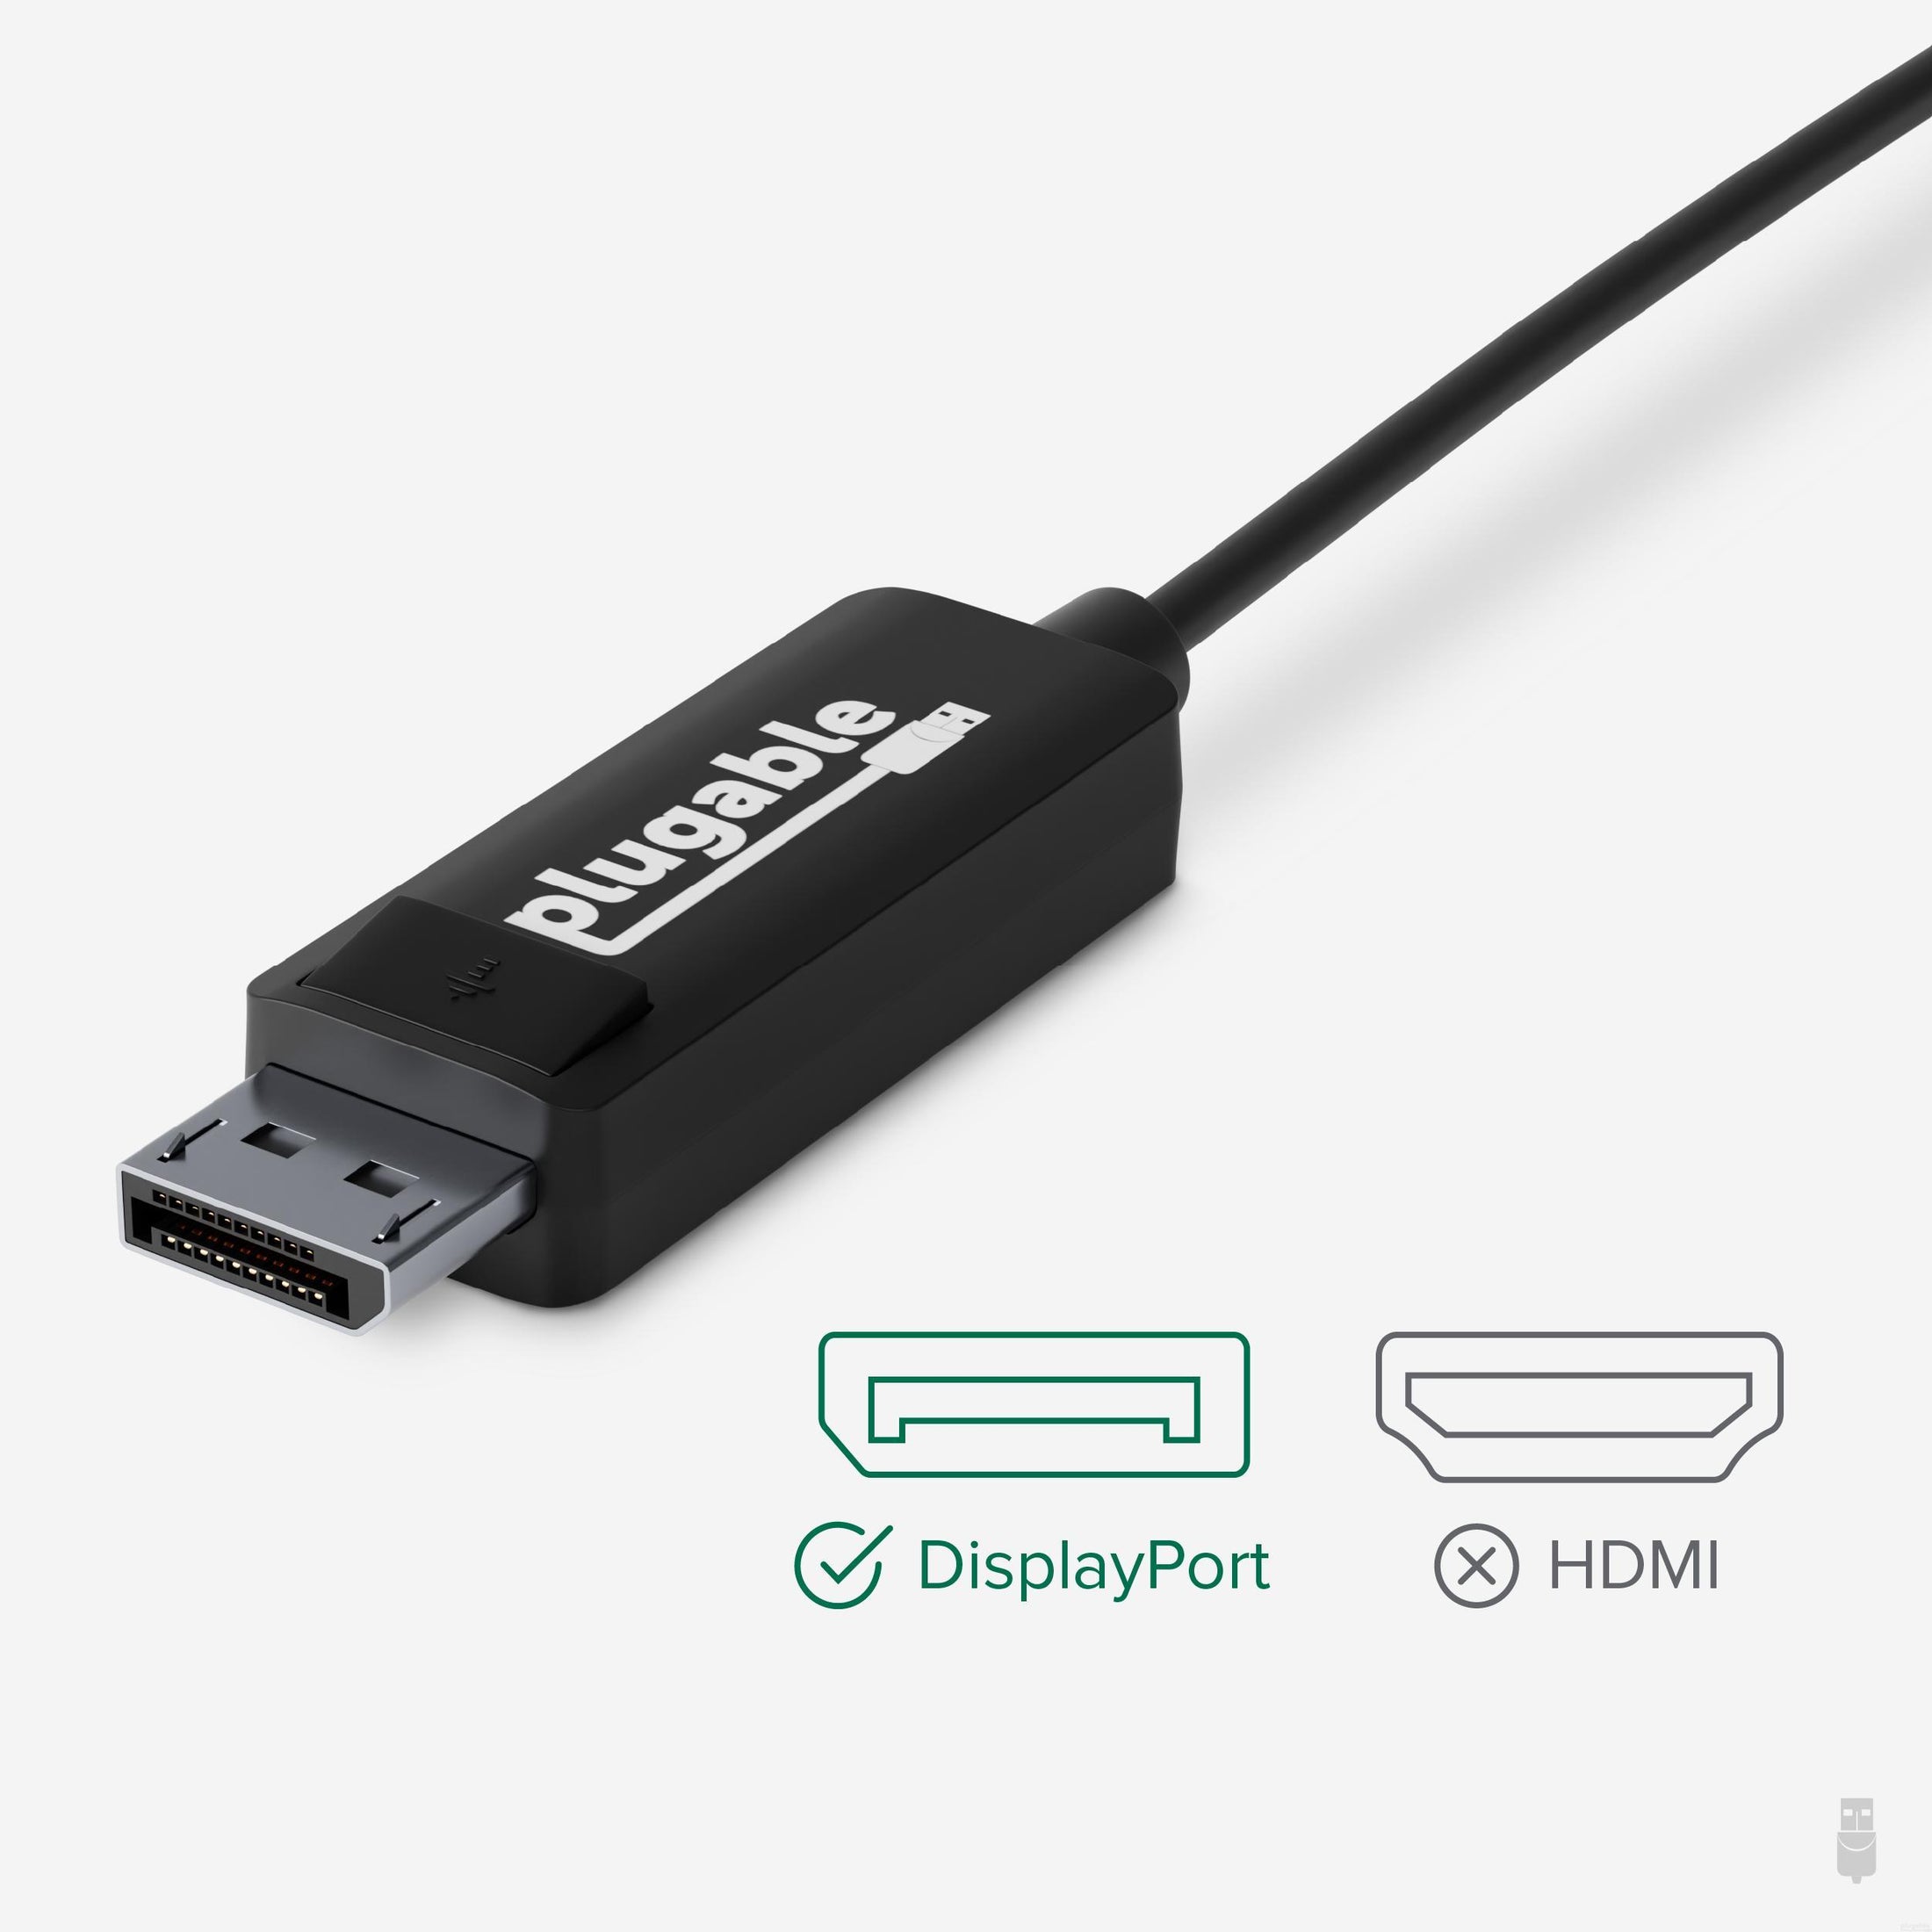
- 対応機器 - 2018 年以降の iPad Pro、USB-C ポート搭載の Mac システム、Dell XPS、Microsoft Surface Book 2、Thunderbolt 3 / 4 ポート搭載の HP Spectre x360 などで使用できます。重要な注意点 - このグラフィック変換ケーブルは、USB-C ポートが DisplayPort 代替モードに非対応の場合は使用できません。またこのケーブルは USB-C ポート出力を DisplayPort 入力のあるモニターに接続するためのもので、逆方向の接続で使用することはできません。DisplayPort 入力ポートのないモニタでは使用できません。
- 2 年の品質保証 - Plugable は 2 年間の品質保証およびメールでのサポートをご提供いたします。正規販売元よりご購入ください。製品について質問がございましたら、Plugable Japan サポートまでお気軽にご連絡ください。
35 ドル以上のご注文で米国内送料無料


Plugable USB Type-C - DisplayPort 変換ケーブル
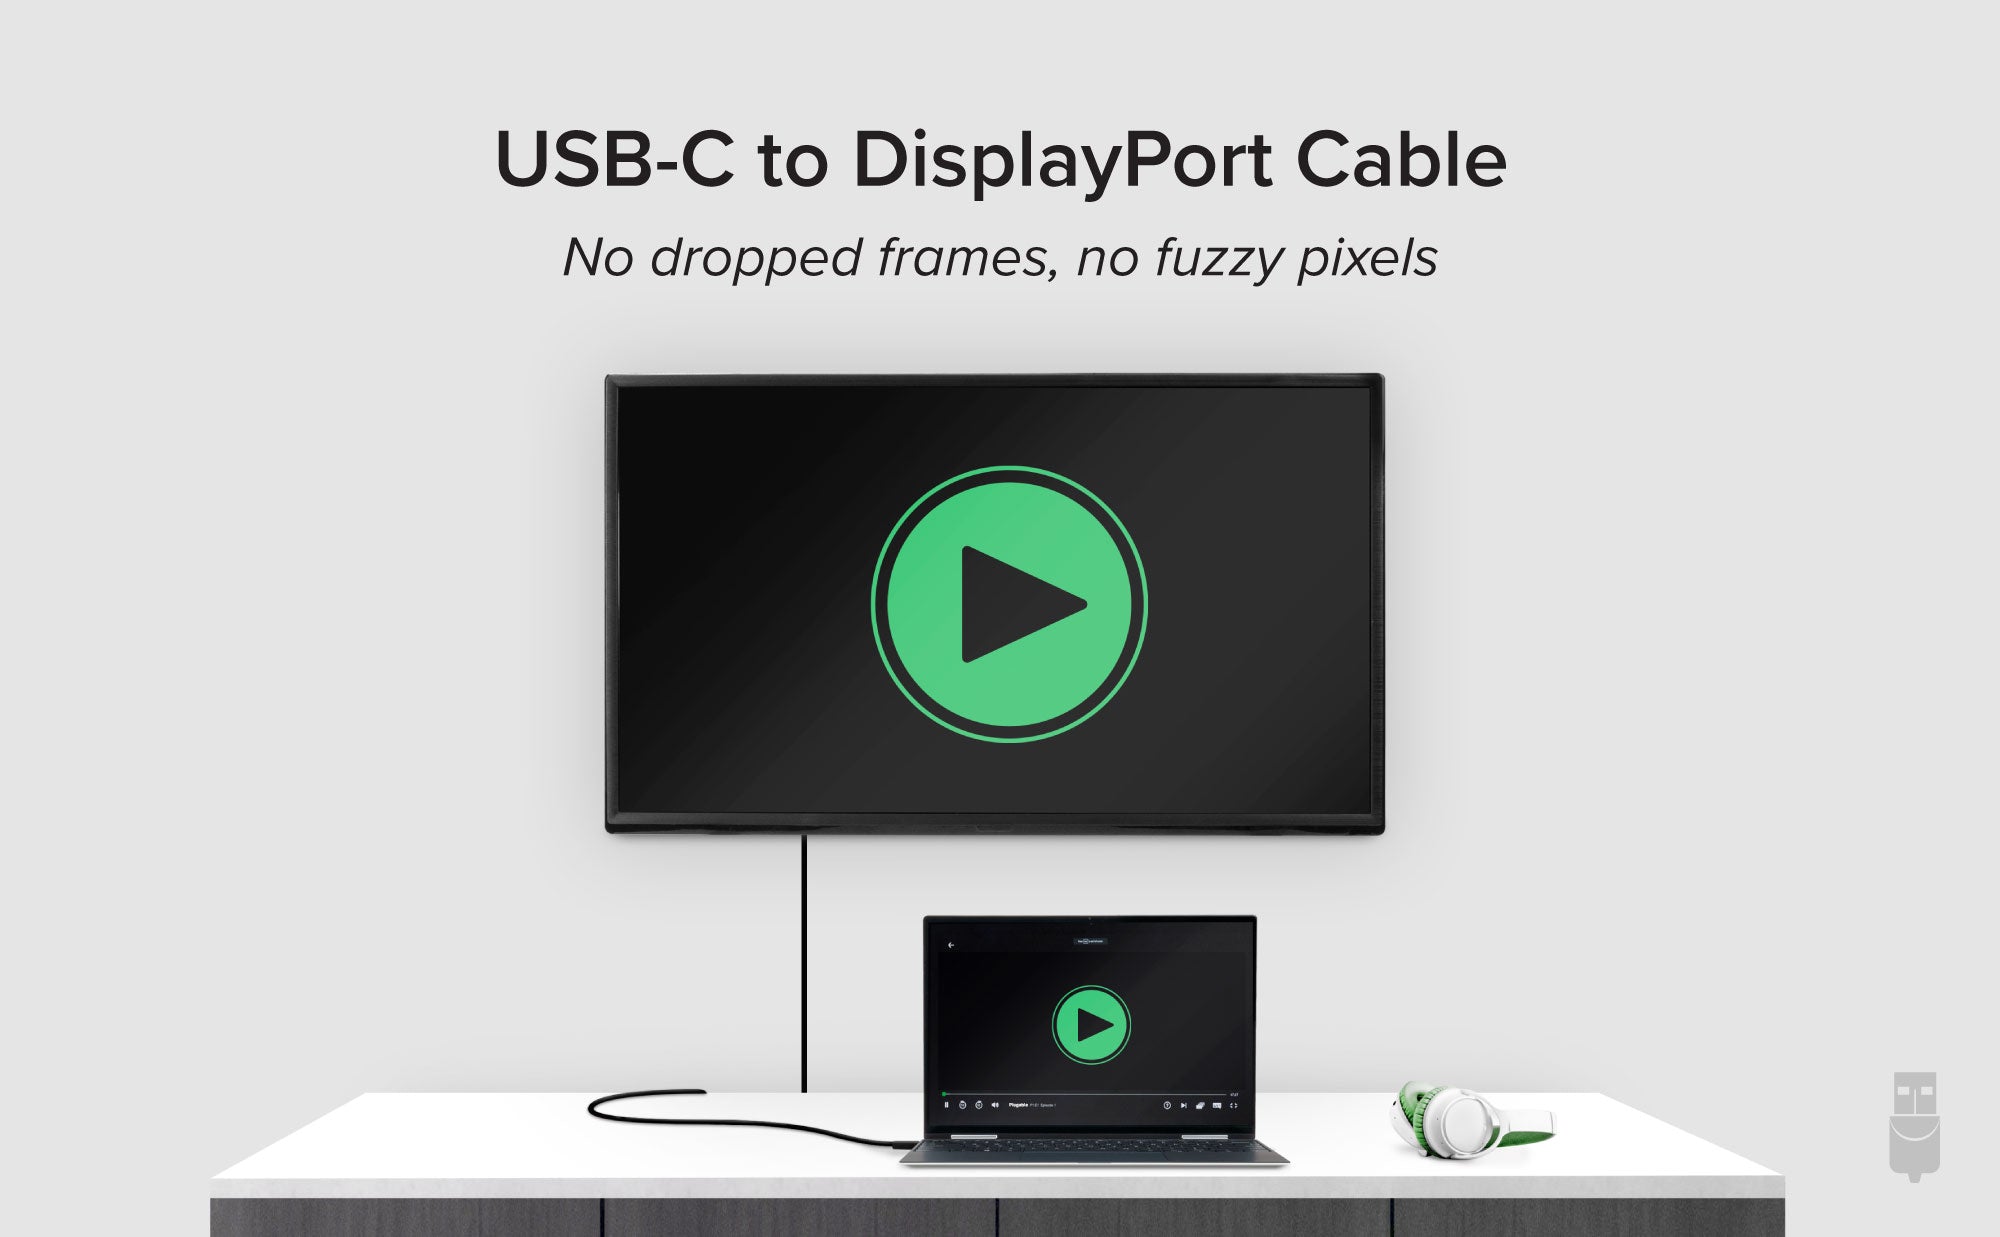
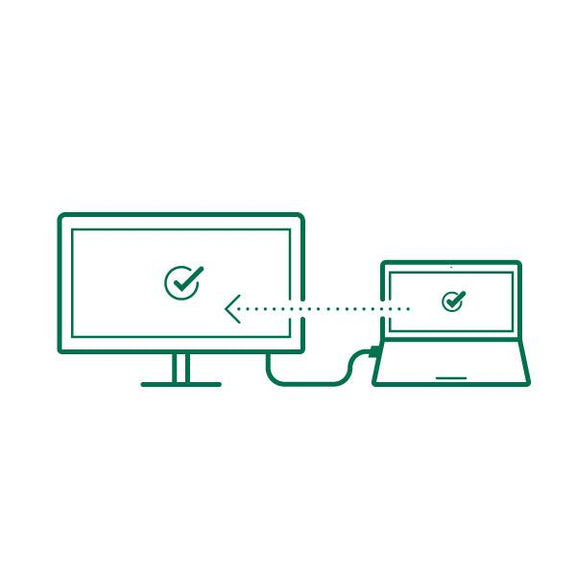
この Plugable USB Type-C – DisplayPort 変換ケーブルを使用すると、「DisplayPort 代替モード」に対応した USB Type-C(USB-C)ポートや Thunderbolt 3 /4 ポート付のシステムに、4K(3840×2160@60Hz)解像度までの DisplayPort モニタを追加接続できます。
長さは約 2 mです。「USB Type-C 代替モード」または「Thunderbolt 3 / 4」に対応した USB-C ポートを搭載のシステムで使用できます。

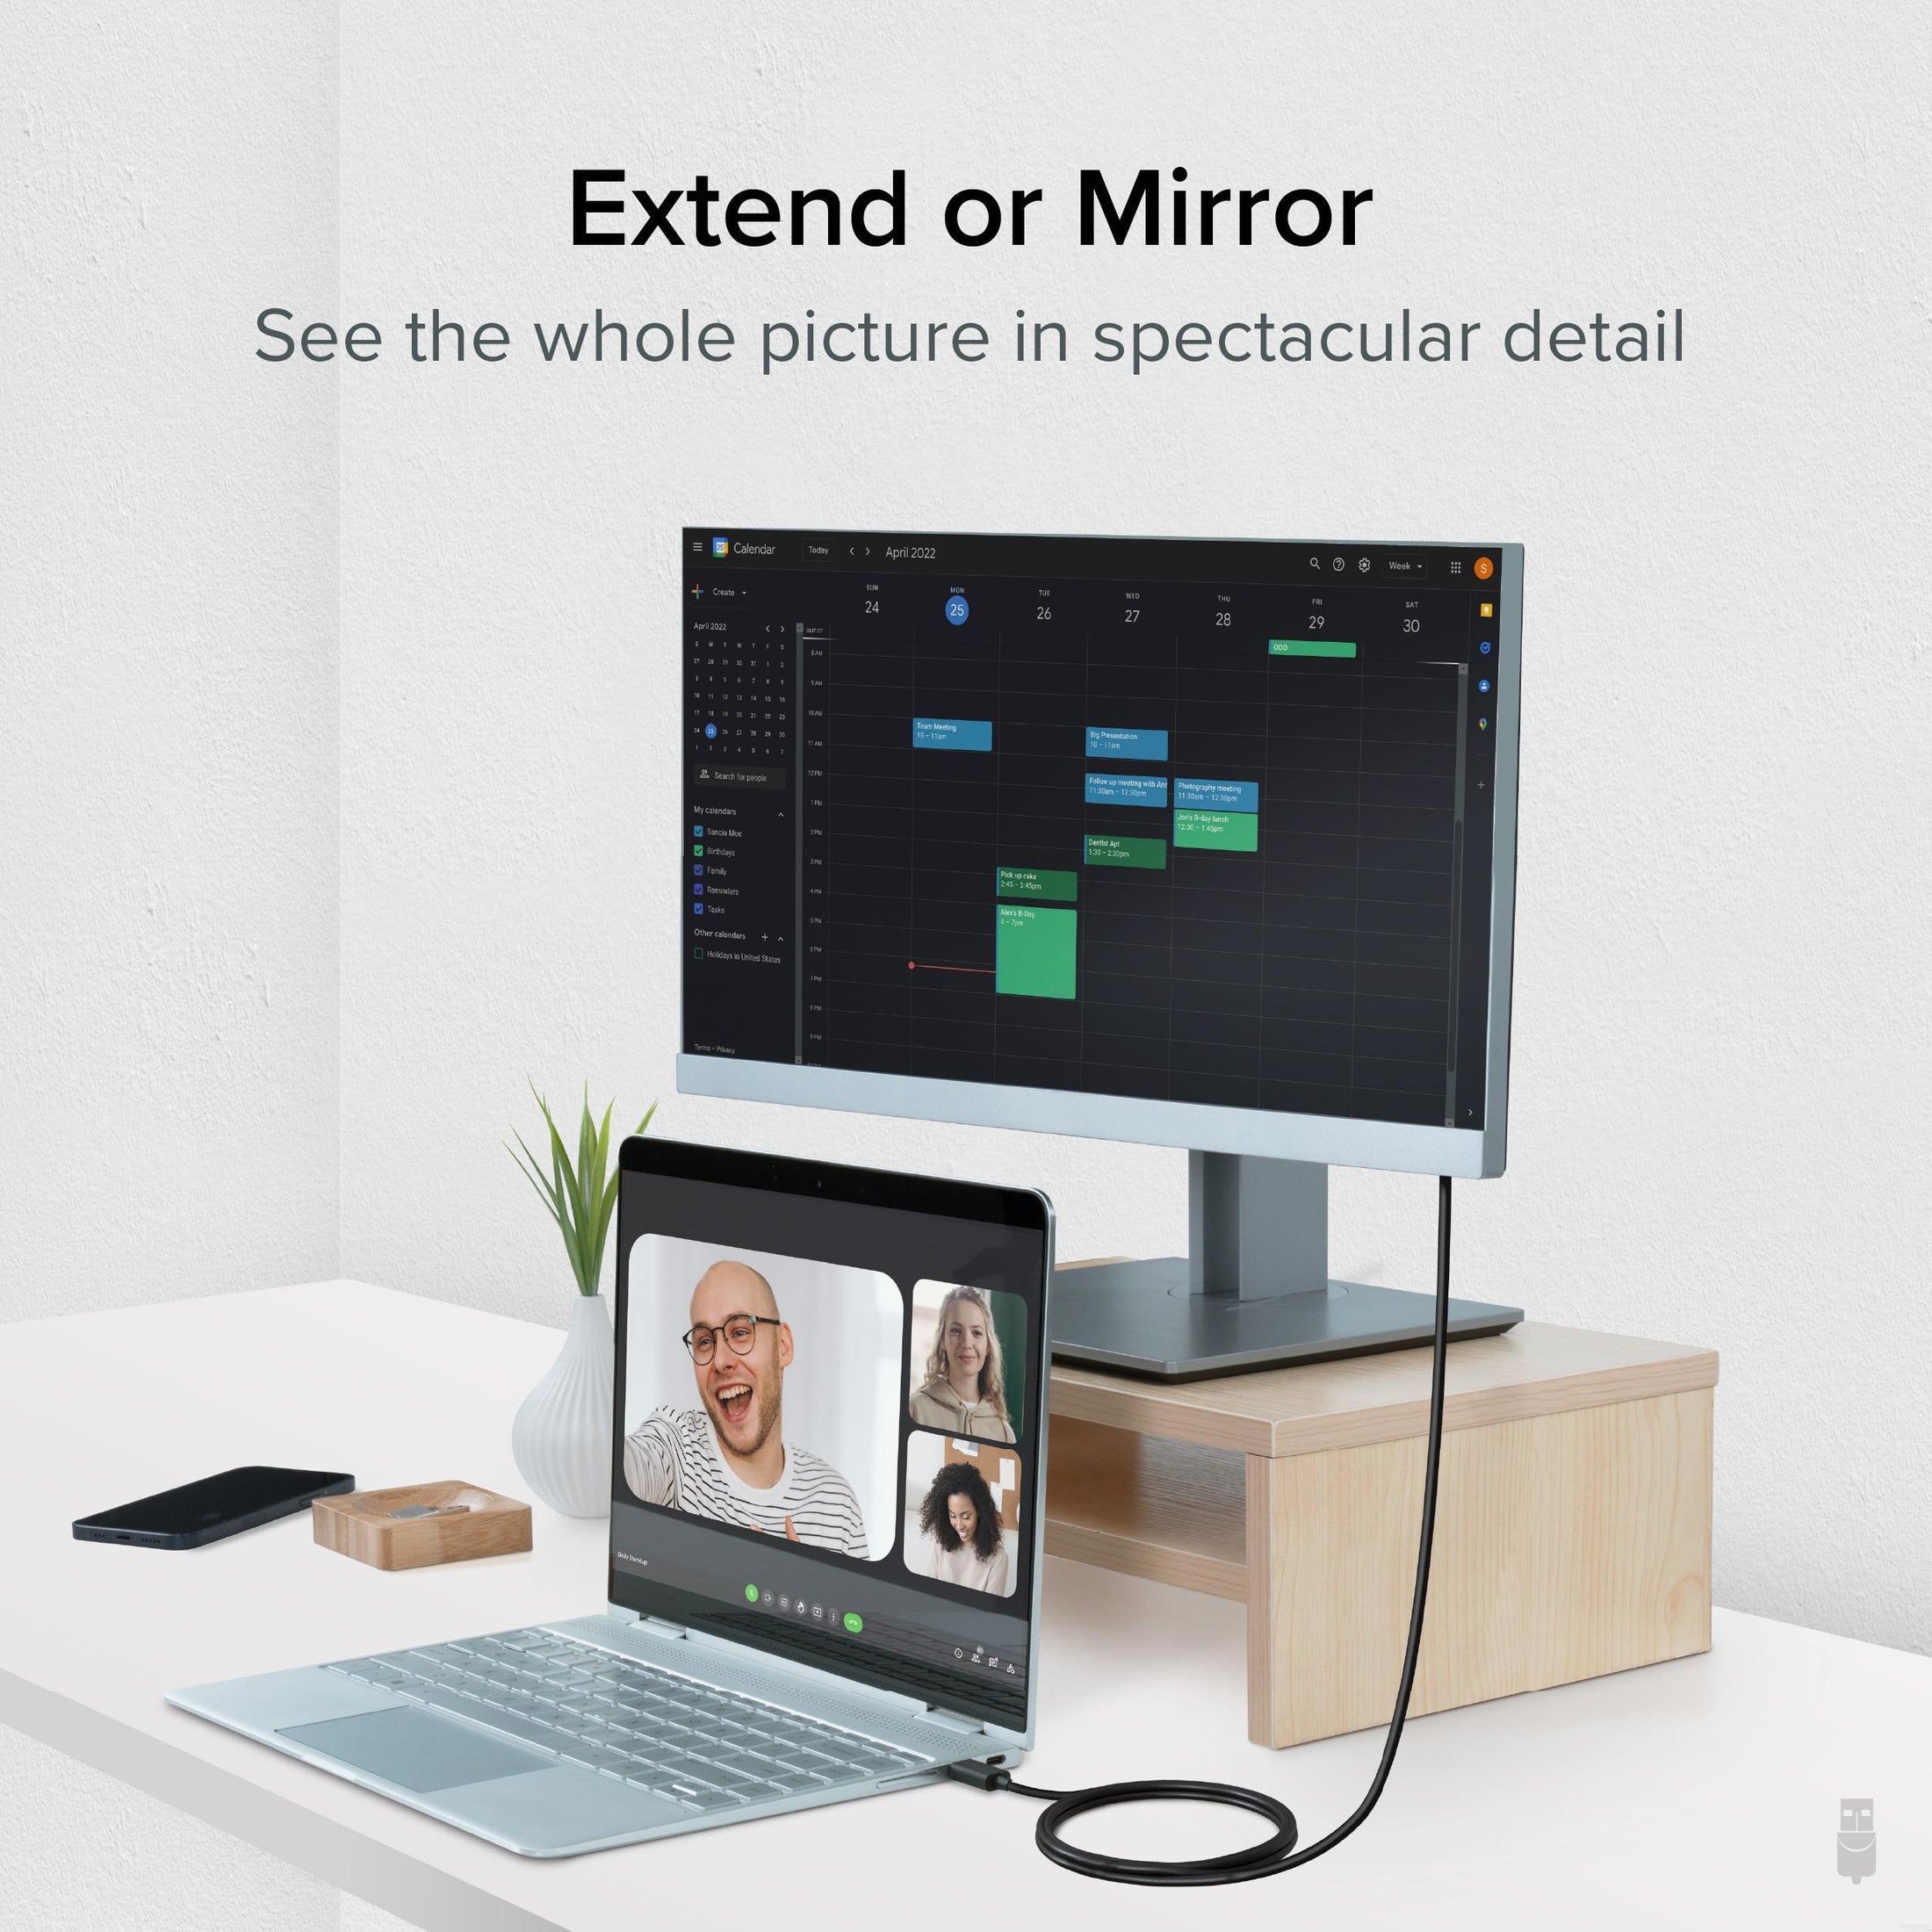
マザーボードに直接接続したモニタと同等のパフォーマンス
この USBC-DP 変換ケーブルは、「VESA USB Type-C 経由 DisplayPort 代替モード(代替モード)」を使用します。「DisplayPort 代替モード」は、USB 3.1 より使用可能となった特別な機能によってシステムの GPU に直接アクセスします。したがって「USB 外部グラフィックス・アダプタ」を使用する場合のようなパフォーマンス上の懸案がありません。当アダプタ経由で接続されたモニタは、システムのマザー・ボード付属のグラフィックス・ポートに直接接続したモニタとまったく同じ様なパフォーマンスを提供でき、また機能します。
ビデオやイメージ編集、ゲーム、その他のシステム・リソースを多く要求するタイプのアプリケーションでも、システム自身が搭載している GPU の能力が十分である場合には、このアダプタ経由の外部モニタ上で問題なく使用することができます。
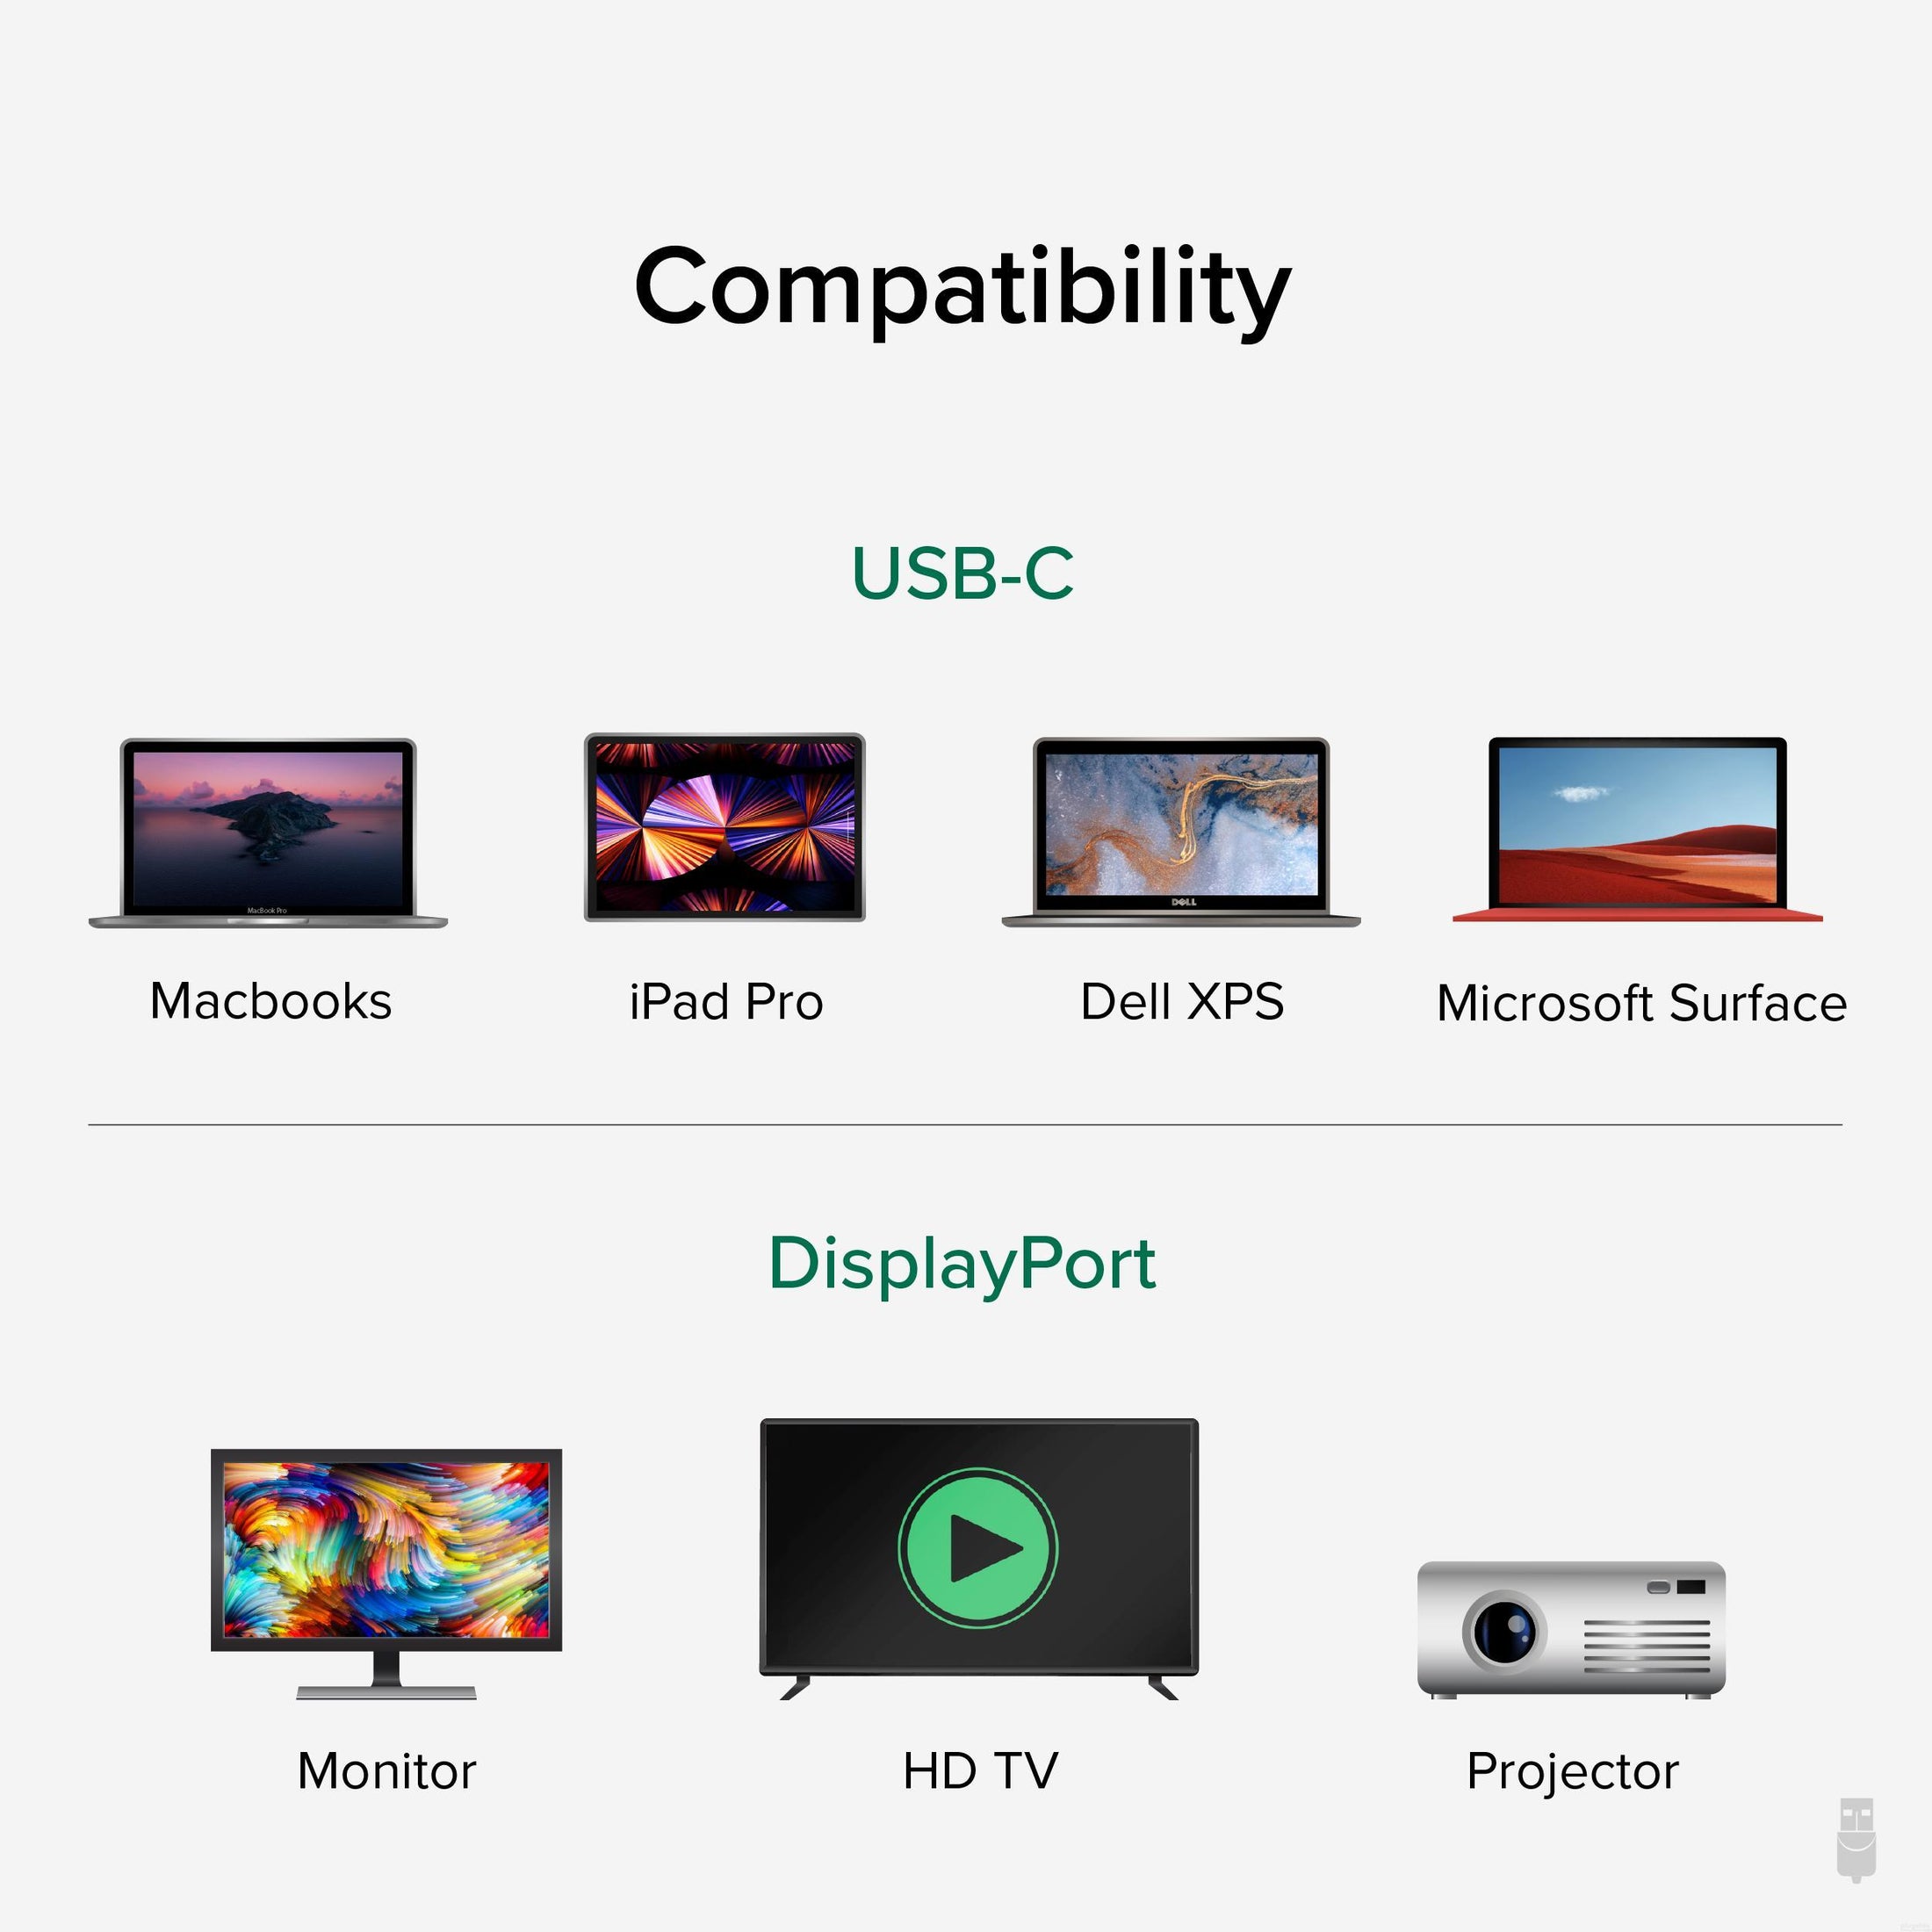
互換性
互換性のあるシステム
macOS、Linux、Windows の「DisplayPort 代替モード」ビデオ出力に対応したシステムであれば、プラグ&プレイですぐに接続することができます。
当変換ケーブルは、2018 年以降の iPad Pro(ミラーリングのみ)、MacBook Air、2017 iMac/iMac Pro、2017 および 2018 MacBook/MacBook Pro、MacBook Retina 12" 2016 / 2017、Google Pixelbook、Chromebook Pixel 2015、Dell XPS 13 9360 / 9370 や XPS 15 9560 / 9570、Lenovo P50、および Samsung Galaxy S8 / S8 + で機能検証されています。
DisplayPort 対応のテレビや、スピーカーを内蔵したモニターとの接続では音声出力にも対応します。
グラフィックス出力を、HDMI、DVI、VGAなどに変換することはできません。このケーブルは、DisplayPort入力ポートがついたモニタでのみ使用することができます。
互換性のないシステム
USB Type-C ポート搭載の Android スマートフォンやタブレットの多くは「DisplayPort 代替モード」に対応していません。
ASMedia 社の USB 3.1 コントローラは、現時点で「DisplayPort 代替モード」に対応していません。
DisplayPort コネクタは、HDMI 、DVI 、VGA に変換することはできません。
USB-C または Thunderbolt 3 ポートを複数搭載したマザーボードであっても、代替モードで接続できる外部モニタは通常システムにつき 1 つだけです。
DisplayPort MST(マルチストリーム)
当変換ケーブルは、マルチストリーム(MST)データの受け渡しが可能です。ただし、DisplayPort MST デイジーチェーンが使用できるかどうかは、ホストシステム、グラフィックスドライバ、モニタ側の機能に依存する点に注意してください。
 |
 |
 |
|
|---|---|---|---|
ビデオ出力 |
DisplayPort |
HDMI 2.0 |
VGA |
最大解像度 |
3840 x 2160 @ 60Hz |
3840 x 2160 @ 60Hz |
1920 x 1200 @ 60Hz |
ケーブル長 |
約 1.8m |
約 1.8m |
約 1.8m |
オーディオ サポート |
いいえ |
Filter Help Articles and Frequent Questions by Category
Choose one or more filters within each category to narrow down the articles. Each selection will result in only displaying articles that include all of your choices.
Articles
Well how about that, it looks like we don't have any articles matching your filters! Try removing one of your choices or clear the filters to show all articles.
You can always contact support if you need help too!
No Sound? How to Change Your Default Audio Device to Your Plugable Product
Whether you're on Windows, macOS, or Linux, it's common to add new audio devices to your computer.
Some examples of additional audio devices you may want to switch to include:
- Bluetooth headsets, headphones, and speakers
- Speakers built into a display, such as a TV or monitor
- A USB sound card, digital audio converter (DAC), or analog to digital converter (ADC)
- USB microphones
- Audio jacks on a docking station
These steps don't apply to the Plugable Performance NIX HDMI Capture Card (USBC-CAP60).
Here are the steps that you need to set a new default audio recording or output device on different operating systems.
Set Audio Output Device
Set Audio Recording Device
Set Default Playback Device in Windows
- Check that your device is properly connected, and that any necessary drivers are installed
- It is also a good idea to make sure that your sound device is turned on, and that the device's volume control is not at the absolute minimum setting
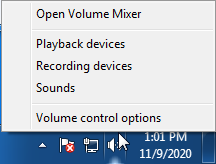
- Right-click on the speaker symbol in the Windows taskbar/system tray
-
Windows 7/8.x—Select Playback Devices. The Sound window will open with the Playback tab highlighted
-
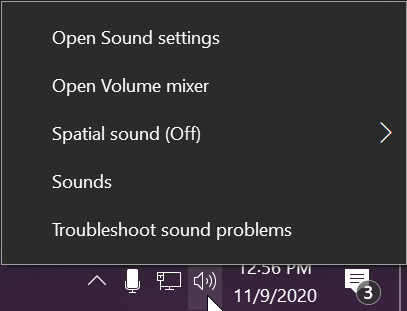
Windows 10/11—Select Open Sound Settings then click the link under 'Related Settings' for Sound Control Panel, then click the Playback tab
- Alternatively, after selecting Open Sound Settings, use the dropdowns under the Output header
-
Windows 7/8.x—Select Playback Devices. The Sound window will open with the Playback tab highlighted
- Find your device in the window
- A Plugable USB 3.0 docking station or sound-enabled display adapter will appear as Plugable Audio
- A Plugable USB 3.0 Silicon Motion docking station or sound-enabled display adapter will appear as SMI USB Audio
- A Plugable USB 2.0 docking station will appear as USB Multimedia Audio Device
- A Plugable USB Audio adapter will appear as USB Audio Device
- Right-click on the device you found in step 3 and select Set as Default Device. A check mark should appear next to your device, and sound should now play through it
- Click OK to exit the window
Additional Configuration for Bluetooth
Please see our pairing and configuration guide for Bluetooth devices.
Set Default Playback Device in macOS
- Open System Preferences
- Click Sound
- Select Output
- Select the most appropriate device
- A Plugable USB Audio adapter will appear as USB Audio Device
Set Default Playback Device in Linux
- Ensure that you audio device is connected to the PC
- If the audio device is self-powered, it is a good idea to make sure that it is powered on, and that the device's volume control is not at the absolute minimum setting
- Launch the 'Settings' application in your distro
- Go to the 'Sound' option
- Find the dropdown for your 'Output Device', and change it to your preferred output device
- For additional sound device controls, you may want to consider using Pulseaudio Volume Controls (package name pavucontrol)
Set Default Recording Device in Windows
- Check that your device is properly connected, and that any necessary drivers are installed
- It is also a good idea to make sure that your sound device is turned on, and that the device's volume control is not at the absolute minimum setting
- Right-click on the speaker symbol in the Windows taskbar/system tray
-
Windows 7/8.x—Select Recording Devices. The Sound window will open with the Recording tab highlighted
-
Windows 10/11—Select Open Sound Settings then click the link under 'Related Settings' for Sound Control Panel, then click the Recording tab
- Alternatively, after selecting Open Sound Settings, use the dropdowns under the Input header
-
Windows 7/8.x—Select Recording Devices. The Sound window will open with the Recording tab highlighted
- Find your device in the window
- A Plugable USB 3.0 DisplayLink docking station or sound-enabled display adapter will appear as Plugable Audio
- A Plugable USB 2.0 docking station will appear as USB Multimedia Audio Device
- A Plugable USB Audio adapter will appear as USB Audio Device
- Right-click on the device you found in step 3 and select Set as Default Device. A check mark should appear next to your device, and sound should now play through it
- Click OK to exit the window
Additional Configuration for Bluetooth
Please see our pairing and configuration guide for Bluetooth devices.
Set Default Recording Device in macOS
- Open System Preferences
- Click Sound
- Select Input
- Select the most appropriate device
- A Plugable USB Audio adapter will appear as USB Audio Device
Set Default Recording Device in Linux
- Ensure that you audio device is connected to the PC
- If the audio device is self-powered, it is a good idea to make sure that it is powered on, and that the device's volume control is not at the absolute minimum setting
- Launch the 'Settings' application in your distro
- Go to the 'Sound' option
- Find the dropdown for your 'Input Device', and change it to your preferred input device
- For additional sound device controls, you may want to consider using Pulseaudio Volume Controls (package name pavucontrol)
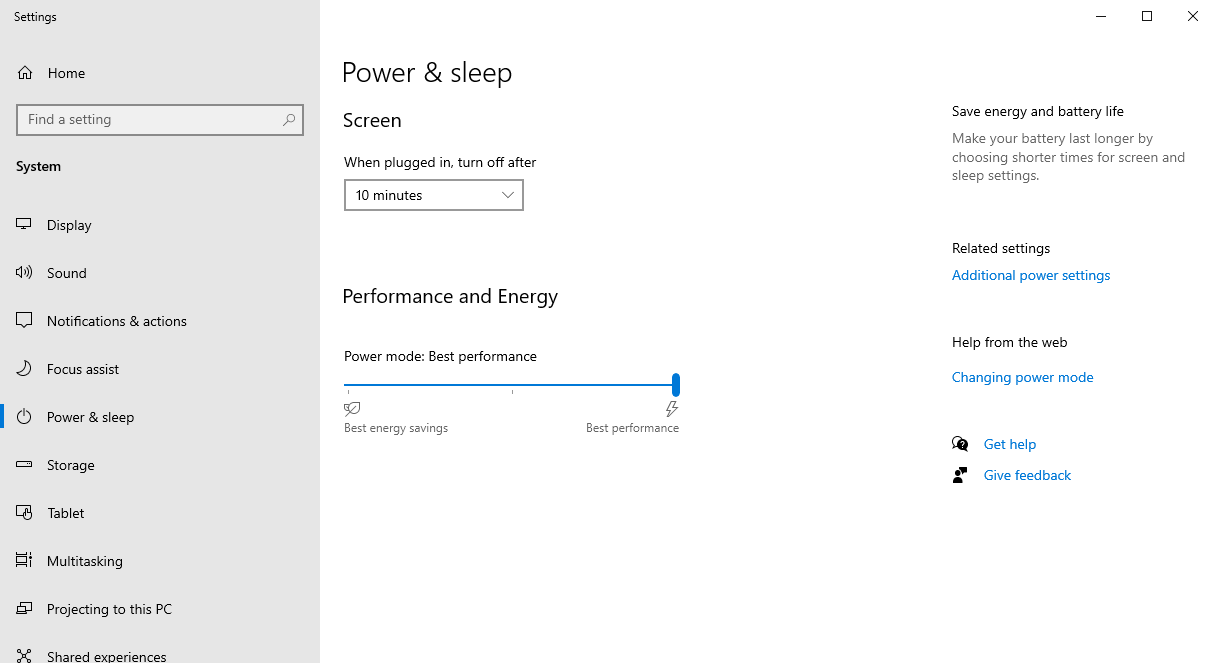
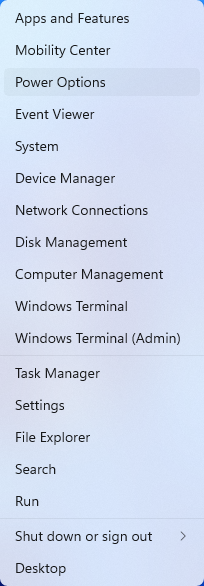
My Docking Station/Adapter Works Well With My Windows Laptop, but When I Close the Lid the Displays and Laptop Turn Off or Sleep. How Do I Fix This?
Most Windows notebook computers power management settings will default to putting the computer to sleep with the lid closed, regardless of any external displays, keyboard, or mouse connected to the computer. If this is happening but you would prefer the system to remain active with the lid closed utilizing the external display or displays, these settings can be changed by performing the following:
For Windows 10:
- Start by right-clicking on the Start button and select Power Options from the menu.
- From the right side of the Power Options settings page, select the blue link for Additional power settings
- From the choices present on the left-hand side of the Power Options window, please click on Choose what closing the lid does
- Make sure the setting for When I close the lid under the Plugged In column is set to Do Nothing
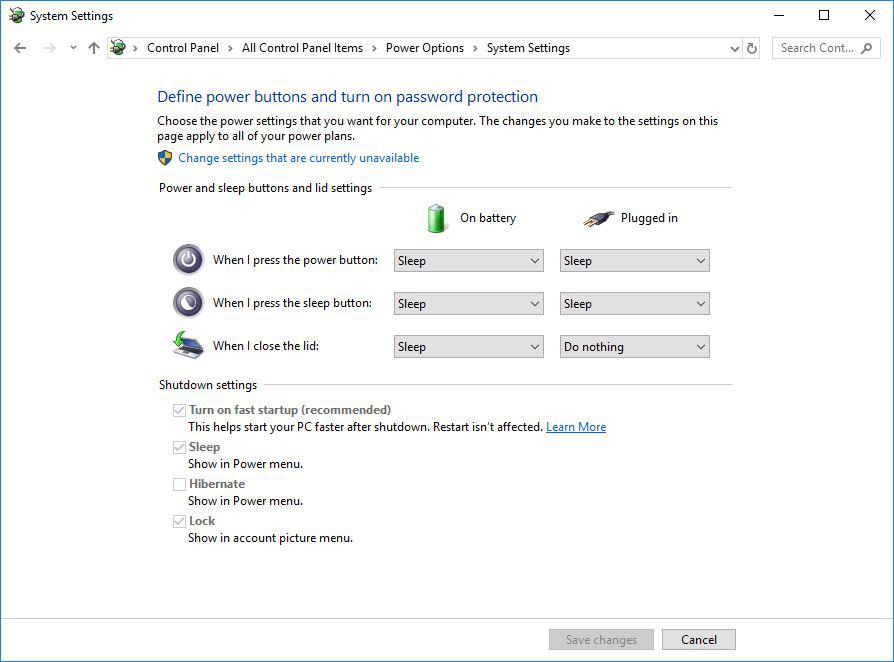
- Click the Save Changes button and restart the system (making sure that the laptop’s power adapter is also connected) and test the behavior again.
For Windows 11:
- Start by right-clicking on the Start button and select Power Options from the menu.
- In the upper left corner of the settings window, in the search box, type "lid" then select Change what closing the lid does from the search results
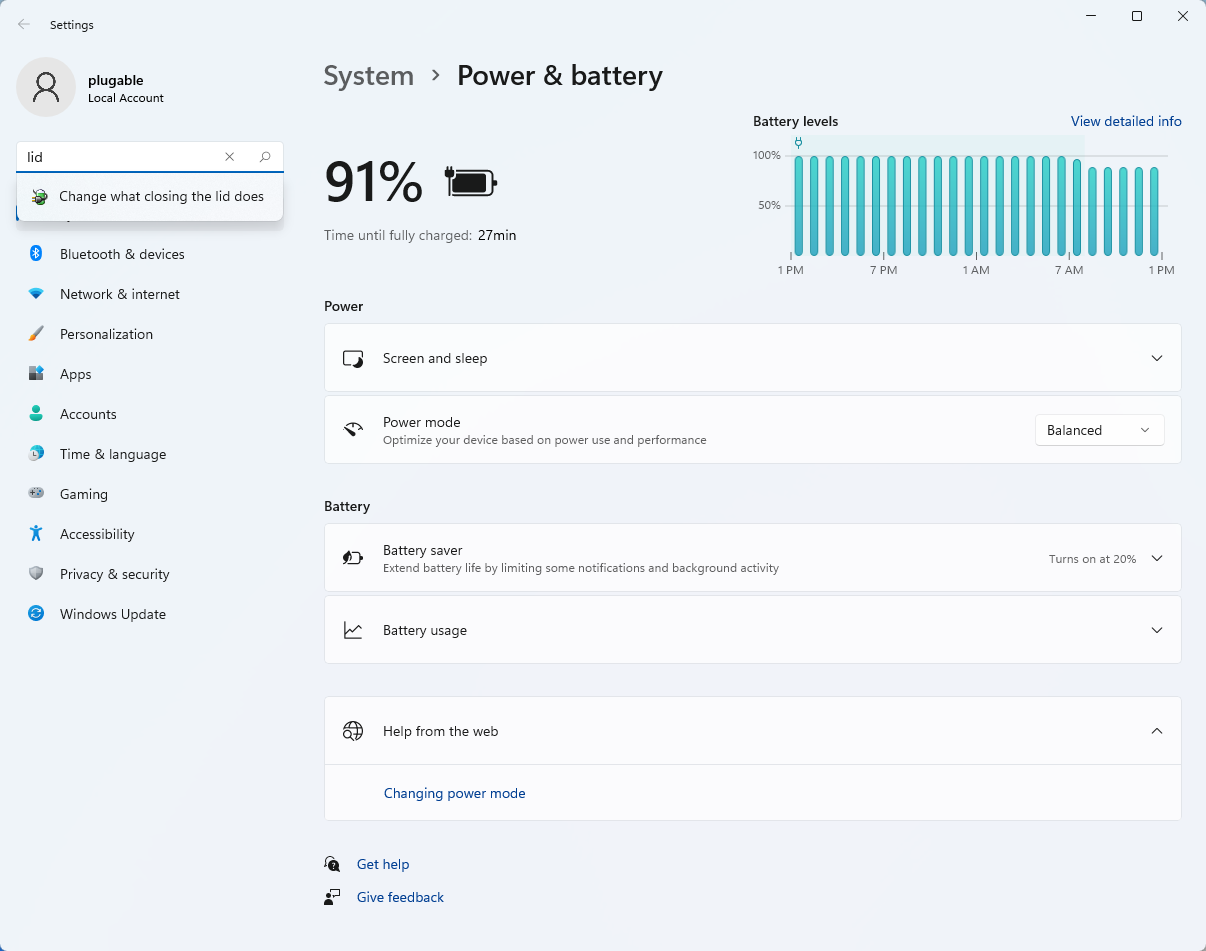
- Make sure the setting for When I close the lid under the Plugged In column is set to Do Nothing
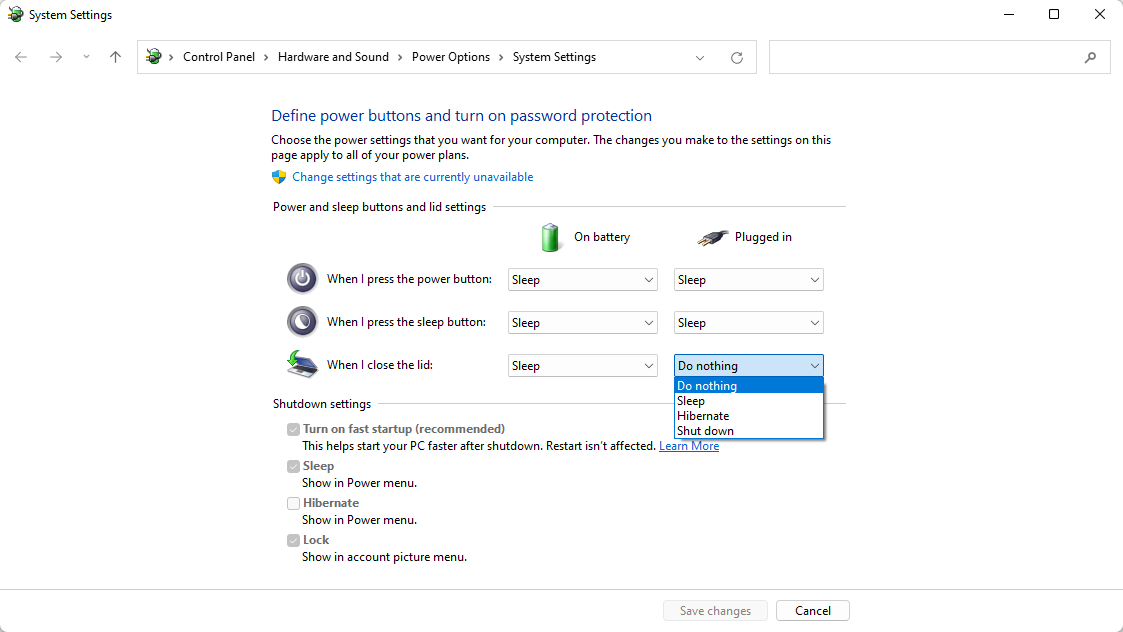
- Click the Save Changes button to apply the new settings.
Closing the lid should no longer put the computer into sleep mode when an external display and power source is connected, instead one of the external displays should now become the Primary display with the desktop icons instead of the laptop's built-in display.
The lid may still need to be opened to perform the following tasks:
- To power on the computer from a fully powered off state
- To log into the computer if logged out or if the computer is restarted with the lid closed
- To wake the computer from a deep sleep state ( hibernation, or Windows hybrid sleep states )
My System Has Multiple USB-C and/or Thunderbolt 3 Ports. Can I Add Multiple Alt Mode Adapters for Multiple Displays?
If your system supports multiple Thunderbolt 3 or USB-C Alt Mode outputs, then you will be able to use multiple adapters on one system. However, there are some Thunderbolt 3/USB-C Alt Mode systems that limit the video output to one port.