Plugable USB C NVMe SSD ケース、USB 3.1 Gen 2(10Gbps)対応
SKU: USBC-NVME
List Price : $29.00
Amazon Rating :
(2095 Reviews)
機能
- 超高速転送 - PC の USB-C(USB 3.1 Gen2)または Thunderbolt 3 ポートに、最大 10Gbps スピード で NVMe SSD ドライブを接続することができます。高速 NVMe メディアを使用すると、800MB/s 以上の読み書きパフォーマンスを発揮します。USB-C および USB 3.0(Type-A)ケーブルの両方が同梱されます。
- ツール不要のすっきりとしたデザイン - ツールを使わずに簡単に M.2 NVMe SSD をシステムに接続できるドライブケースです。すっきりとした黒のアルミニウム筐体でコンパクトなため、持ち運びにも適しています。放熱用の穴と溝がついています。
- 互換性 - NVMe SSD ドライブは製品に含まれません。M.2 NVMe SSD と互換性があります。USB 3.1 Gen 2 10Gbps までの転送速度に対応していますが、実際のパフォーマンスはホストシステムの性能、使用状況、および NVMe メディアに依存しますのでご注意ください。USB-C Gen2 または Thunderbolt 3 対応のポートで使用することをお勧めします。USB 3.0/USB3.1 Gen1 対応のシステムでは、転送速度が 5Gbps までになります。M.2 SATA SSD や、M.2 PCIe AHCI SSD、WiFi/キャプチャーカードなどの M.2 PCIe 周辺機器、mSATA SSD、非 M.2 SSD などには互換性がなく使用できません。
- 対応OS - Windows、Mac、Linux システムでプラグ & プレイで接続できます。ケース内で使用する SSD ドライブのファイルシステムが、使用する OS によりアクセス可能なフォーマットである必要があります。
- 2 年の品質保証 - Plugable は 2 年間の品質保証およびメールでのサポートをご提供いたします。正規販売元の Plugable Japan よりご購入ください。製品について質問がございましたら、Plugable Japan サポートまでお気軽にご連絡ください。

ツール不要のデザイン、超高速 USB ストレージを使用可能
USB 経由でのファイル転送が非常に高速です。USB 3.1 Gen 2 または Thunderbolt 3 対応の USB-C ポートに接続した場合は USB 3.1 Gen 2 のスピードである 10Gbps までに対応しており、800MB/s のデータ転送速度を誇ります。従来からある SATA SSD 外部ケースや USB 3.0(5Gbps)フラッシュ・ドライブなどよりも、読み取りで約 40%、書き出しで約 200%程度の高速化を実現できます。
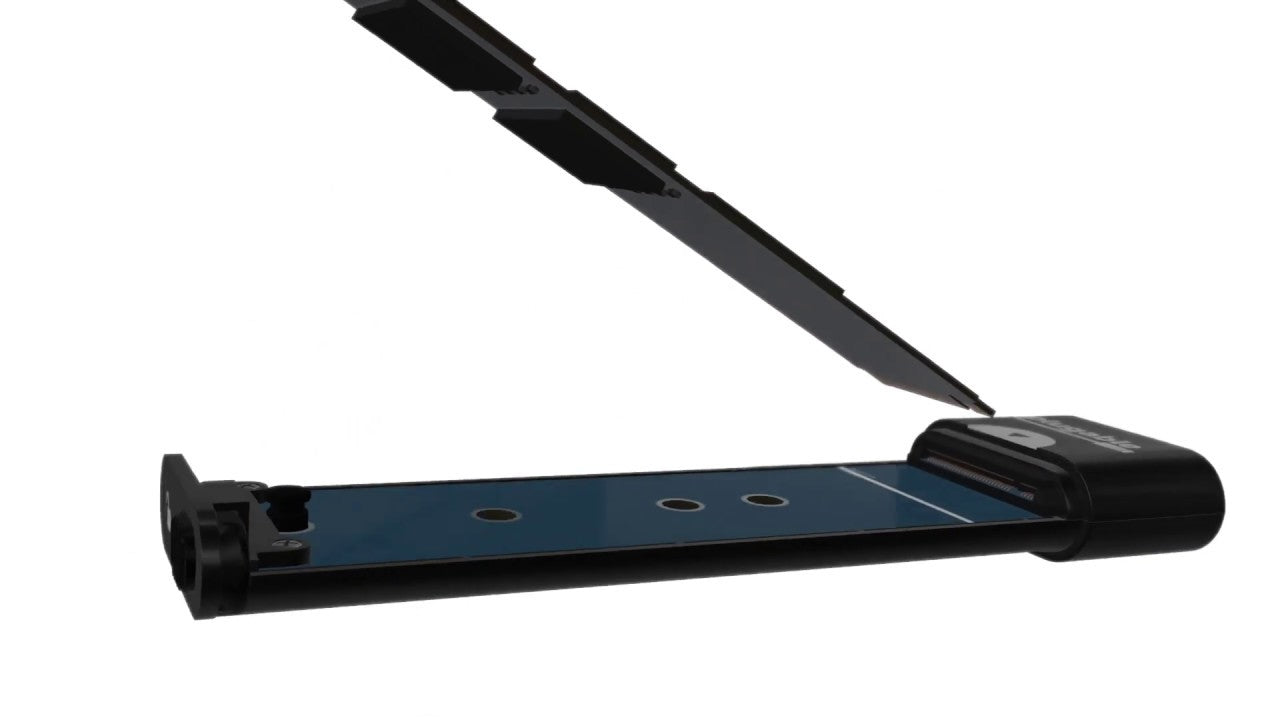
この「Plugable USB 3.1 Gen 2 NVMe SSD ドライブケース」を使うと、M.2 NVMe SSD ドライブをツール不要で簡単にシステムに接続することができます。外側のアルミニウムカバーは、ケースの横にあるロック用ラッチをスライドすれば外すことができます。SSDカードを内部のゴム製固定ペグ部分に合わせて固定し、カバーを戻すだけです。SSD 固定用のゴム製ペグは移動することができるため、2280、2260、2242、2230などの、M.2 NVMe SSD長に対応します。

NVMe SSD の互換性および注意事項
- このケースには、NVMe M.2 SSD を挿入して使用できます。
- M.2 SATA SSD、M.2 PCIe AHCI SSD、その他の非 M.2 SSD では使用できません。
- 最新の製品比べ非効率的な、古い NVMe ドライブを使用すると、最新のドライブのように高パフォーマンスを発揮できないことがあります。
- 新しい NVMe SSD をシステムに認識させるには、Windows や macOS の機能により「パーティション分け」し「フォーマット」する必要があります。

システム要件および互換性
- 理論上 10Gbps の転送速度を享受するには、システムの USB 3.1 Gen 2 または Thunderbolt 3 / 4 対応の USB-C ポートに接続して使う必要があります。実際の転送速度は、ケース内で使用するSSD メディア、使用するファイルシステムのオーバーヘッド、SSD自体の温度調整機能などにも依存します。
- USB 3.1 Gen1/USB 3.0 のポートに接続すると、理論上の最大転送速度は 5Gbps です。
- USB Type-A、USB Type-C、Thunderbolt 3、Thunderbolt 4 ポートを搭載したシステムで使用できます。
- Windows、macOS、Linux 対応です。
- ファイルシステム、ソースデータファイル(ファイルをコピーする場合)、システムの仕様により、転送速度が制限される場合があります。
- SSD のファイルシステムが OS 固有の場合、他の OS では認識されないことがありますのでご注意ください。Windows とmacOS コンピュータの両方で作業する場合は、exFat ファイルシステムをお勧めします。

放熱に配慮したデザインと温度調整機能(サーマルスロットリング)
NVMe SSD ドライブは、大量の熱を発します。当「Plugable USB 3.1 Gen 2 NVMe SSD ドライブケース」は、SSD の両側に空気を流すための穴があり、アルミニウムの筐体には放熱用の溝がついています。
しかし上記のような設計により温度調整を図ったとしても、特に大きな負荷がかかる作業中には、一部の SSD では温度が上がり、それに伴って転送速度に影響が出ることがあります。効率的に放熱しない比較的古い NVMe SSD を使っていると、かなり熱くなることもあります。
現在主流の NVMe SSD は、それ自身が高温になり始めると自動的に転送速度を落とし、それ以上の発熱を下げる温度調整機能を備えています。多くの場合それが機能するのは大量データを転送して SSD が 60℃ から 70℃ に達した場合です。
このような転送パフォーマンスの低下を避け最も良い状態で使用するために、充分に空気が循環するような場所にこのドライブケースを設置し、SSD 温度が 50℃ を超えないように運用することをお勧めします。
パッケージ内容
内容物と数量 | 注記 |
---|---|
1x USB-C NVMe SSD ドライブケース | |
1x USB Type-C - USB Type-C ケーブル | |
1x USB Type-C - USB Type-A ケーブル | |
1x3 ゴム製 SSD 固定用ペグ | |
1x 温度緩衝用パッド(オプション、SSD に貼り付けて使用) | |
1x クイックスタートガイド |
電源
ポート | 場所 | 電源 ホスト/デバイス | 接続タイプ | 備考 | 電圧 | アンペア | ワット数 |
---|---|---|---|---|---|---|---|
USB Type-A | 背面 | 周辺機器 | USB バスパワー(電源アダプタ不要) | 5.0V | 900mA | 4.5W | |
USB Type-C | 背面 | 周辺機器 | USB バスパワー(電源アダプタ不要) | 5.0V | 900mA | 4.5W |
ホストへの接続
ポート | 場所 | バージョンとリンクレート | 機能 |
---|---|---|---|
1x USB Type-A または USB Type-C | 前面 | USB 3.2 Gen 2 (10Gbps) |
ストレージ
ストレージポートの位置 | ホスト接続 | ホスト接続ポート仕様 | 付属ケーブル(またはポートタイプ) | スロットとメディアタイプ | 容量(メディアが含まれている場合)または最大サポート容量 | チップセット |
---|---|---|---|---|---|---|
内部 | USB-A または USB-C | USB 3.2 Gen 2 (10Gbps) | なし(USB-C ポート付き) | M.2 NVMe SSD M.2 B Key |
RTL9210 Realtek |
同梱ケーブル
ポートタイプ(側面 1 ) | ケーブル仕様 | ポートタイプ(側面 2 ) | ケーブル長 | ケーブル用外部電源 |
---|---|---|---|---|
1x USB-C オス | USB 3.2 Gen 2 (10Gbps) | 1x USB-C オス | 0.25m | |
1x USB-C オス | USB 3.2 Gen 2 (10Gbps) | 1x USB-A オス | 0.25m |
Windows との互換性
- Windows 11、Windows 10、Windows 8.1 - UAS(USB Attached SCSI)または BOT(Bulk Only Transport )を使用
- Windows 7、Windows Vista、Windows XP - BOT(Bulk Only Transport)を使用
- Windows XPでは、より大きなドライブを使用していても、2TB のみのサイズに制限されることがあります。
macOS との互換性
- macOS 10.8 Mountain Lion 以降 - UAS(USB Attached SCSI)または BOT(Bulk Only Transport)を使用
- macOS 10.7 Lion - BOT(バルク・オンリー・トランスポート)を利用
- macOS 10.4 以降では、実用的な SSD ドライブのサイズ制限はありませんが、採用したファイルシステムによりサイズ制限があることがあります。
Linux との互換性
- Linux Kernel 3.15 以降 - UAS(USB Attached SCSI)または BOT (Bulk Only Transport)を使用
- Linux カーネル 2.6.31 以降 - 2TB を超えるドライブのセクターごとに 4K をサポート
SSD Compatibility
- NVMe M.2 エッジ・コネクタの SSD
- 横の長さ - 80mm(2280)、60mm(2260)、42mm(2242)、30mm(2230)
- M.2 PCIe NVMe M キー・スロット SSD -(PCIe 4x レーン SSD)、またはM+B キー・スロット(PCIe 2x レーン SSD)
互換性のない SSD
- M.2 エッジ・コネクタ付きの PCIe AHCI および SATA SSD は、このケースでは使用できません。
- 長さ 120mm NVMe SSD はケース内に収まりません。(このようなドライブが一般消費者用に売られていることはほぼありません。)
- M-SATA やその他のエッジ・コネクタの SSD
- Apple NVMe 、PCIe、SATA M.2 以外のスロットの SSD
- NVMe SSD ではない M.2 PCIe デバイス
- Intel Optane Memory accelerated NVMe SSDs
These NVMe SSDs include high-speed memory for accelerating data access, however we have had multiple users report that drives removed from computers are not detected when installed into our USBC-NVME enclosure ( as well as other USB 3 and USB-C NVMe enclosures )
問題が報告されている NVMe SSD、USB 3.x ホストコントローラ、システムなど
- ADATA Swordfish NVMe SSD
書き込み速度がかなり低い値しか出ないと報告されています。(2021/01/26現在)
- AsMedia ASM3142 USB 3.1 Gen 2 ホストコントローラ
Windows 10 でこのコントローラを搭載したシステムでは、何らかの理由で本来使用されるはずの uaspstor.sys UASP ドライバではなく、usbstor.sys レガシードライバが使用されることがあります。この状態の場合、TRIM のサポートが妨げられパフォーマンスが低下する可能性があります。
- JMicron ベースの USBC-NVME エンクロージャを搭載した Apple M1 CPU 搭載のノートパソコンと Mac Mini(2020年以前のモデル)
このシステムではドライブが正しく検出されず、接続が断続的に切断する場合があります。 この問題が発生した場合は、「アマゾン注文番号」とともに当社技術サポート nihongo@plugable.com までご連絡ください。
NVMe SSD 導入説明動画

同梱されている温度緩衝用パッドは金属製のループにより、SSD からアルミカバーに熱を伝導します。フォームコアによりパッドがアルミカバーに軽く接触するようになっています。
これらのパッドの取り付けは、古い NVMe SSD、または性能のために熱保護を犠牲にしている「高性能」NVMe SSD を使用している場合に推奨されます。 NVMe SSD の転送性能は SSD 側の技術仕様ではなく USB 3.0 インターフェースの技術仕様によって制限されるため、熱対策が不十分な高性能の NVMe SSD を使用しても費用対効果が高いとは言えず、使用は推奨されません。
導入手順
- NVMe SSD をケース内に取り付け、SSD が問題なく動作することを確認する
- ケースをいったんコンピューターから取り外す
- 筐体のアルミカバーを外し、NVMe SSD が見える状態にする
- 温度緩衝用パッドについているシールを剥がして、 NVMe SSD の上面に閉じたときにアルミカバーに接触するように貼り付ける。
温度緩衝用パッドの切り口がアルミカバーの進行方向に対して垂直になるように配置することをお勧めします。そうすることで、カバーを閉じる際に引っかかるのを防ぐことができます。
標準的な長さの NVMe SSD(2280)であれば 3 つ、2230 または 2242 NVMe SSDであれば 1つ、2260 NVMe SSD は 2 つの温度緩衝用パッドをつかうとよいでしょう。
Windows システムで新しいドライブをフォーマットする方法
新しい NVMe SSD は、パーティションテーブルやフォーマットされたパーティションがない状態で工場から出荷されます。ドライブが検出されるようにするためには Windows のエクスプローラや macOS Finder で、ドライブをフォーマットする必要があります。Windows、macOS でのパーティション分割とフォーマットについては、以下のビデオを参照してください。

macOS で新しいドライブをフォーマットする方法
新しい NVMe SSD は、パーティションテーブルやフォーマットされたパーティションがない状態で工場から出荷されます。ドライブが検出されるようにするためには Windows のエクスプローラや macOS Finder で、ドライブをフォーマットする必要があります。Windows、macOS でのパーティション分割とフォーマットについては、以下のビデオを参照してください。

ダウンロード
デバイス・ドライバ
ドライバは、Windows 8.x 以降の Windows、macOS 10.8 以降、Linux の最新オペレーティングシステムに組み込まれています。
ファームウェア
ファームウェアのアップデートは、こちら の情報を参照してください。
Filter Help Articles and Frequent Questions by Category
Articles
Well how about that, it looks like we don't have any articles matching your filters! Try removing one of your choices or clear the filters to show all articles.
You can always contact support if you need help too!
Does the USBC-NVME Support SMART?
Yes! Our USBC-NVME enclosure does support SMART data.
Access to SMART data is software dependent, we have tested our enclosures with smartmontools, a free, cross platform SMART reading and monitoring utility. The command line utility smartctl is the primary method for accessing the SMART data.
For our original JMicron enclosures the SMART data can be read using the "-d sntjmicron" argument at the command line, for example:
smartctl -a -d sntjmicron /dev/sdb
Our USBC-NVME enclosures with Realtek RTL9210 chipset use a similar "-d sntrealtek" argument, however this will be automatically detected in future version of smartmontools ( Build #949 (7.2-r5053) as of April 2020 no longer requires the additional argument ). Thank you to the smartmontools team for helping to achieve this!
smartctl -a -d sntrealtek /dev/sdb
Checking Drive SMART Values in Windows 10
Modern hard drives and solid state drives include support for Self-Monitoring, Analysis, and Reporting Technology or SMART. SMART data can show signs of drive failure or wear before data loss occurs and can be used to monitor the health of the drive including the temperature sensors in the drive itself.
From the Crystal Disk Info Graphical Utility
Crystal Disk Info can be downloaded from here, this is a 3rd party utility for viewing a drive’s SMART data in windows. This can be run without installation by downloading and extracting the ZIP file, or installed like many other applications.
Crystal Disk Info version 8.12.6 and above includes built-in support for these Plugable Products:
After extracting the zip file, right-click on “DiskInfo64.exe” and select “Run as Administrator” to start the application with Administrative permissions required to read the SMART data from the drive.
From the Command Line with smartctl
The smartctl command is provided in the smartmontools suite. This can be downloaded and installed for Windows or Linux. The current stable version 7.2 released December 30 2020. The latest daily build can be downloaded from here, these are built from the latest source code and include support for newer chipsets not available in the 7.2 release.
Smartmontools version 7.2 and above includes built-in support for these Plugable Products:
Installation and Running
- After downloading the smartmontools-7.2-1.win32-setup.exe, right-click on the file and select “Run as Administrator” to start the installation. Follow the on screen steps to install smartmontools.
- Open a terminal, right-click on the start menu and select “Windows PowerShell (Admin)” from the pop-up menu
- Type in `smartctl --scan` to list the available drives
- To output all of the drive’s SMART data, type in `smartctl --all /dev/sdn` where /dev/sdn is the first column from the scan output for the drive to be read
- Optionally, output this to a file the desktop using the following: `smartctl --all /dev/sdn > $env:USERPROFILE\Desktop\smartdata.txt
If you receive an error “Open failed, Error=5” most likely the Windows PowerShell was not run as Administrator.
Checking Drive SMART Values in Linux
Modern hard drives and solid state drives include support for Self-Monitoring, Analysis, and Reporting Technology or SMART. SMART data can show signs of drive failure or wear before data loss occurs and can be used to monitor the health of the drive including the temperature sensors in the drive itself.
From the terminal with smartctl
The smartctl command is provided in the smartmontools suite. This can be downloaded and installed for Windows or Linux. The current stable version 7.2 released December 30 2020, Fedora 34 provides the latest version through DNF, however both Ubuntu 20.04 LTS and CentOS 8 provide an older version that does not support all of our storage products. The latest daily build can be downloaded from here, these are built from the latest source code and include support for newer chipsets not available in the 7.2 release.
Smartmontools version 7.2 and above includes built-in support for these Plugable Products:
Downloading and running
- Download smartmontools from your repository using the following commands:
- For Ubuntu 20.04 LTS or Pop!OS: `sudo apt install smartmontools`
- For Fedora or CentOS: `sudo dnf install smartmontools`
- To scan for detected drives run the following command: `smartctl --scan`
- To print all SMART data for a specific drive use the command: `sudo smartctl --all /dev/sdn` where /dev/sdn is the path to the block device.
- Optionally, this output can be saved to a file using the following: `sudo smartctl --all /dev/sdn > ~/smartdata.txt` for detailed examination
Downloading and running the nightly build
If your distribution has not updated to smartmontools 7.2, then running the nightly build is the easiest way to read SMART values on our USBC-NVME enclsoure, smartmontools 7.1 supports both our USB-C SATA adapter and vertical drive dock.
- Download smartmontools latest build for your system from the nightly builds webpage here https://builds.smartmontools.org/
- For modern x86_64 computers I recommend: 'builds/smartmontools-linux-x86_64-static-7.3-r####.tar.gz' where #### depends on the build number.
- Extract the contents of the tarball using the following command: `tar -xf smartmontools-linux-x86_64-static-7.3-*.tar.gz`
- This creates a file structure in the same directory as the smartmontools tarball file.
- Navigate into the file structure with the following command: `cd ./usr/local/sbin`
- To scan for detected drives run the following command: `./smartctl --scan`
- Please note, the './' preceding 'smartctl' tells the shell to run the command from this directory, rather than searching the PATH for the 'smartctl' command
- To print all SMART data for a specific drive use the command: `sudo ./smartctl --all /dev/sdn` where /dev/sdn is the path to the block device.
- Optionally, this output can be saved to a file using the following: `sudo ./smartctl --all /dev/sdn > ~/smartdata.txt` for detailed examination
Does the USBC-NVME Support TRIM?
Yes! The Plugable USBC-NVME enclosure does support Trim with compatible operating systems and files systems.
For Windows, Trim support was initially added with Windows 7 for SATA SSDs, however support for USB Trim was not added until Windows 8 with the UAS (USB Attached SCSI) Protocol. Trim is supported on Microsoft's ReFS and NTFS file systems.
For macOS, Trim support was initially added with macOS 10.6.8, however Trim support was limited to Apple branded SSDs. As of macOS 10.10.4 the trimforce terminal command was added to support Trim on 3rd party SSDs. Some users have reported success with Trim on our USBC-NVME enclosure while others have reported the command failed to execute correctly. Apple's HFS+ and APFS file systems both support Trim.
For Linux, Trim support was added with kernel 2.6.28 and is compatible with a variety of file systems, default Trim behavior is dependent on the specific Linux distribution and version.
Trim an SSD in Windows 10
Windows 10 enables Trim for both internal and USB connected SSDs with supported host controllers, devices, and file systems. Windows 10 supports Trim on USB storage devices that support UASP (USB Attached SCSI Protocol) and with either NTFS or ReFS file systems. Some early USB 3 host controllers may not support UASP or Trim correctly.
To check if Trim is enabled in Windows 10 please try the following:
- Launch Windows PowerShell with Administrative Permissions ( Right-click on the Start Menu and select "Windows PowerShell (Admin)"
- Allow the application to run as administrator through Windows User Account Control
- Type in the following command to check the value for DisableDeleteNotify
fsutil behavior query DisableDeleteNotify
- If DisableDeleteNotify is set to 1, we can enable Trim with the following command
fsutil behavior set DisableDeleteNotify 0
To manually run Trim or to modify the automatic schedule:
- Open the Windows 10 Start Menu and type "optimize" into the search box
- Select "Defragment and Optimize Drives" app from the search results
- The Optimize Drives window shows connected drives that can be optimized
- Select the USB connected SSD from the list and then press the "Optimize" button to manually start trim
- Use the "Change settings" button to adjust or schedule Trim on the drive
Alternatively Trim can be run manually from the command line:
- Launch Windows PowerShell with Administrative Permissions ( Right-click on the Start Menu and select "Windows PowerShell (Admin)"
- Allow the application to run as administrator through Windows User Account Control
- Type in the following command, where X: is the drive letter of the external device to run Trim at the command prompt
defrag /o X:
Trim an SSD in macOS
Apple macOS enables Trim for internal Apple SSDs only. Advanced users can also enable Trim for USB connected SSDs with Apple APFS formatted partitions. Apple macOS runs Trim when the file system is detected by the operating system, this is either on device connection or system restart, Apple does not provide a manual Trim tool like with Windows or Linux.
Enabling Trim in macOS
Open a terminal (Finder > Go > Utilities > Terminal) and enter the following command:
`sudo trimforce --enable`
This requires administrative permissions to run and you will need to enter your password to continue.
A long warning will be presented, please read this fully.
Enter ‘Y’ to continue, or ‘N’ to cancel
Trim can be disabled with the following command:
`sudo trimforce --disable`
Verifying Trim on macOS
Apple macOS does not have a function to manually run a Trim command, instead it is run when a supported drive and supported file system is detected by the operating system. We can check to verify Trim is running on a drive by performing the following:
Open a terminal (Finder > Go > Utilities > Terminal) and enter the following command:
`log show --start $(date +%F) | grep -i spaceman_trim_free_blocks`
This may take a moment to complete, I recommend expanding the window to full screen for easier reading.
Each output line represents a file system that has been trimmed on today’s date, here is an example line:
2021-08-13 07:16:07.556498-0700 0x2b2d Default 0x0 0 0 kernel: (apfs) spaceman_trim_free_blocks:3371: disk3 scan took 0.000614 s, trims took 0.000000 s
The specific drive is “disk3” in my example, we verify that disk3 matches the external drive by comparing to the output of this command:
/dev/disk3 (synthesized):
/dev/disk3 (synthesized): #: TYPE NAME SIZE IDENTIFIER 0: APFS Container Scheme - +160.0 GB disk3 Physical Store disk2s2 1: APFS Volume Intel160 774.1 KB disk3s1
TRIM an SSD in Linux
Trim Support in Linux
Modern Linux distributions support the TRIM and DEALLOCATE commands for SATA SSDs and NVMe SSDs respectively, for simplicity we will refer to these two commands as Trim in this article.
These commands are filesystem dependent and supported on the following file systems:
File System | Trim Support |
---|---|
Btrfs | Yes |
Ext4 | Yes |
XFS | Yes |
JFX | Yes |
EXT3 | No |
NTFS-3G | Yes (Periodic Only) |
VFAT | Yes |
When a file is no longer needed by the file system, the TRIM command can be sent to the SSD to help the built-in garbage collection utility determine which memory locations need to be maintained and which can be ignored. Maintaining unnecessary memory locations takes time and can slow down read and write access to the drive.
Most current Linux distributions use fstrim.service and fstrim.timer to coordinate periodic SSD maintenance with TRIM. However USB connected SSDs do not automatically have TRIM enabled, instead requiring some manual configuration. The TRIM command can be issued manually using the fstrim command, for example the following code will run Trim on compatible file system mounted to /media/user/USBSTORAGE. Please note, all code examples in this document require root permissions unless otherwise noted.
fstrim -v /media/user/USBSTORAGE
Ubuntu 20.04 LTS automatically mounts USB storage to /media/{username}/{storage volume name} while Fedora 34 automatically mounts USB storage to /run/media/{username}/{storage volume name}. The fstrim command can be run using these automatic mount points after enabling Trim for the USB storage drive.
Verify Trim Compatibility on the External SSDs
Our first step is to check for Trim support on the SSD, this requires installing the sg3 utilities package:
Ubuntu 20.04 LTS
sudo apt install sg-utils
Fedora 32
sudo dnf install sg_utils
Next we can run the sg_vpd command to check for unmap support, in the following command /dev/sdX is the path to the block device for the USB connected SSD (this can be found by checking the `dmesg` output after connecting the drive or with the `lsblk` command)
sudo sg_vpd -a /dev/sdX | grep "Unmap"
If the command returns the following line then we can enable Trim on this device.
Unmap command supported (LBPU): 1
Enable Trim on the External SSD: Temporarily
We can enable Trim on the SSD until the drive is either disconnected, or the computer is restarted with this command, with sdX again being the block device for the USB connected SSD:
echo unmap | sudo tee /sys/block/sdX/device/scsi_disk/*/provisioning_mode
To enable Trim on Plugable's SSD docks, adapters, and enclosures on every connection
For our USBC-SATA-V: USB-C Vertical Hard Drive Dock
Our USBC-SATA-V USB-C Vertical Hard Drive Dock supports both TRIM and SMART for docked SATA SSDs.
Run the following command to enable TRIM when the enclosure is connected to the computer:
echo 'ACTION=="add|change", ATTRS{idVendor}=="174c", ATTRS{idProduct}=="1153", SUBSYSTEM=="scsi_disk", ATTR{provisioning_mode}="unmap"' | sudo tee --append /etc/udev/rules.d/10-uas-discard.rules
USBC-SATA24: 2.5-inch SATA SSD TRIM
Our USBC-SATA24 USB-C 2.5-inch SSD and HDD Adapter supports both TRIM and SMART for connected SATA SSDs.
Run the following command to enable TRIM when the enclosure is connected to the computer:
echo 'ACTION=="add|change", ATTRS{idVendor}=="174c", ATTRS{idProduct}=="55aa", SUBSYSTEM=="scsi_disk", ATTR{provisioning_mode}="unmap"' | sudo tee --append /etc/udev/rules.d/10-uas-discard.rules
USBC-NVME: USBC-NVME Enclsoure
Our USBC-NVME Tool Free M.2 NVMe SSD Enclosure supports both TRIM and SMART for installed NVMe SSDs.
Run the following command to enable TRIM when the enclosure is connected to the computer:
echo 'ACTION=="add|change", ATTRS{idVendor}=="0bda", ATTRS{idProduct}=="9210", SUBSYSTEM=="scsi_disk", ATTR{provisioning_mode}="unmap"' | sudo tee --append /etc/udev/rules.d/10-uas-discard.rules
What happens if I install the USBC-NVME aluminum cover backwards and it gets stuck?
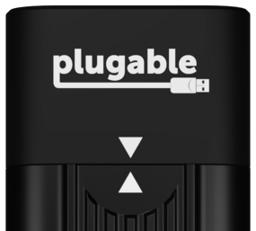
If the aluminum cover is installed backwards and gets locked trying to remove it, wiggle the cover from side to side, it should pivot to the right and come off (with the Plugable logo at the top, facing forward).
Can I clone my internal SSD to an NVMe SSD installed in this enclosure?
Our USBC-NVME external enclosure can be used as the destination for many full featured retail or open source cloning tools, as long as the tool is compatible with USB storage it should work just fine.
Some SSDs include proprietary or limited capability cloning software. For example Samsung includes the Samsung Data Migration software and Crucial includes a limited version of the Acronis True Image software.
Cloning software | Compatible with USBC-NVME (Realtek chipset) | Compatible with USBC-NVME (JMicron chipset) |
---|---|---|
Macrium Reflect | Yes | Yes |
Acronis True Image (Retail) | Yes | Yes |
Clonezilla | Yes | Yes |
Samsung Data Migration Software | Yes - Only to compatible Samsung SSDs | No |
Acronis True Image (Crucial) | No | No |
Can I update the firmware of the SSD installed in the USBC-NVME enclosure?
Unfortunately the manufacturer's SSD firmware updating and monitoring utilities are unlikely to be compatible with the NVMe SSD connected to the computer over USB. These utilities are designed to communicate with the NVMe SSD on a PCI Express interface and are not designed to be compatible with USB, it is possible this functional can be added by the SSD manufacturer, however with the risk of unexpected disconnections it is unlikely this will be added by most manufacturers.
USBC-NVME Firmware Updates

USBC-NVME with Realtek Chipset
Firmware version 1.27.5
Released December 2021
This firmware update aims to improve stability with Samsung 980 Pro and Western Digital SN550 NVMe SSDs.
The power LED behavior is also improved on Windows, and Intel based Mac systems: now when safely ejected the power LED should turn off ( it may blink slowly ) indicating the drive may be safely unplugged from the computer.
This update is recommended for uses who have experienced connectivity problems with Samsung 980 Pro or Western Digital SN550 NVMe SSDs.
Applicable to enclosures with serial number starting with 2645-A##### and up.
Installation instructions in the "USBC-NVME Realtek Firmware Update Instructions EN.pdf" and translated to Japanese in the "USBC-NVME Realtek Firmware Update Instructions JA.pdf" included in the zip file. This firmware update utility is only compatible with Microsoft Windows operating systems.
Download USBC-NVME Firmware 1.27.5
For macOS and Linux users please contact our support for additional assistance, we’re more than happy to help!

Firmware version 1.23.15
Released February 2021
This firmware update aims to improve compatibility with some ASMedia USB 3.0 host controllers with roll-up firmware changes from 2020.
This update is recommended for uses with ASMedia host controllers, these are generally PCIe add-in cards or early USB 3.0 host controllers.
Applicable to enclosures with serial number starting with 2645-A##### and up.
Installation instructions in the readme_en.pdf included in the zip file. This firmware update utility is only compatible with Microsoft Windows operating systems.
Download USBC-NVME Firmware 1.23.15
For macOS and Linux users please contact our support for additional assistance, we’re more than happy to help!

Firmware version 1.20.12
Released March 2020
This firmware update aims to address an incompatibility with Phison E7 and E12 based NVMe SSDs, including some SSDs from Silicon Power.
This update is not necessary for most NVMe SSDs which do not use the Phison chipset.
Applicable to enclosures with serial number starting with 2645-A##### and up.
Installation instructions in the readme.pdf included in the zip file. This firmware update utility is only compatible with Microsoft Windows operating systems.
For macOS and Linux users please contact our support for additional assistance, we’re more than happy to help!

USBC-NVME with JMicron Chipset
There are currently no firmware updates available for this enclosure.
Understanding Large SATA Drive Compatibility
Originally authored by: Jeff Everett, March 21, 2013
This post is intended to offer detailed technical information for troubleshooting issues affecting new “Advanced Format” 512e SATA disk drives.
Plugable’s full-size 3.5″ hard drive docks, the USB3-SATA-UASP1, USB3-SATA-U3 and USBC-SATA-V; these feature support for these new 512e Advanced Format drives. Our Plugable Storage System “PSS” products also support 512e large volumes (as soon as 2.5″ drive capacities increase and these drives become available in smaller sizes than 3.5″).
Some docks have a non-standard sector emulation feature that enables using capacities above 2TB on Windows XP 32 bit. But this requires that drives initialized and formatted in a special way, and NOT be used with other SATA controllers in desktop PC’s or other drive docking stations, unless those units also have a matching firmware version and support for this feature.
Plugable USB SATA docks do not support sector emulation for XP. Rather, we’ve chosen to support 3TB+ Advanced Format drives in the standard way without any emulation.
Background
The storage model used by disk makers for the last 10+ years is changing, and this post is an effort to explain how these changes work in detail. In case of issues moving drives between different systems, or when encountering issues using USB attached drives to host enterprise application data, the details here can help understand what factors are at play.
Data is stored fundamentally in bits (bits with a little b). Busses like USB often measure throughput in bits, like USB 2.0’s 480 Megabits per second (480 Mbps) or SATA III’s Gigabits per second (6 Gbp/s). Eight of these individual bits of data make up one of the capital-B “Bytes” that we usually measure data in, be it kilobytes (KB) in a document, MegaBytes (MB) in an MP3, or GigaBytes (GB) of data on a storage volume like a hard drive or SSD. Generally speaking, transfer rates industry-wide are measured in bits so transfer rates appear higher than if they were measured the same way the data is actually stored, in Bytes.
On modern solid state drives and traditional hard or even floppy disks, these bytes are grouped into sectors for actual read/write operations. Over the last decades, almost all storage drives used 512 Bytes per sector to store data since addressing individual bits and Bytes would be impractical.
Having all drives at 512 bytes per sector was nice, as there were few compatibility issues to think about when moving drives between systems or SATA docks, or when cloning them.
Evolution
512 byte sectors present problems with larger capacity drives (3TB+)- to make way for larger drives, sector sizes had to grow. This presents challenges throughout the “software stack” from the SATA hardware controllers and their firmware, their drivers, the operating system, and even to how applications may sometimes assume certain sector sizes or where sectors will start. Resulting issues are numerous and will take time for the industry to fully work out.
Over the past few years, Advanced Format Drives (512e, AF) drives reporting 512 Bytes/”logical” sector while actually using physical sectors of 4096 Bytes/”physical” sector have gained in popularity due to their higher data density potential, and resulting larger capacities. For more on how these drives work and why the industry switched, read this great ZD net post. Soon, we’ll be seeing drives that use 4096B logical and physical sectors.
Drive Type | Support/functionality |
---|---|
4K native (4K logical sector size) | Supported on the following operating systems:
|
Advanced Format or 512E (4K physical and 512-byte logical sector size) | Supported on the following operating systems:
*Except for Hyper-V. See the “Windows support in enterprise” section below. Specific requirements are listed in the following section. Run only applications and hardware that support these drives. |
512-byte native (512-byte physical and logical sector size) | Supported on all platforms. |
*from Microsoft support policy for 4K sector hard drives in Windows
As you can see from the table above, determining whether you have a 512n (drive with reported and physical sectors of 512 bytes), 512e (the 512 emulation 4096 “Advanced Format” drives with physical 4096B clusters), or 4Kn (drive with both reported and physical sectors of 4096B) is crucial to determine which Windows operating systems will be able to recognize the drive.
On OS X, large volume support is somewhat better, with effectively no limits on volume size in modern OS X versions:
*From Mac OS X: Mac OS Extended format (HFS Plus) volume and file limits
How to check your drive’s sector size
To determine if you have an 512e Advanced Format Drive, open an administrative command prompt and run the following command on the NTFS formatted volume:
fsutil fsinfo ntfsinfo [your drive]
[your drive] will be the letter of the disk you’re testing, so c: or d: etc.
The output will look like this, with the bold portion below being the relevant information. Bytes per Sector of 512 and bytes per Physical Sector of 4096 indicate a 512e drive:
C:\Windows\system32>fsutil fsinfo ntfsinfo h:
NTFS Volume Serial Number : 0x8a0c5e820c5e68e9
NTFS Version : 3.1
LFS Version : 1.1
Number Sectors : 0x00000001d1bcafff
Total Clusters : 0x000000003a3795ff
Free Clusters : 0x000000003a3671d7
Total Reserved : 0x0000000000000000
Bytes Per Sector : 512
Bytes Per Physical Sector : 4096
Bytes Per Cluster : 4096
Bytes Per FileRecord Segment : 1024
Clusters Per FileRecord Segment : 0
Mft Valid Data Length : 0x0000000000040000
Mft Start Lcn : 0x00000000000c0000
Mft2 Start Lcn : 0x0000000000000002
Mft Zone Start : 0x00000000000c0000
Mft Zone End : 0x00000000000cc820
Resource Manager Identifier : DB59D441-7AD6-11E2-BEE8-00027232D73D’
If your drive reports:
Bytes Per Sector : 512
Bytes Per Physical Sector : 512
This one of the 512n volumes commonly used over the last decade. Support for these drives is universal.
If your drive reports:
Bytes Per Sector : 512
Bytes Per Physical Sector : 4096
The volume is operating in 512e mode, and should be recognized by most Windows Vista (SP1 and later) systems, as well as by newer Windows 7 and 8 PC’s. Windows 7 and Server 2008 users who do not have Service Pack 1 installed need a system update for 512e compatibility.
Macs should also be able to see the volume with no issue, however do not have native NTFS write capabilities, so they may only be able to read the drive.
If your drive reports:
Bytes Per Sector : 4096
Bytes Per Physical Sector : 4096
Then the drive has been formatted with non-standard sector emulation, in order to support 3TB+ drives on Windows XP.
A special release of firmware for the Plugable USB3-SATA-U3 (firmware v12092681f600) is available by special request that uses this non-standard emulation strategy. However, it is not the default and is generally not recommended as it limits moving the drive to other docks with the same emulation strategy.
How to clean and re-initialize a volume
Moving volumes initialized with 4096B sector re-emulation to other SATA controllers (other drive docks or PC SATA connections) may result in drives that are visible in disk manager but with no partitions, and no option to re-format the drive since the “new” (non U3) SATA controller doesn’t support the 4096B sector re-emulation. In this case, wiping the drive is necessary to use it on the new controller.
Wiping a misaligned drive’s partition table will allow the volume to be re-initialized as though it were new, and a new partition table may be written when the disk is re-formatted.
Performing the following steps will destroy all data on the disk selected, so these steps must be performed with extreme caution.
To check for all attached volumes, open an administrative command prompt and enter diskpart, then enter the list disk command as shown below, and select the disk of your choice to clean. After selecting whichever disk number you want to wipe, the clean command will destroy the partition table and allow you to re-initialize the volume.
C:\Windows\system32>diskpart
Microsoft DiskPart version 6.2.9200
Copyright (C) 1999-2012 Microsoft Corporation.
On computer: GRANDCENTRAL
DISKPART> list disk
Disk ### Status Size Free Dyn Gpt
——– ————- ——- ——- — —
Disk 0 Online 111 GB 1024 KB
Disk 1 Online 1863 GB 0 B
Disk 2 No Media 0 B 0 B
Disk 3 No Media 0 B 0 B
Disk 4 No Media 0 B 0 B
Disk 5 No Media 0 B 0 B
Disk 6 Online 1862 GB 0 B
Disk 7 No Media 0 B 0 B
Disk 8 Online 465 GB 0 B
DISKPART> select disk 8
Disk 8 is now the selected disk.
DISKPART> clean
DiskPart succeeded in cleaning the disk.
DISKPART>
From here the disk is blank and can be re-initialized and formatted with whatever partitions are desired. Most consumers will not need to be aware of the other issues that can arise with Advanced Format volumes in enterprise applications.
Partition Alignment
If the performance of your 512e large volume has degraded when being moved from system to system, partition alignment issues may be the cause. Issues with non-bootable cloned volumes may also be due to improperly aligned partitions. Western Digital and Hitachi offer drive alignment utilities for affected operating systems. Seagate drives should not require alignment. Customers with other brands of drives will need to check with the manufacturer of their drive to determine if an alignment tool is available and/or necessary. Partition alignment issues often affect older Windows Vista and Windows XP systems where drives are frequently accessed on other operating systems.
Before initializing a new drive, using a large volume with Windows XP, or especially before cloning an Advanced Format Western Digital drive, please check the chart below to determine if aligning your drive is necessary for maximum performance and compatibility with your software environment.
Using your WD Advanced Format Hard Drive with a Windows Operating System may require you to run the WD Align Windows software utility after you install your operating system or partition and format the drive as a secondary drive. The WD Align software aligns existing partitions on the Advanced Format drive to ensure it provides full performance for certain configurations. (Please see table for configuration details)
Running Hitachi’s “HGST Align” tool may be necessary for Windows XP or Windows Vista users. Windows 7 and Windows 8 users should not need to use this utility.
Windows support in the enterprise
Most end-users won’t need to worry about drive sector sizes, partition alignment, or any of the details above. Due to the specific issues documented by Microsoft with some of their enterprise applications, thorough planning for drive purchasing and migration is crucial in enterprise environments leveraging the following technologies:
- Hyper-V: http://support.microsoft.com/kb/2515143
- Microsoft SQL Server: http://blogs.msdn.com/b/psssql/archive/2011/01/13/sql-server-new-drives-use-4k-sector-size.aspx
- Windows Home Server v1: http://support.microsoft.com/kb/2385637
- Microsoft Exchange Server: http://technet.microsoft.com/en-us/library/ee832792.aspx#Phys
- Third-party applications and hardware: Applications and hardware devices may have reliability and performance issues when they are connected to these new drives. Contact your application and hardware vendors about their support policy for these drives.
*from “Microsoft support policy for 4K sector hard drives in Windows.”
For more details on 512e and 4Kn Advanced Format support across Windows versions, application specific issues, other known issues, and unsupported scenarios, read Microsoft support policy for 4K sector hard drives in Windows.
Further details on the evolution from 512n to 512e and 4Kn drives are available in this presentation from IDEMA (International Disk Drive Equipment and Materials Association).
Deeper technical details for driver developers are available in Microsoft’s “Advanced format (4K) disk compatibility update (Windows)” article.