


Hassle free, 2-Year Warranty
Fast, Free Shipping on Orders $35+
Lifetime Technical Support
30-Day Money Back Guarantee
PLUGABLE USB-C 電流電圧チェッカー 100W 対応、 パソコン ケーブル スマートフォン 充電器を計測
$26.95 USD
SKU: USBC-VAMETERAmazon Rating : (735 Reviews)
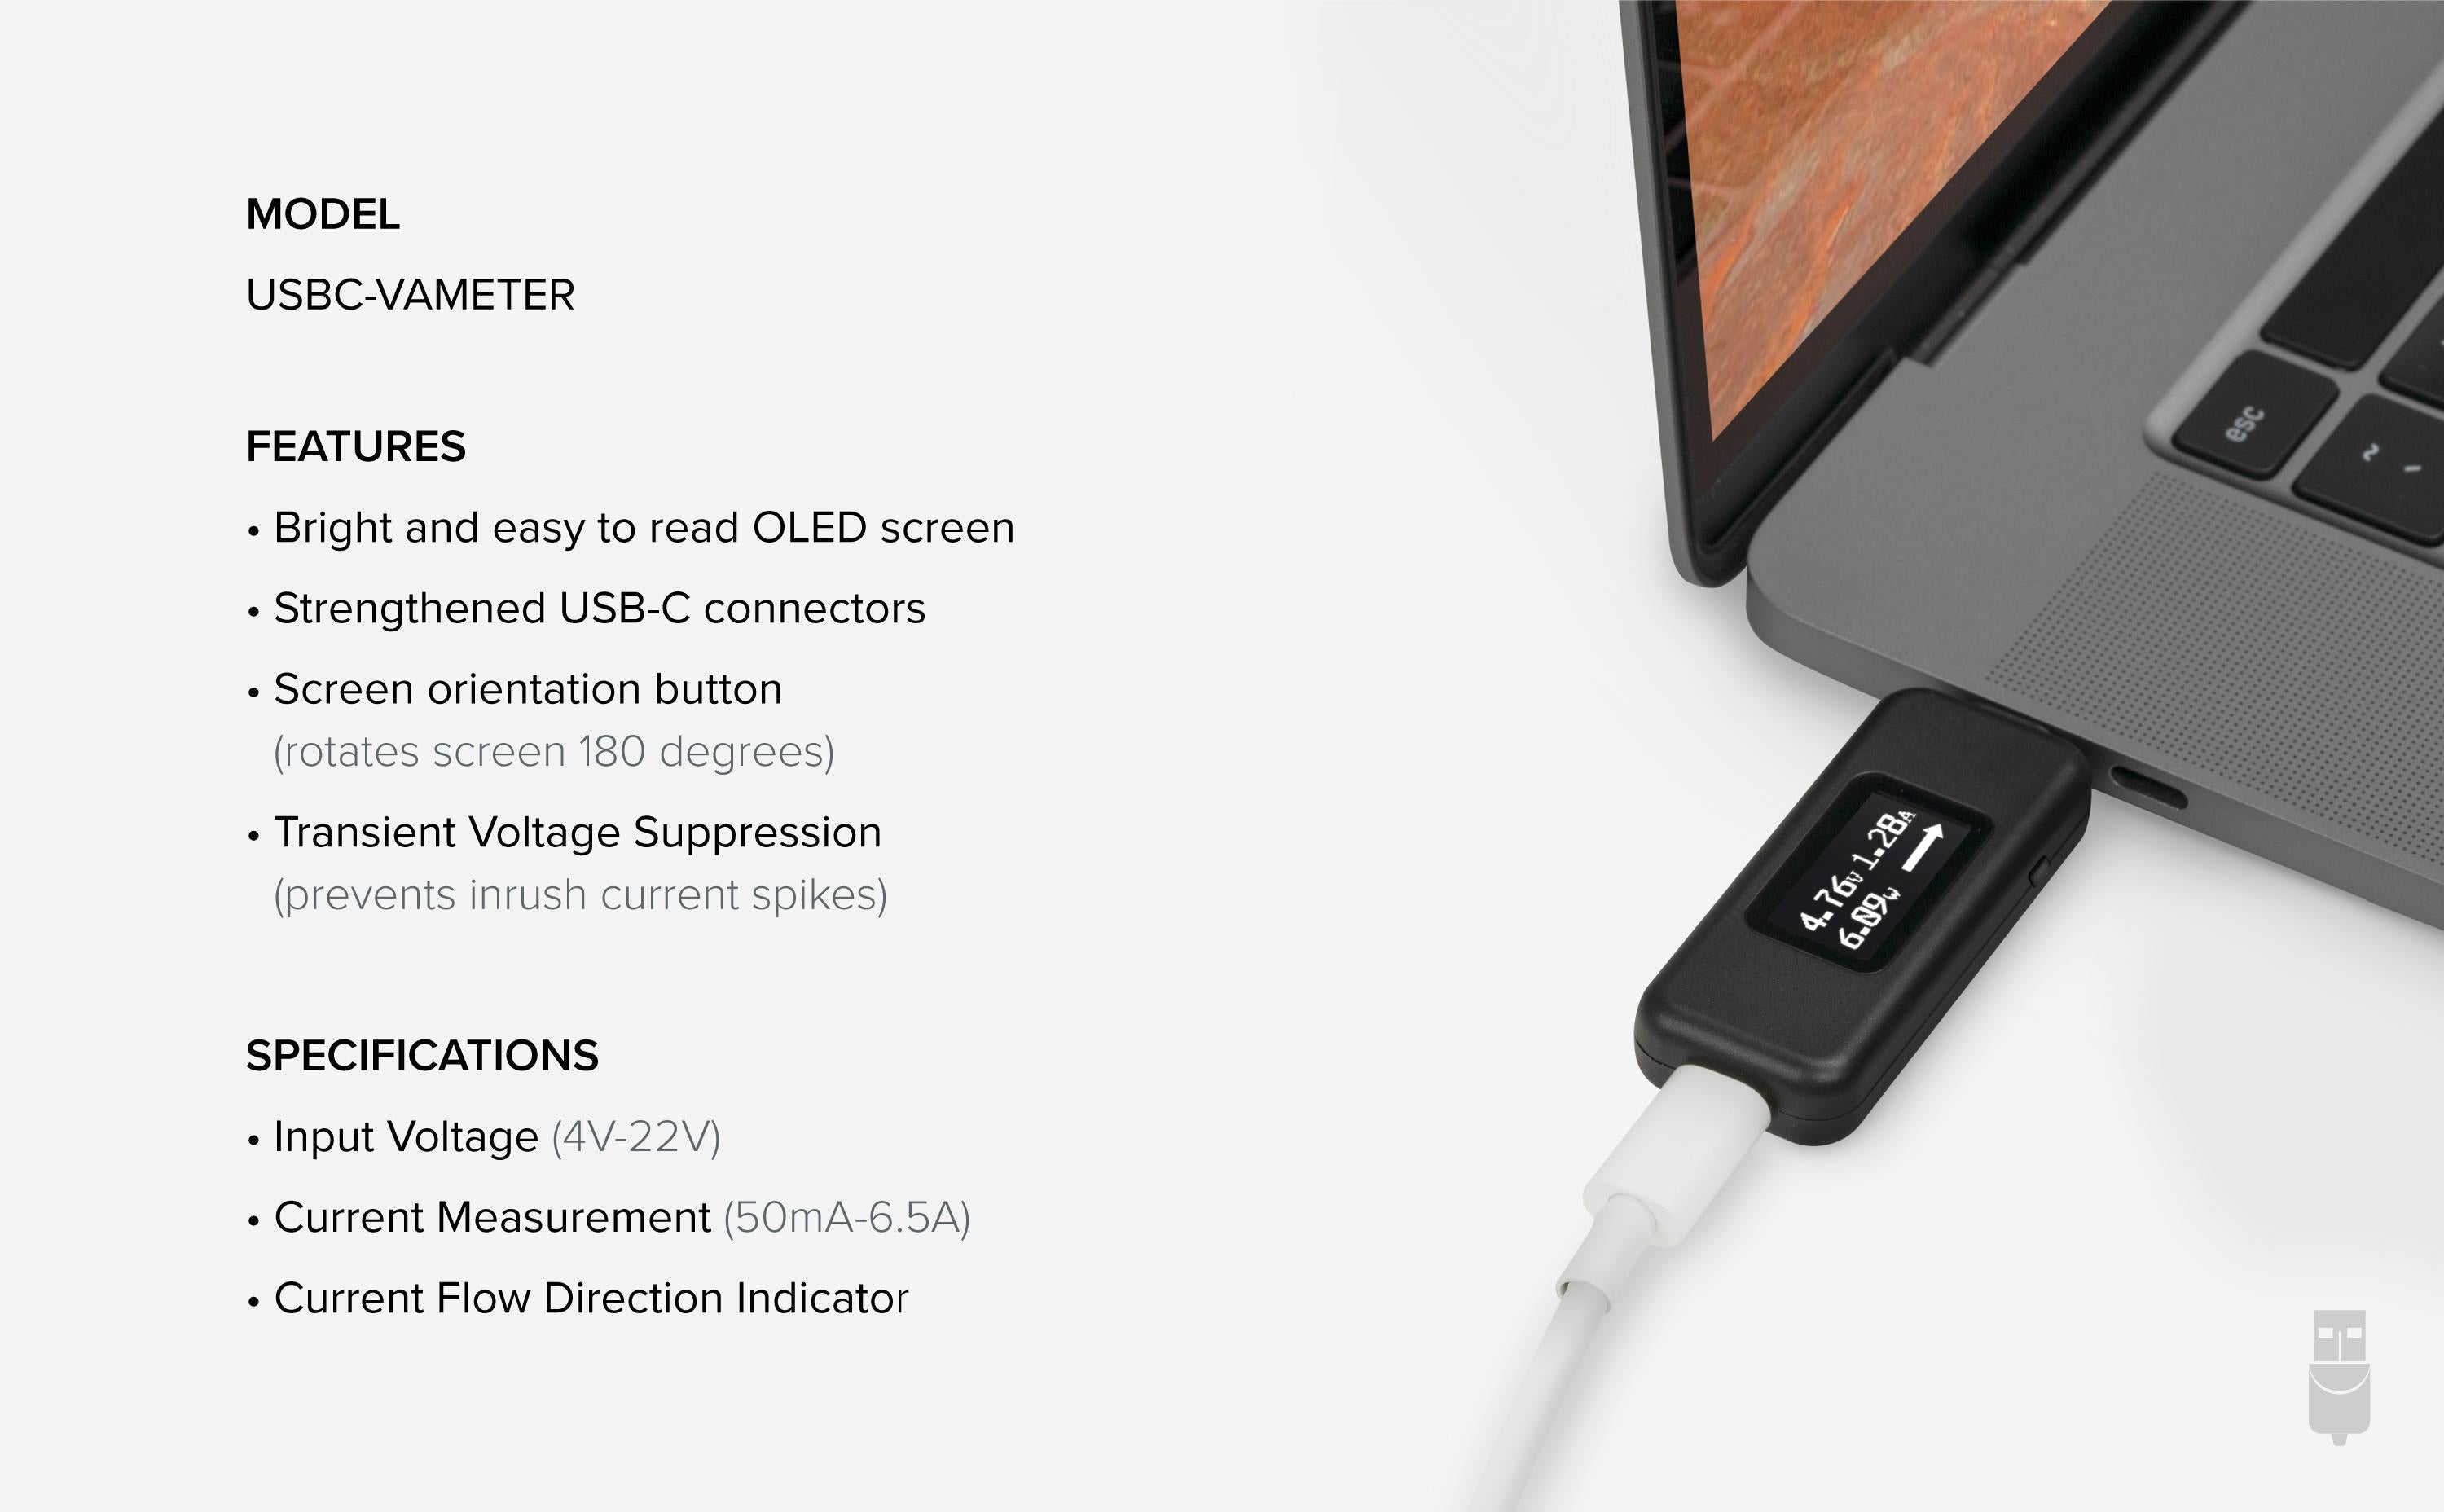
機能
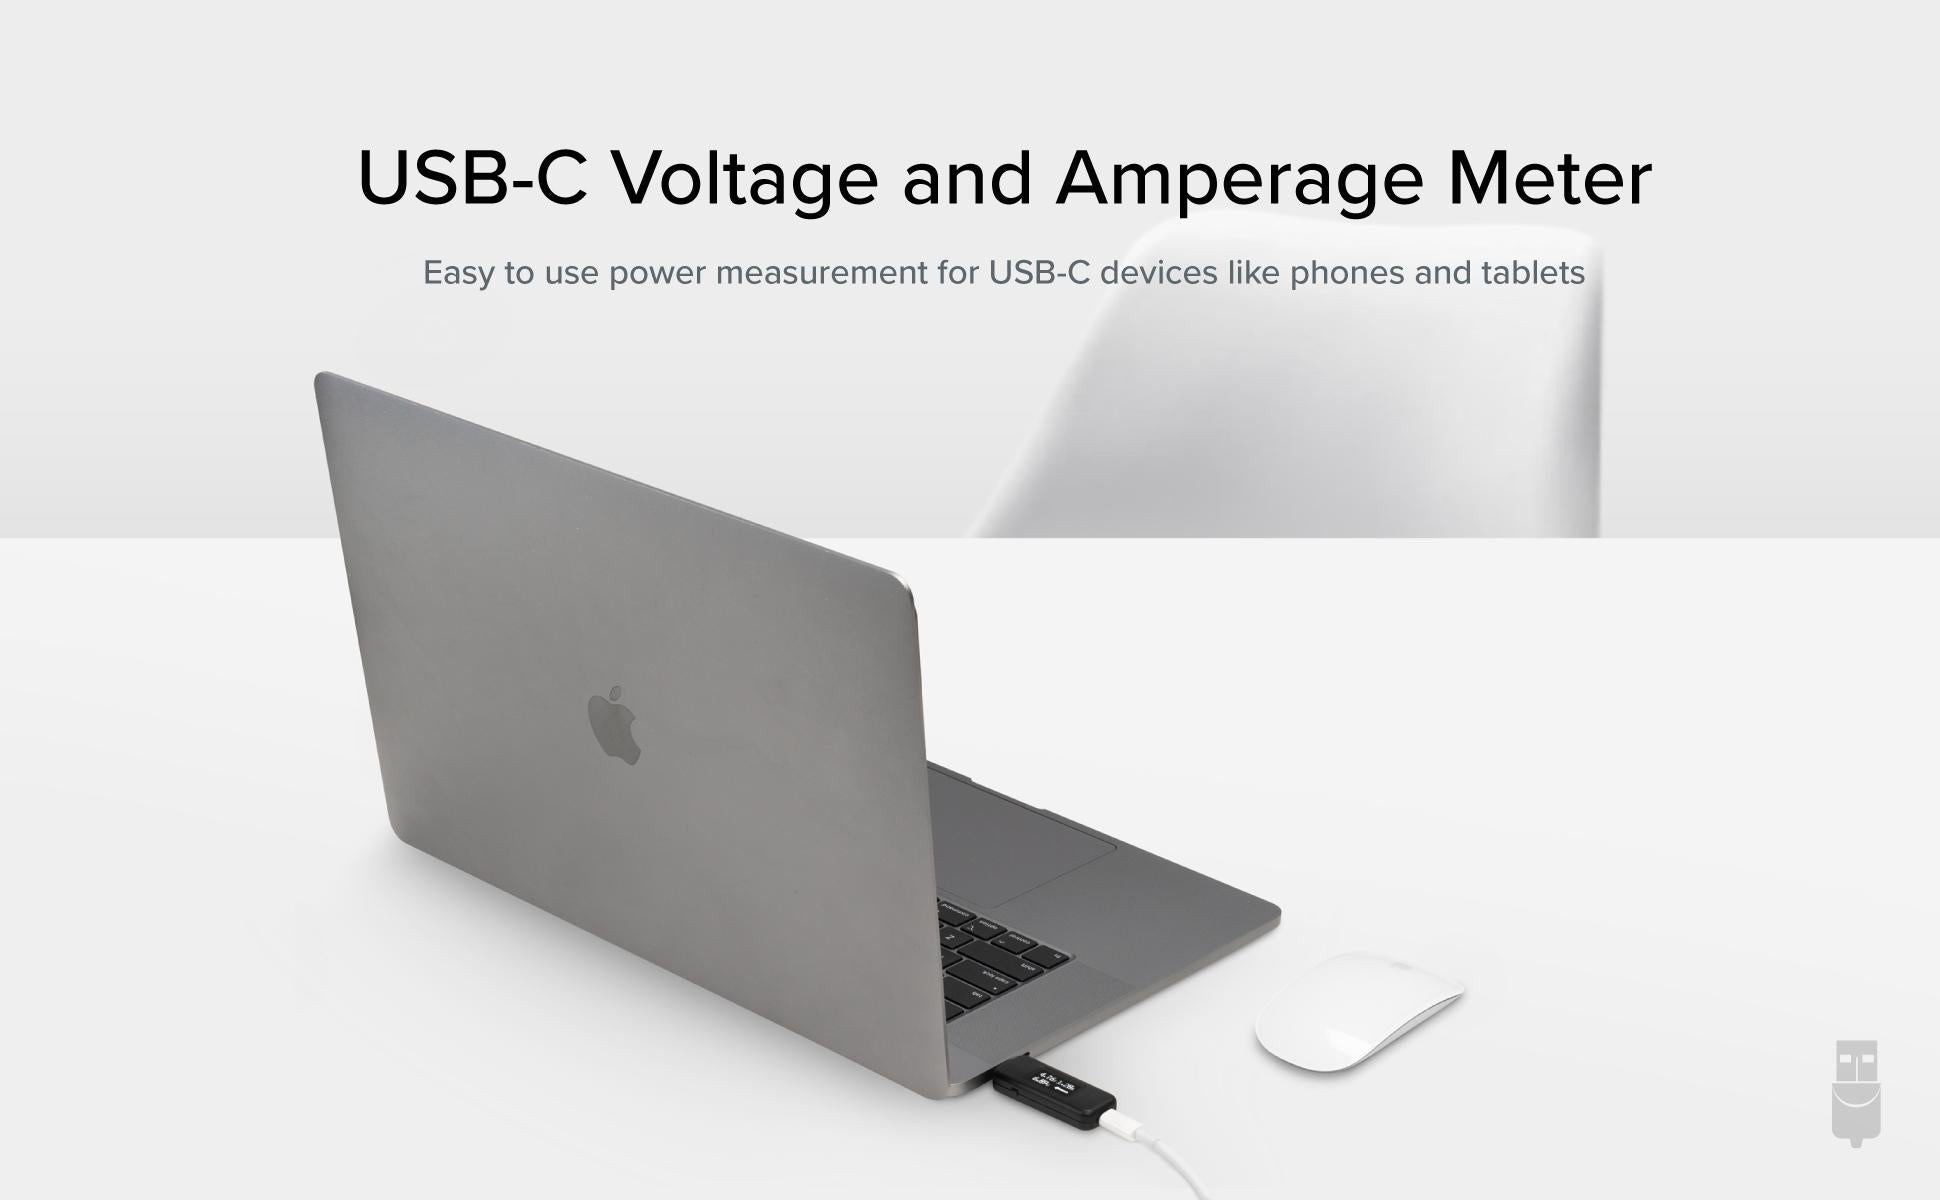
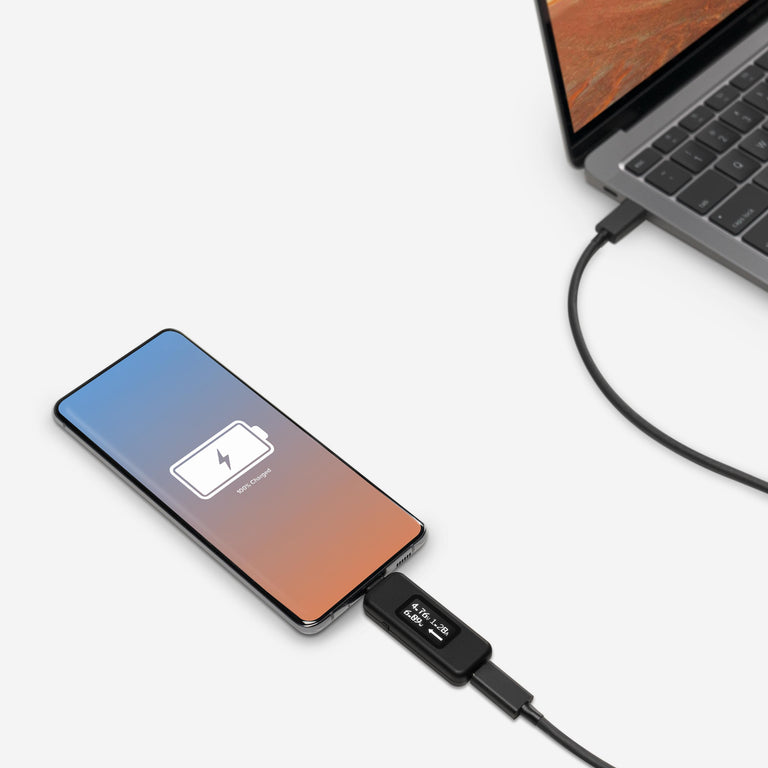
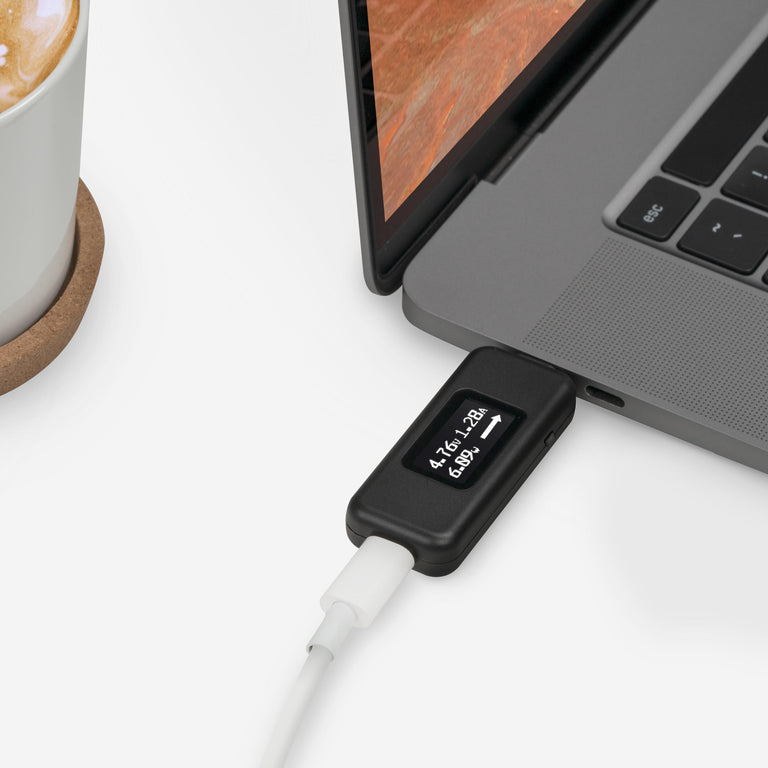
- At a glance - USB C Tester— Monitor USB-C power and charging. Measure voltage and amperage. Visualize the directional flow of electrical current. Updated OLED display is brighter and easier to read. New orientation button lets you flip the screen 180 degrees
- Bidirectional— USB power meter can be connected in either orientation, allowing for the full range of USB Power Delivery voltage from 5 to 20V (4V-22V, 50mA-6.5A operating range)
- Broad USB Support— Used as a data and power quality meter, device allows USB data pass through, USB-C Alt Mode video, USB-C charging. Use USB tester inline with USB-C docking stations, chargers, accessories, etc. Not compatible with Thunderbolt 3 devices
- Small and Tough— Small enough to go anywhere you need a USB C voltage meter. Even fits most phones and tablets without removing protective case. Strengthened USB-C connections ensure it's sturdy enough to be your go-to USB C power tester
- 2-Year Coverage, Lifetime Support— Every Plugable product, including this USB C Power Meter Tester, is covered against defects for 2 years and comes with lifetime support. If you ever have questions, contact our North American-based team - even before purchase
For volume orders or business inquiries contact sales@plugable.com


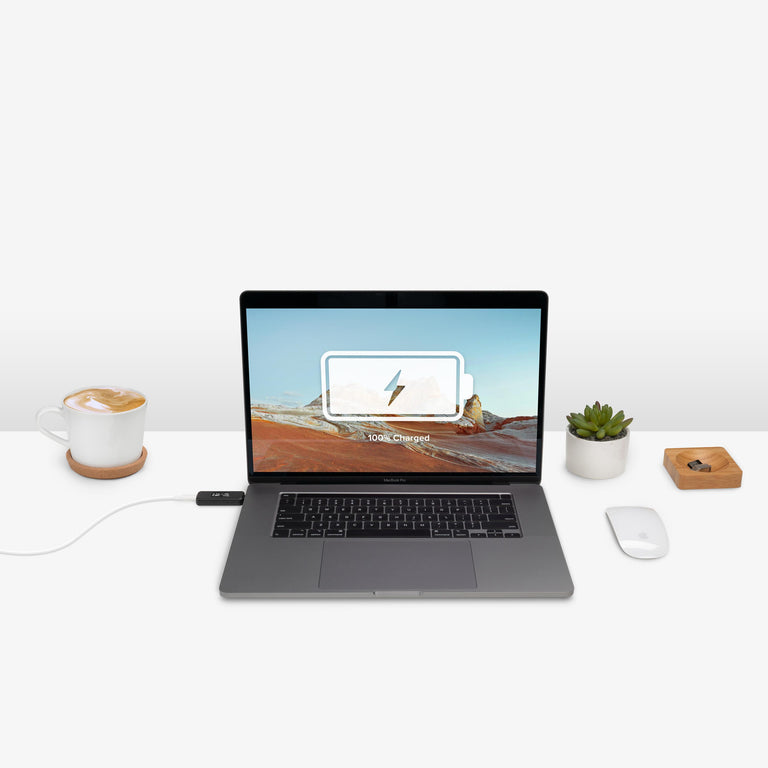
この Plugable USB-C 電圧・電流チェッカー(USBC-VAMETER)は、USB Type-C が付属した様々な機器の電圧・電流(充電レート)を簡単に計測するためにデザインされています。非常に小型で軽量です。USB Type-C ポートがついたスマートフォン、タブレット、ラップトップやその他の USB Type-C 機器で使用できます。 USB フラッシュドライブとほぼ同じサイズで、USB Type-C ポート経由のリアルタイムの電圧・電流を表示し、電流の方向を矢印で示します。両方向の電流を計測可能で、差し込む方向を選びません。
USB Type-C 対応のホスト・システムと、ドッキング・ステーション、充電器、その他の USB Type-C アクセサリーなど周辺機器との間に差し込んで、電流や電圧を計測するために使用してください。 有機 LED スクリーンは明るく明瞭で見やすく、ボタン一つで表示の上下が反転できるようになっています。
計測の仕組み
このチェッカーは、電流の間に挿入されても透過的に機能する用設計されています。したがってUSBデータ(USB 1.1~USB 3.1 Gen2まで)や、USB-C DisplayPort 代替モードによる画像データ、USB-C 充電に影響を与えることはありません。 USB Type-C 対応のドッキング・ステーション、充電器、その他の USB Type-C アクセサリーなどとホスト・システムの間に差し込んで使用できます。 USB-Cコネクタ・ポート内の電力(VBUS)とグラウンド(接地)用専用信号ラインの値を計測するのみで、別に独立したデータ用ラインには一切干渉しないようになっています。
用途
- USB Type-C 付きのラップトップやタブレット等のホストシステムと充電器を接続した際の、おおまかな充電レートを知りたいとき
- USB Type-C 付きのホストシステムとドッキングステーションを接続した際の、おおまかな充電レートを知りたいとき
- USB Type-C 付きのホストシステムと、USB Type-C コネクタ付きのバスパワー機器(HDDドライブ、フラッシュ・ドライブなど)を接続した際に、バスパワー機器にどれだけの電力が供給されているかを知りたいとき
- VBUS ホット・コンディションや電圧低下など、その USB Type-C ポートが仕様に準拠しているかを確認したいとき
重要な注意点
- このチェッカーは、プロ仕様の計測機器の代替として使用することを目的とはされておらず、使いやすさや簡単さを重視したユーザレベルの計測用です。
- このチェッカーは Thunderbolt 3 プロトコル対応機器では使用できません。
技術仕様
- 双方向の電流を計測可能です。
- 4~22V、50mA~6.5A の動作範囲に対応します。
- USB-PD R3.1 EPR(拡張パワーレンジ)28V、36V、48V をサポートしていません 。
- USB 1.1~3.1 Gen2 対応のシステムや機器で使用できます。
使用に際しての注意点:
このチェッカーを使用する際、通常は「両側に」何らかの USB Type-C 機器(USB ホスト、充電器、PC アクセサリなど)が接続されない限り電源はオンになりません。もし一方だけに機器を接続して電源がオンになる場合、接続されたその USB 機器は「VBUS ホット」と呼ばれ、USB Type-C の仕様に準拠していないことを意味します。
Filter Help Articles and Frequent Questions by Category
Choose one or more filters within each category to narrow down the articles. Each selection will result in only displaying articles that include all of your choices.
Articles
Well how about that, it looks like we don't have any articles matching your filters! Try removing one of your choices or clear the filters to show all articles.
You can always contact support if you need help too!
USB Port Types
USB-A

pietz, CC BY-SA 3.0 , via Wikimedia Commons
This is the standard USB connection that most computers offered prior to the introduction of USB Type-C (USB-C). Even after the introduction of USB Type-C, this is still quite common.
It can provide data transfer rates up to the USB 3.1 Gen 2 (10 gbps) specification depending on the host and device, but does not directly support video in the way that USB-C Alternate Mode does. This limitation makes DisplayLink USB graphics adapters and docking stations ideal on systems that do not have USB-C, or in instances where more displays are needed beyond available video outputs of a PC.
USB-B

Fred the Oyster, CC BY-SA 4.0 , via Wikimedia Commons

IngenieroLoco, CC BY-SA 4.0, via Wikimedia Commons
This type of connection comes in a couple different styles depending on whether USB 3.0 and higher transfer rates are supported (bottom graphic). Usually this type of connection is used to plug into USB devices that do not have a fixed cable connected, such as USB docking stations, USB hubs, printers, and others.
USB Mini-B

Fred the Oyster, CC BY-SA 4.0 , via Wikimedia Commons
One of the first connectors for charging a smartphone, wireless game controller (such as the Sixaxis and DualShock 3), and other small devices such as external hard drives. Not commonly used today, but is still used in some cases. Most devices using USB Mini B are using USB 2.0, though a USB 3.0 variant does exist. This specification also added USB On-The-Go (OTG) functionality, though it is more commonly implemented with Micro USB.
USB Micro-B

Fred the Oyster, CC BY-SA 4.0, via Wikimedia Commons

IngenieroLoco, CC BY-SA 4.0 , via Wikimedia Commons
A smaller connector that serves many of the same uses as the Mini B connector, with added optional features such as Mobile High-Definition Link (MHL) to allow devices like smartphones to output video to larger displays without requiring a dedicated port for video output.
The larger variant of USB-B is most commonly used for external hard drives for higher 5Gbps transfer rates.
USB-C, Thunderbolt™ 3, and Thunderbolt™ 4
Niridya , CC0, via Wikimedia Commons
The most recent USB connection, USB Type-C (USB-C), represents a major change in what USB can do. The connector is smaller, can be connected in two orientations, is able to carry substantially more power and data, and can directly carry video signals of multiple types (HDMI, DisplayPort, etc.) Intel has also adapted the USB-C connector for use with Thunderbolt 3 and Thunderbolt 4.
It is important to note that while all Thunderbolt 3 and Thunderbolt 4 connections are USB-C, not all USB-C connections can be used with Thunderbolt 3 or Thunderbolt 4 devices.
More details regarding physical USB connections can be found on Wikipedia . The graphics depicted here are adapted from Wikimedia Commons by various artists under the Creative Commons Attribution-Share Alike 3.0 Unported license.
How Accurate Are the Voltage and Amperage Measurements From the USBC-VAMETER?
In our testing we’ve found that compared to a professional multimeter, our USBC-VAMETER is within +/- 3% of the true value (measured at 20V).
Please note that this meter is not meant to replace professional USB-C testing equipment, it is designed for quick and easy measurements for users at any skill level.
How Do I Calculate the Wattage From the Provided Voltage and Amperage Information on the USBC-VAMETER?
The USBC-VAMETER will display voltage, amperage, and the calculated wattage on screen. If you would like to manually calculate the wattage (how much power a device using) you can follow this simple formula:
The power (P) in watts (W) is equal to the voltage V in volts (V) times the current (I) in amps (A), P = V × I.
Example: A device is charging at 20V, 5A: 20V × 5A = 100W.
I Have a USBC-VAMETER but It Looks Different Than What Is on the Plugable Website, Why?
The USBC-VAMETER has had three revisions.
- Units purchased before Q1 2018 are our original design.
- Units purchased after Q1 2018 through Q1 2021 are an updated design.
- Units purchased after Q2 2021 are our newest design.
If you have issues with your USBC-VAMETER of any revision please feel free to contact us at support@plugable.com and we'll be happy to assist!
What is the Difference Between the USBC-VAMETER and USBC-VAMETER3?
The USBC-VAMETER is designed for USB-C Power Delivery Revision 3.0 (5-20 volts, up to 5 amps, 100 watts maximum). Most devices currently on the market use PD R3.0.
The USBC-VAMETER3 is designed for the latest USB-C Power Delivery Revision 3.1 Extended Power Range (EPR) (5-48 volts, up to 5 amps, 240 watts maximum). As of July 2022 there are not many EPR devices available yet, but a good example is the 16" Apple MacBook Pro with 140W charger.
If unfamiliar with Extended Power Range feel free to take a look at our blog post on this topic here: https://plugable.com/blogs/news/what-is-240w-usb-extended-power-range-epr
Do Plugable products support the Apple SuperDrive?
Unfortunately Plugable products do not support the Apple SuperDrive.
The Apple SuperDrive has stringent power requirements that can only be met by directly connecting the SuperDrive to your host laptop. As a result at this time Apple recommends only using their USB-C adapter cables. You can find more information on that here → How to connect the Apple USB SuperDrive
If you have purchased a Plugable product to use with your Apple SuperDrive, and would like some additional assistance please do not hesitate to reach out. You can do so by emailing support@plugable.com, or going to Plugable.com/Support.
Can I connect this product to a computer's Thunderbolt/Thunderbolt 2 port?
Many users assume that USB-C devices can work with older Thunderbolt 2 Macs if they use a Thunderbolt 3 to Thunderbolt 2 adapter, such as the one made by Apple. However, this is not the case. These adapters are specifically designed to support Thunderbolt devices only - not standard USB-C peripherals.
While Thunderbolt 3 and USB-C share the same connector type, they use different underlying data protocols. Non-Thunderbolt USB-C devices, rely on USB standards for data and power. The Thunderbolt 3 to Thunderbolt 2 adapter does not carry USB signals; it only passes Thunderbolt data. Because of this, plugging a USB-C device into a Thunderbolt 2 Mac using this adapter will not work - the computer will not detect or communicate with the device.
If you need to connect peripherals to a Thunderbolt 2 system, we recommend using a USB-A dock or hub (if available on your system). This ensures compatibility without relying on unsupported adapter chains.
In short, even though the connectors may fit, USB-C devices are not compatible with Thunderbolt 2 Macs via Thunderbolt adapters - only Thunderbolt devices will work in that setup.

