


Hassle free, 2-Year Warranty
Fast, Free Shipping on Orders $35+
Lifetime Technical Support
30-Day Money Back Guarantee
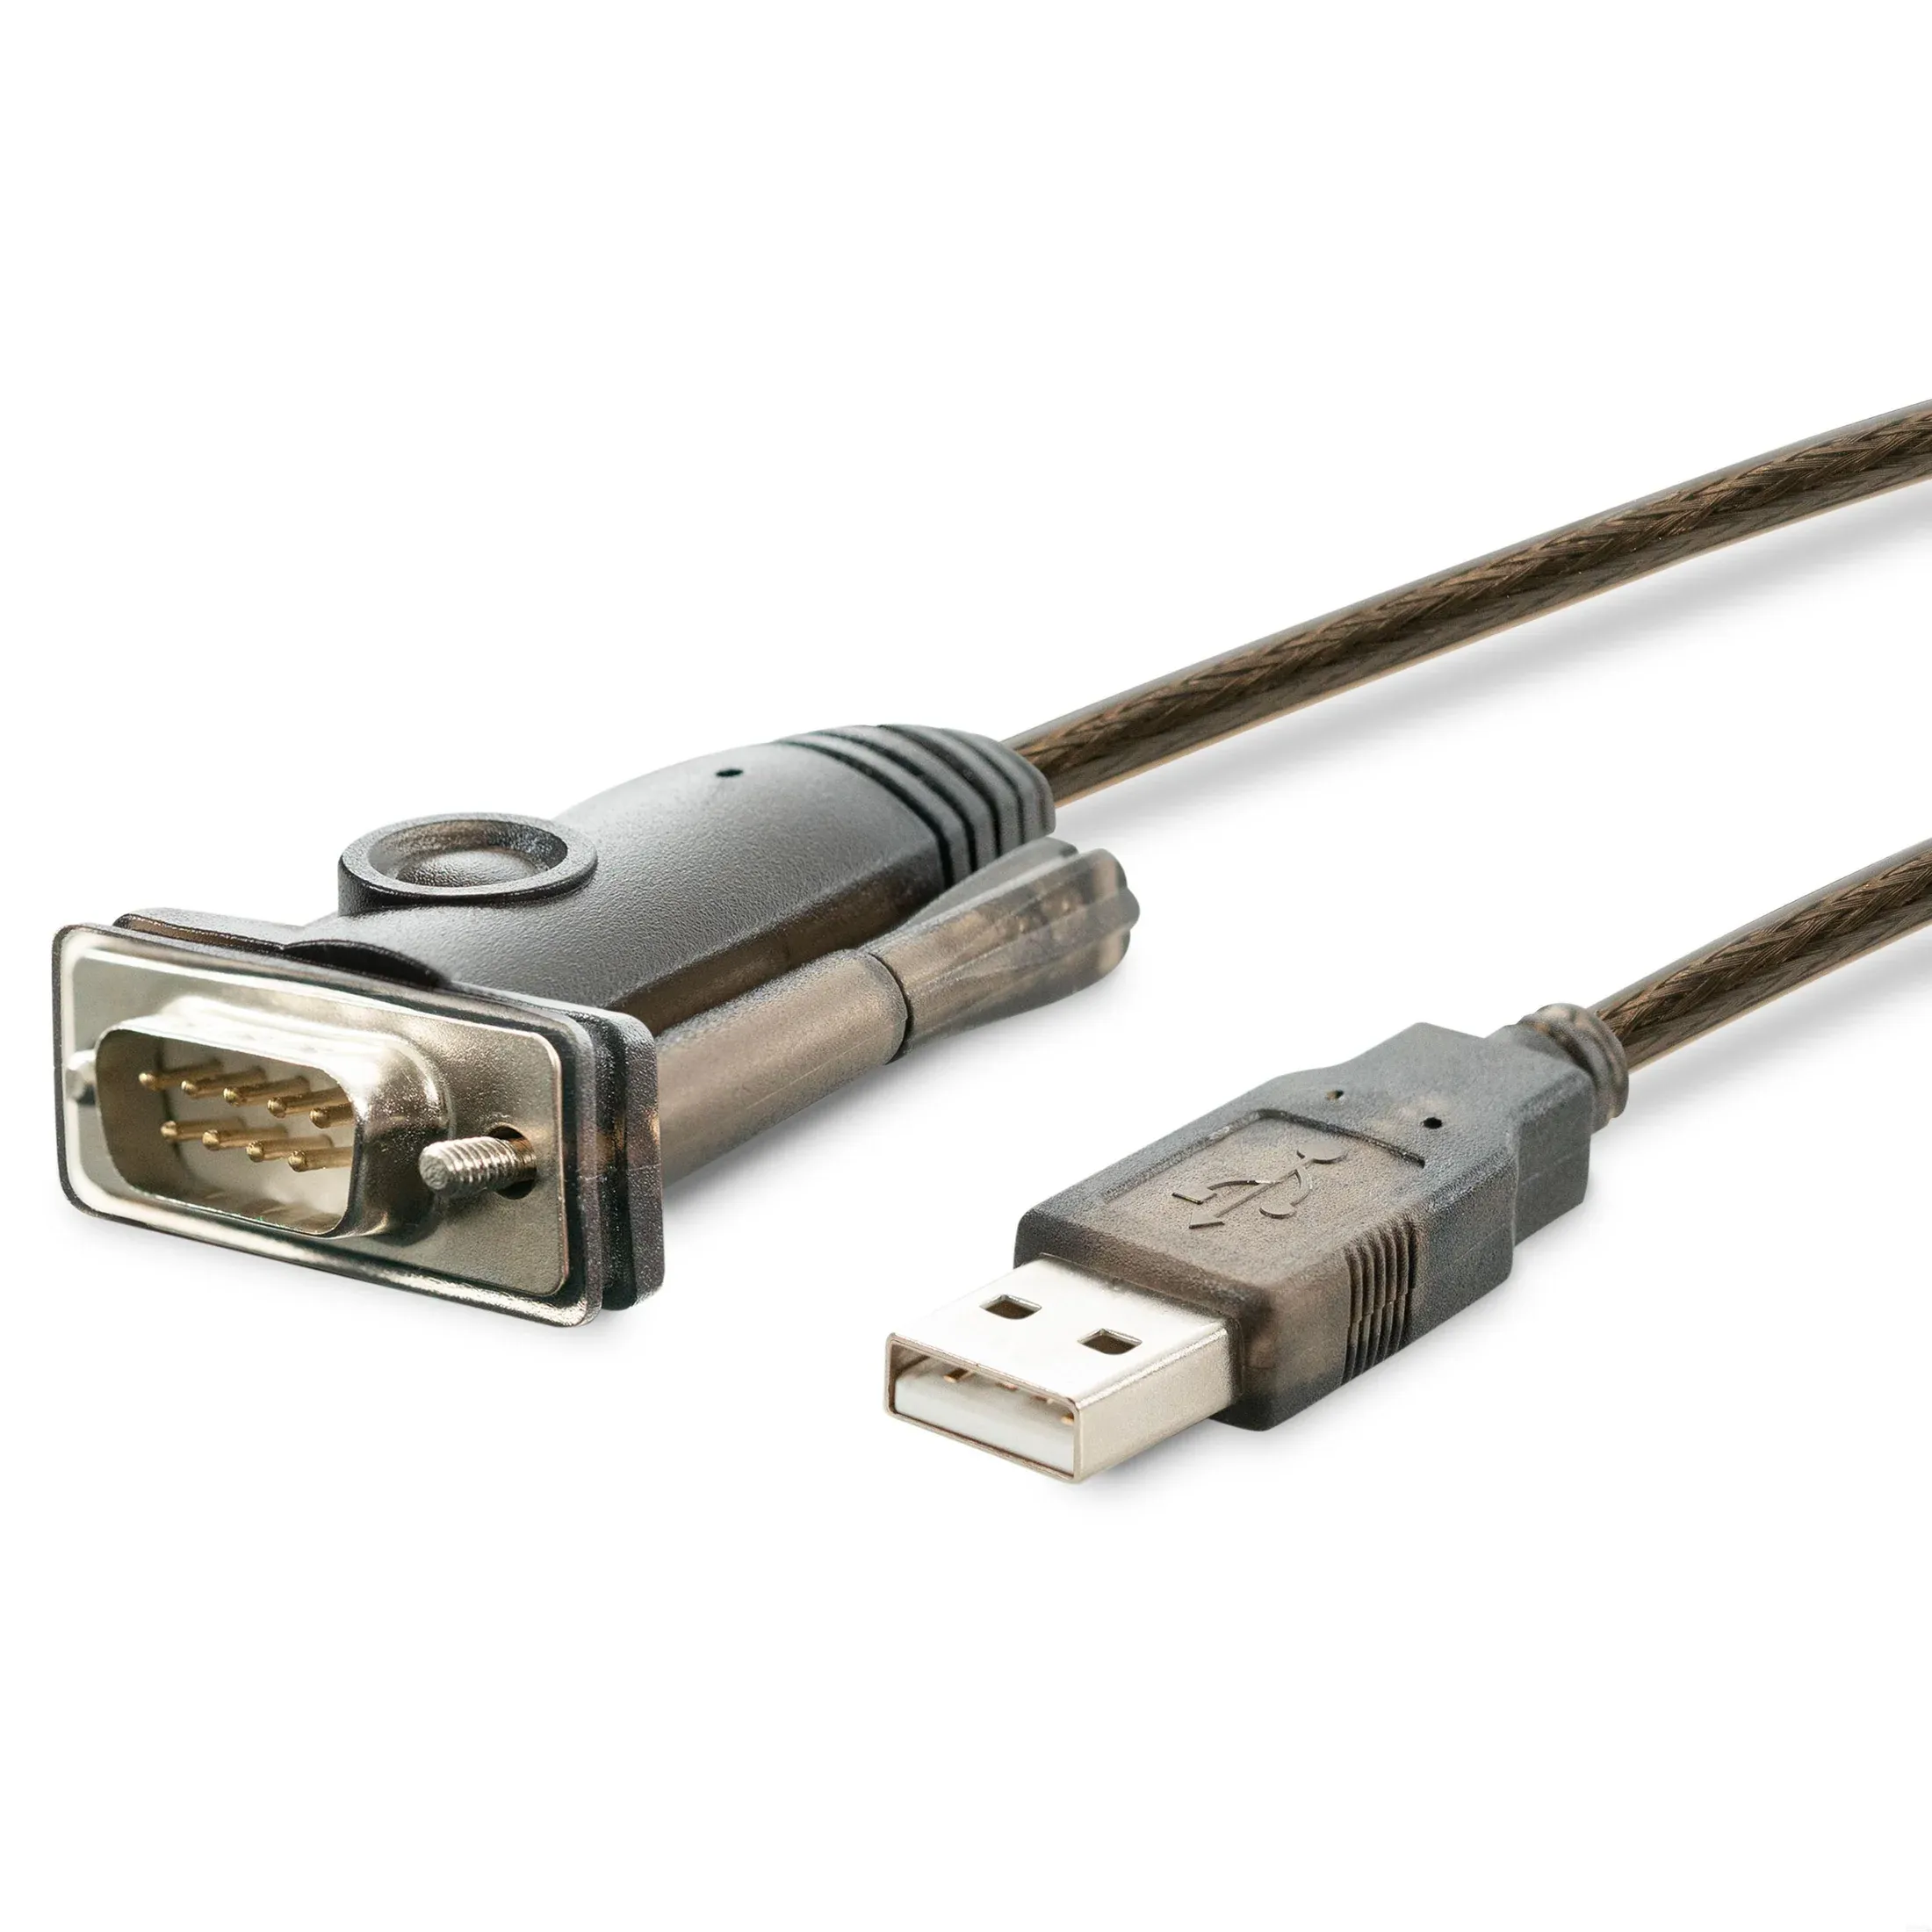
Plugable USB to RS-232 DB9 Serial Adapter (Prolific PL2303GT Chipset)
$24.95 USD
SKU: PL2303-DB9Amazon Rating : (2220 Reviews)
機能
- USB To RS232 Serial Adapter (5ft)— Connect legacy DB-9 serial communications devices to a modern computer over USB. Powered by USB; no external power needed
- Legacy Support— Add a 9-pin DB9 RS-232 serial port to any modern computer, replaces built-in or PCIe serial adapters, recommended for use with a serial cable or NULL modem cable
- Compatibility Guarantee— Genuine Prolific PL2303GT Chipset for widest possible compatibility with Windows (11, 10, 8.x, 7, and Vista), Mac, Linux, and other platforms
- Flexible— The USB RS-232 adapter supports a programmable baud rate from 75bps to 1Mbps. This RS232 USB Adapter allows for a plug-and-play creation of a COM port. Features COM retention to maintain port number and settings across reboots
- Warranty and Support— Questions only an expert can answer? When you contact our support team, you’re connecting with the engineers who design our devices. Every Plugable product is backed by our North American support team–even before purchase, and a 2-year limited parts and labor warranty after purchase
For volume orders or business inquiries contact sales@plugable.com
Free 3-Day Continental U.S. Shipping on Orders Over $35!


Easily add an RS-232 9-pin serial port to any computer with our PL2303-DB9 USB to Serial Adapter!
Perfect for terminal services, data transfer, remote control, and programming, or any application that requires connection to an RS-232 port. Featuring a DB9 Male RS232 DTE connector with full RS-232 signal support (TXD, RXD, RTS, CTS, DTR, DSR, DCD, RI, GND) and a 5 foot (1.5 meter) cable, this bus-powered 9 pin to USB adapter can easily reach your devices at a distance. Or, pair it with an RS232 extension cable for an even further reach. Supporting baud rates from 75bps to 1Mbps with standard stop bit, parity, and flow control options, this USB serial adapter fits almost any application.
This RS-232 to USB adapter is powered by USB, and requires no extra external power. It also supports COM port retention in Windows, ensuring that the COM port number and settings are retained per-adapter across reboots and unplugs.

Connect RS232 to Any Computer
Plugable USB to Serial Adapter with PL-2303GT chip for RS-232. Plug and play in Windows 11/10/8.x, most Linux. Install for earlier Windows, macOS.

Secure, Extended Connection
Prolific USB to serial adapter with a fixed male port, screw-in connection, 5ft cable. Use a DB9 coupler or serial cable for male-to-male connections

互換性
Compatible with RS-232 devices like PCs, GPS, modems, routers, telescopes, scanners, and more. Works with HyperTerminal, PuTTY, TeraTerm, and more

Genuine PL2303GT Chipset
Our adapter uses genuine Prolific chipsets for reliable compatibility with the latest Prolific drivers, unlike cloned chipsets that may not work
技術仕様
| チップセット | Prolific PL2303GT for reliable USB to Serial (RS-232) communication |
| Baud Rate | Programmable baud rate from 75bps to 1Mbps for flexible data transfer speeds |
| 互換性 | Works with Windows, macOS, and Linux |
| Connectivity | RS-232 DTE serial port connects via USB-A, or USB-C (with separately sold adapter) |
| COM Retention | Windows retains COM port number and settings per adapter across reboots |
A: Works with RS-232 devices like handheld scanners, POS machines, PLC controllers, printers, scanners, CNC, and more.
A: No, it is USB-powered and does not require an external power supply.
A: Yes, with a USB-C to USB-A adapter (sold separately). The adapter itself has a standard USB-A connector.
A: PL2303-DB9 uses the standard male RS232 DTE pinout.
A: Yes, we use only authentic Prolific PL2303GT chips, ensuring compatibility with the latest drivers and operating systems

Filter Help Articles and Frequent Questions by Category
Choose one or more filters within each category to narrow down the articles. Each selection will result in only displaying articles that include all of your choices.
Articles
Well how about that, it looks like we don't have any articles matching your filters! Try removing one of your choices or clear the filters to show all articles.
You can always contact support if you need help too!
How Do I Change the COM Port for a USB Serial Adapter on Windows?
Originally authored by: Bernie Thompson, July 4, 2011
To change the COM port for a USB Serial adapter on Windows, you must adjust the advanced port settings within the Device Manager. This is often necessary because Windows may automatically assign a high COM port number, while many legacy applications expect a port between COM1 and COM4.
How to Change the COM Port
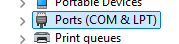
- Open the Device Manager and expand the Ports (COM & LPT)
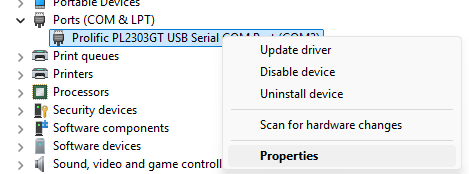
- Right-click on your USB Serial adapter device and click on Properties
- Select the Port Settings tab and click on the Advanced button

- Click on the COM Port Number drop-down menu to change the port to the required port number, ideally between 1 and 4 (some legacy applications expect a COM port in this range)

- Click OK on all open Property windows to apply and save the settings. The updated COM port number should now be reflected in the Device Manager

Applicable To
PL2303-DB9
How to Install the Plugable USB to RS-232 DB9 Serial Adapter on Windows 7
Originally authored by: Bernie Thompson, July 5, 2011
Updated 2024-07-11 by Pat P.
Updated 2026-03-04 by Sam R.
The Plugable USB to Serial adapter (PL2303-DB9) can be installed on Windows 7 by downloading the recommended Prolific driver, running the installer, and then connecting the device. While Windows 7 may detect the adapter automatically, manual installation ensures the correct driver is used.
How to Install the Prolific Driver on Windows 7
- Download the driver from the Plugable driver page
- Unzip the downloaded folder to your desktop or another accessible location
- Double-click the installer file to begin the installation process
- Follow the prompts to complete the setup (no specific configuration questions are required):
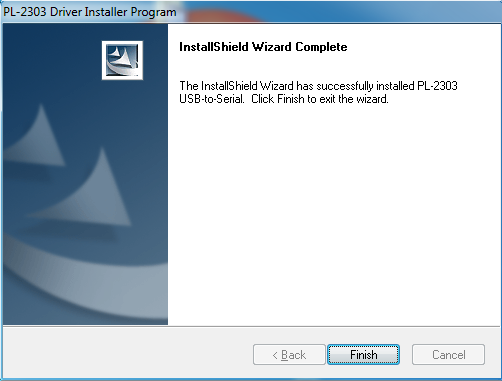
- Connect the USB to Serial adapter to the computer. A pop-up similar to this should appear:
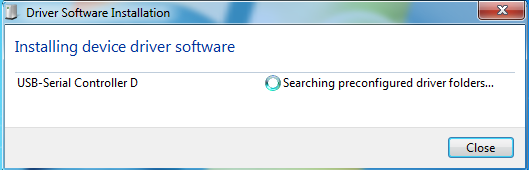
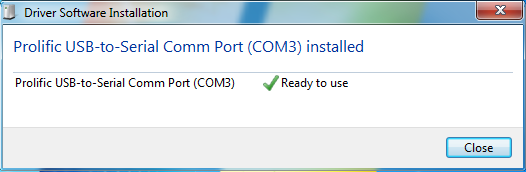
- Wait for the Windows notification confirming the device is ready to use:
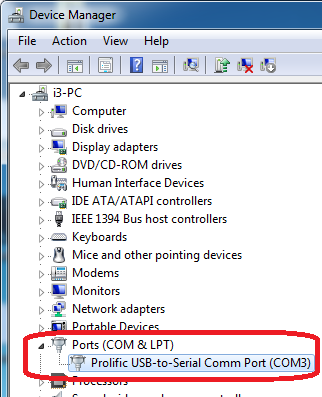
- Verify the installation by opening the Device Manager and looking for the adapter's entry under Ports (COM & LPT):
Installing the drivers after a fresh installation of Windows 7 in 2024
Windows 7 SP1 installation media does not include support for Windows 7's latest driver signing functionality and requires installing the following updates from Microsoft manually before installing the Prolific drivers, or running Windows Update:
After installing these updates the installation process should proceed normally.
Applicable To
PL2303-DB9
How Do I Troubleshoot the Plugable PL2303-DB9 USB Serial Adapter in Windows?
Originally authored by: David Roberts, December 9, 2013
Updated May 7, 2026
Applicable To
PL2303-DB9
Issue Summary
Serial communications over RS232 is a legacy standard, and several variables—including driver loading, software compatibility, COM port assignment, port settings, and cable type—must be correctly configured. Verifying these configurations usually resolves communication problems between the adapter and your legacy device.
Troubleshooting Steps
Driver Installation Issues
Systems running modern versions of Windows usually handle driver installation automatically, but manual installation is sometimes required for older operating systems or offline computers.
Connect the adapter to your computer and ensure you have an active internet connection to let Windows 7 or higher automatically load the driver.
Download and install the latest drivers manually from the Plugable website if an internet connection is unavailable or if you are using Windows XP or Vista.
Software Compatibility Issues
Many legacy devices use specialized software written for older operating systems, which may fail to function correctly on modern versions of Windows.
Check the device manufacturer's website to verify if your legacy device's specialized software is officially compatible with your current version of Windows.
Download and install a standard serial communications program like PuTTY to test the connection manually if your device's software is incompatible or missing.
Incorrect COM Port Assignments
Older Windows applications often restrict communication to specific COM port numbers (typically COM 1 through 4), requiring manual reassignment if Windows assigns the adapter a port outside this range.
Open Device Manager and expand the Ports (COM & LPT) section.
Locate the "Prolific USB-to-Serial Comm Port" and note the COM port number assigned by Windows.
Open your serial communication application and configure it to use this newly assigned COM port number.
Right-click the adapter in Device Manager and select Properties if your legacy application requires a specific port range.
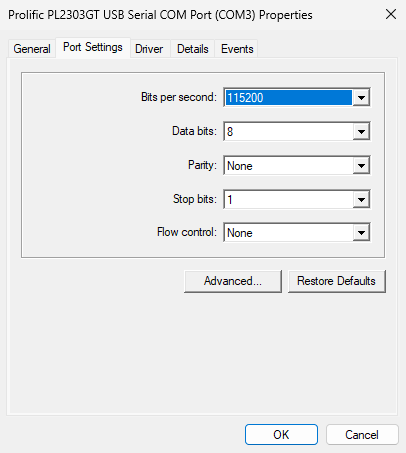
Select the Port Settings tab, then click the Advanced button.
Click the COM Port Number drop-down menu and select an available port within the required range.
Click OK to close the Properties dialog and save the settings.
Mismatched Port Settings
Serial devices require exact matches for settings like baud rate, data bits, parity, stop bits, and flow control to successfully transmit and receive data.
Check your legacy device's manual to find its required communication port settings.
Right-click the Prolific USB-to-Serial Comm Port in Device Manager and select Properties.
Select the Port Settings tab and adjust the adapter's settings to perfectly match the requirements of your legacy device.
Ensure these same settings are identically configured within your third-party communication software.
Incorrect Cable Type
RS232 devices require either a "straight-through" or "null modem" (crossover) wiring configuration, and using the wrong type will prevent communication even if all software settings are correct.
Check your legacy device's manual to determine if it requires a straight-through or null modem connection.
Attach a null modem adapter to the end of the Plugable PL2303-DB9 if your device requires a crossover connection, as the Plugable adapter uses standard straight-through wiring natively.
Expected Result
Device Manager will update and display the newly selected COM port number and settings, and the adapter will use the correct wiring configuration, allowing your legacy application or serial communications program to successfully communicate with the connected device.
If the Issue Persists
Contact Plugable's support team at support@plugable.com for further troubleshooting assistance.
How Do I Install Prolific Serial Port Drivers on a Windows 7 Fresh Installation?
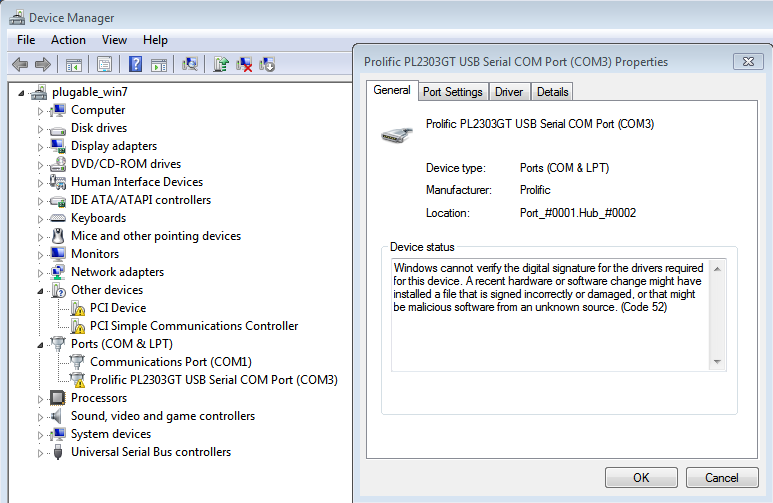
A fresh installation of Windows 7 does not support current driver security requirements out of the box, causing the Prolific PL2303GT serial adapter driver to fail with a "Code 52" unsigned driver error. To resolve this, you must manually install specific Microsoft updates (KB3033929, KB3112343, and KB3135445) to enable proper driver signature recognition. Applying these updates allows the Prolific Serial Drivers to install and verify successfully.
Why Windows 7 Fails to Verify the Driver Signature
A fresh installation of Windows 7 64-bit with Service Pack 1 (SP1) lacks support for newer driver security requirements. Because the driver signature is newer than the operating system version, Windows triggers security warnings and "Program Compatibility Assistant" alerts.
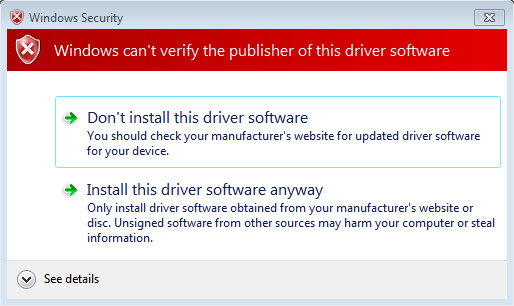
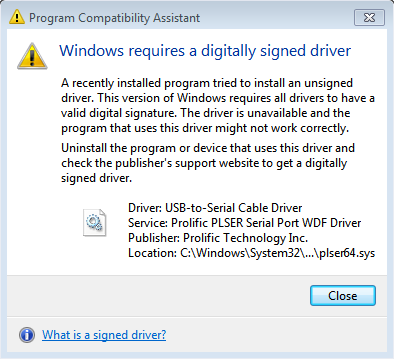
It then flags the device with an unsigned driver error in Device Manager until the necessary system updates are applied.
How to Install Prolific Serial Port Drivers on a Windows 7 Fresh Installation
- Download the required Windows updates (
KB3033929 KB3135445 - Run each of these updates following the on-screen instructions.
- Restart the computer before connecting the USB to serial adapter.
- After logging back into the desktop, reconnect the serial adapter.
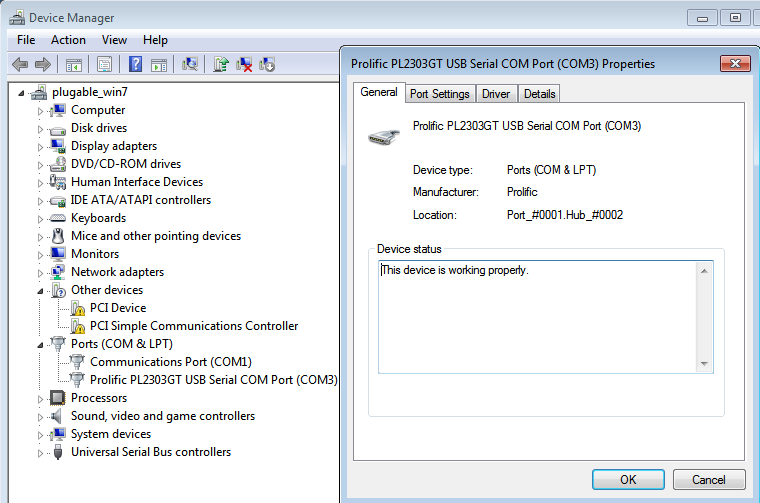
- Open the Start Menu, search for and launch "Device Manager," and expand the "Ports (COM & LPT)" section.
- Double-click on the "Prolific PL2303GT USB Serial COM Port" entry to open the properties and verify the adapter is recognized correctly without a "Code 52" unsigned driver error and that the device status shows "This device is working properly".
Applicable To
PL2303-DB9
How Do I Install Prolific Serial Port Drivers on macOS?
Up until recently macOS has included built-in driver support for our USB to RS232 serial adapter, however we have noted that new computers, and those with a fresh operating system installation are no longer automatically creating TTY and CU serial devices. To address this Prolific provides an Driver Extension installer through the Apple App Store and we included step-by-step installation instructions below.
How to Install the Prolific Serial Port Drivers
1. Open the Apple App Store, and search for "prolific technology inc."
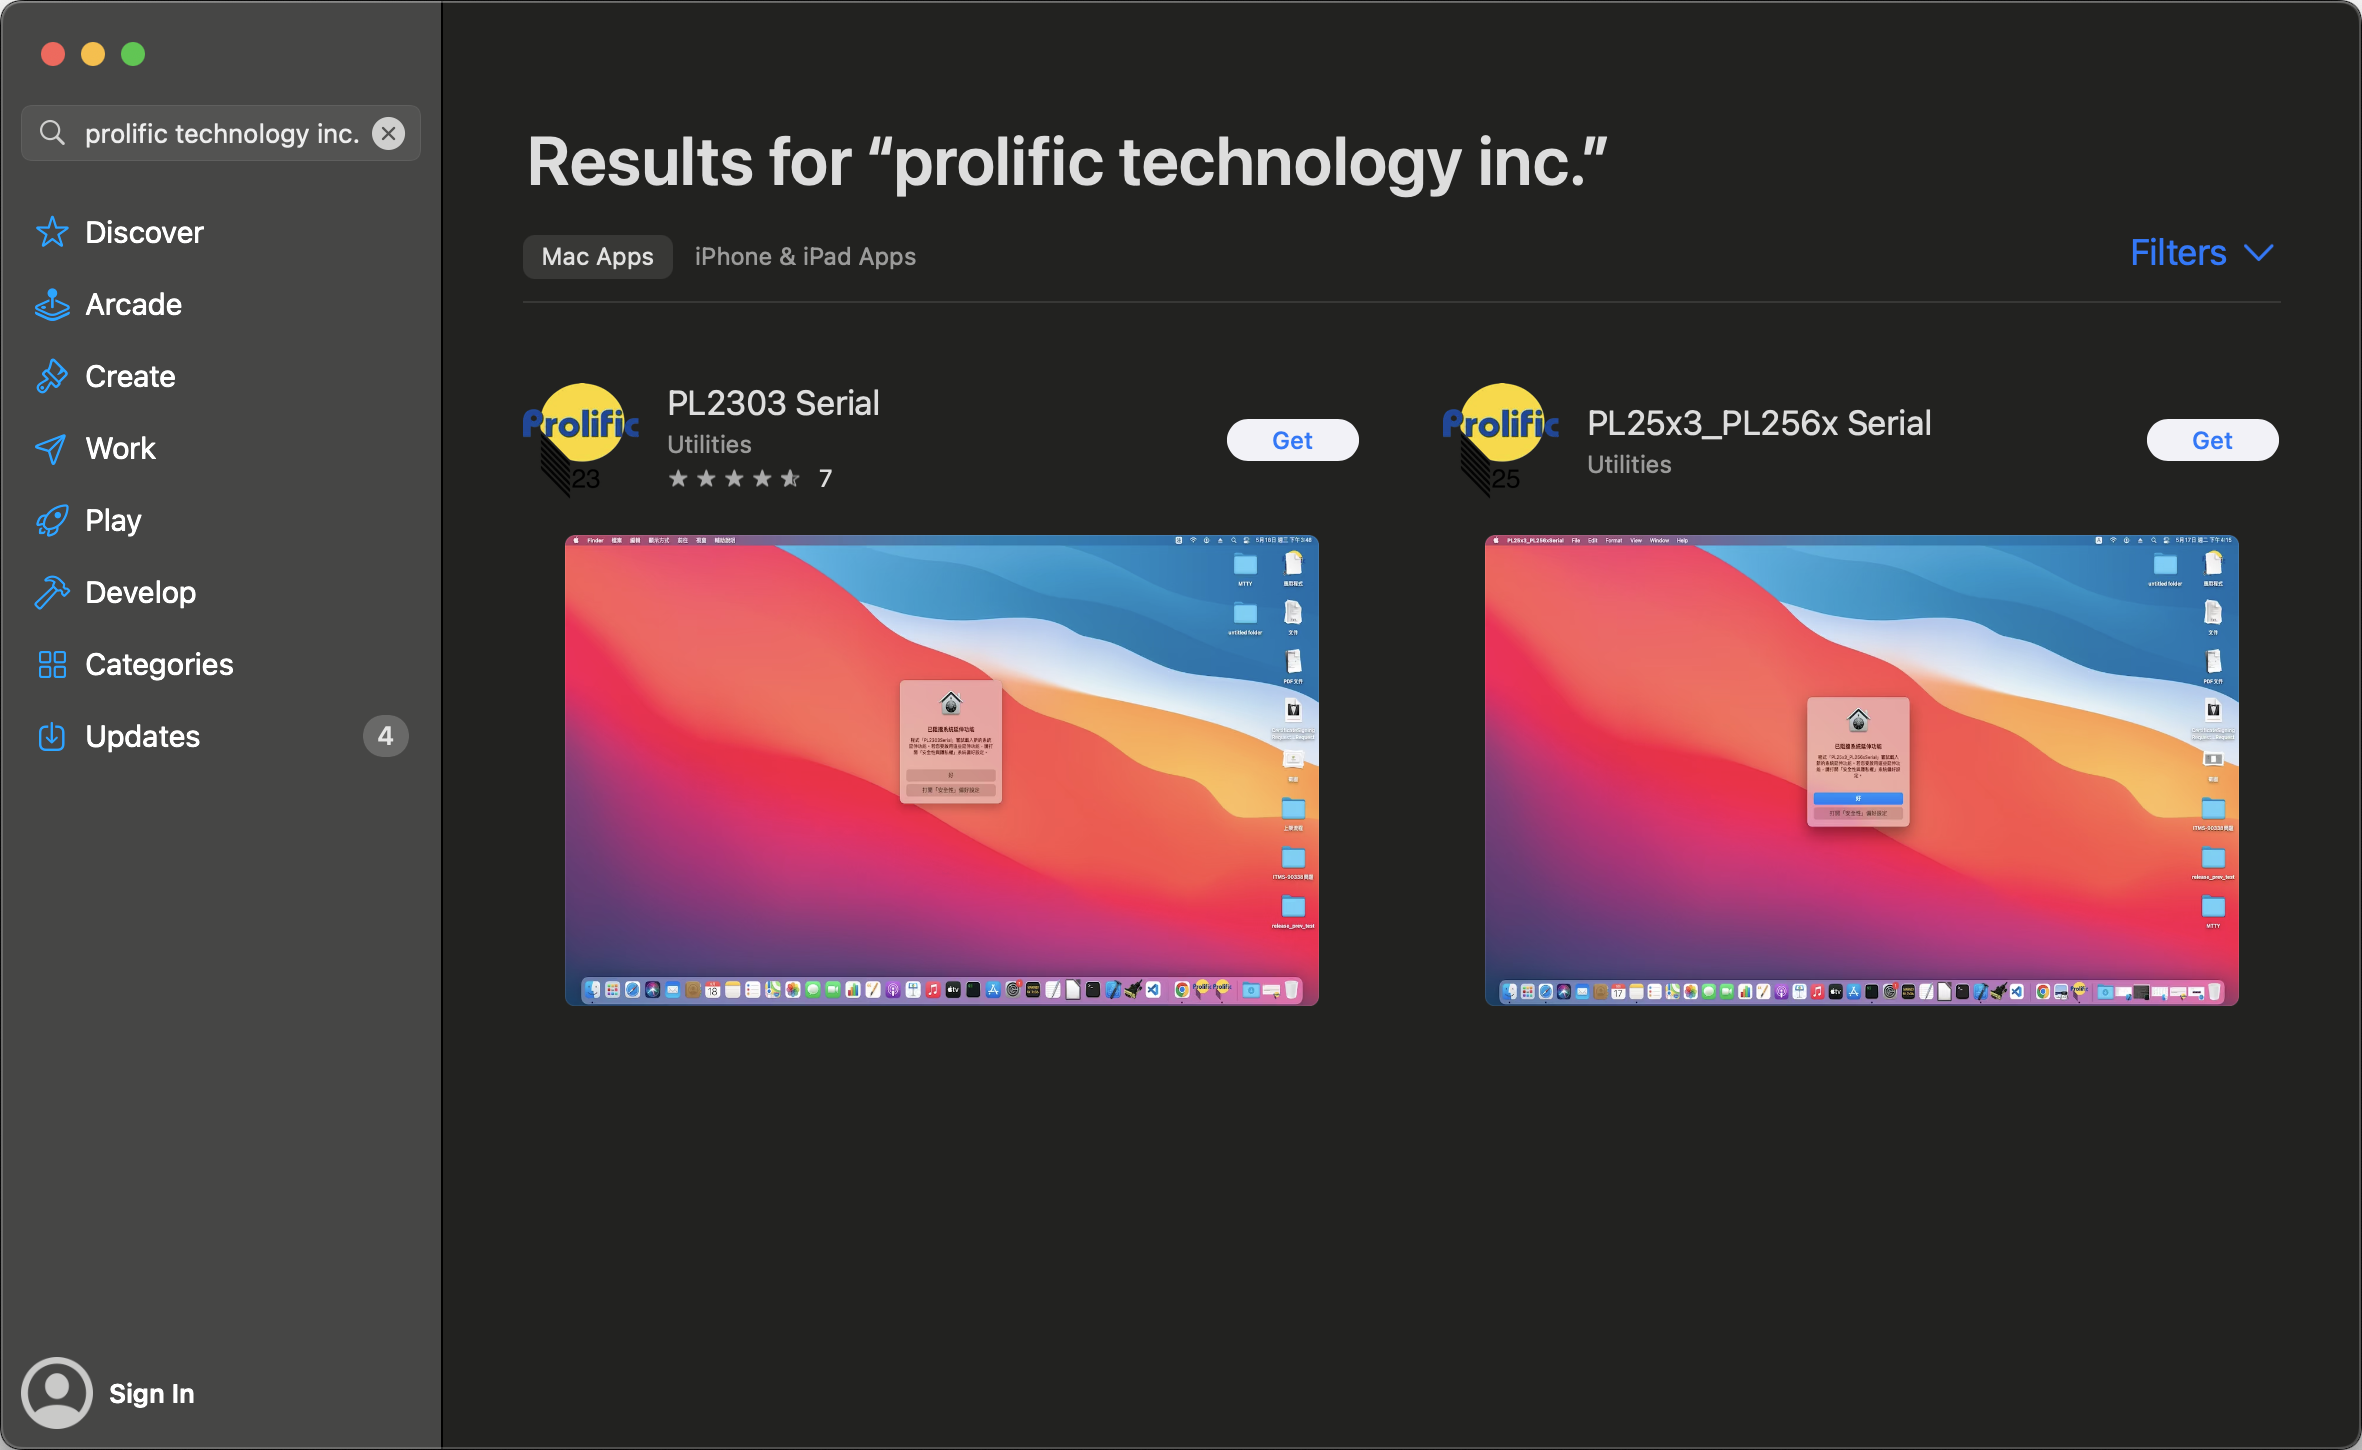
2. Select the "Get" button for the "PL2303 Serial" application
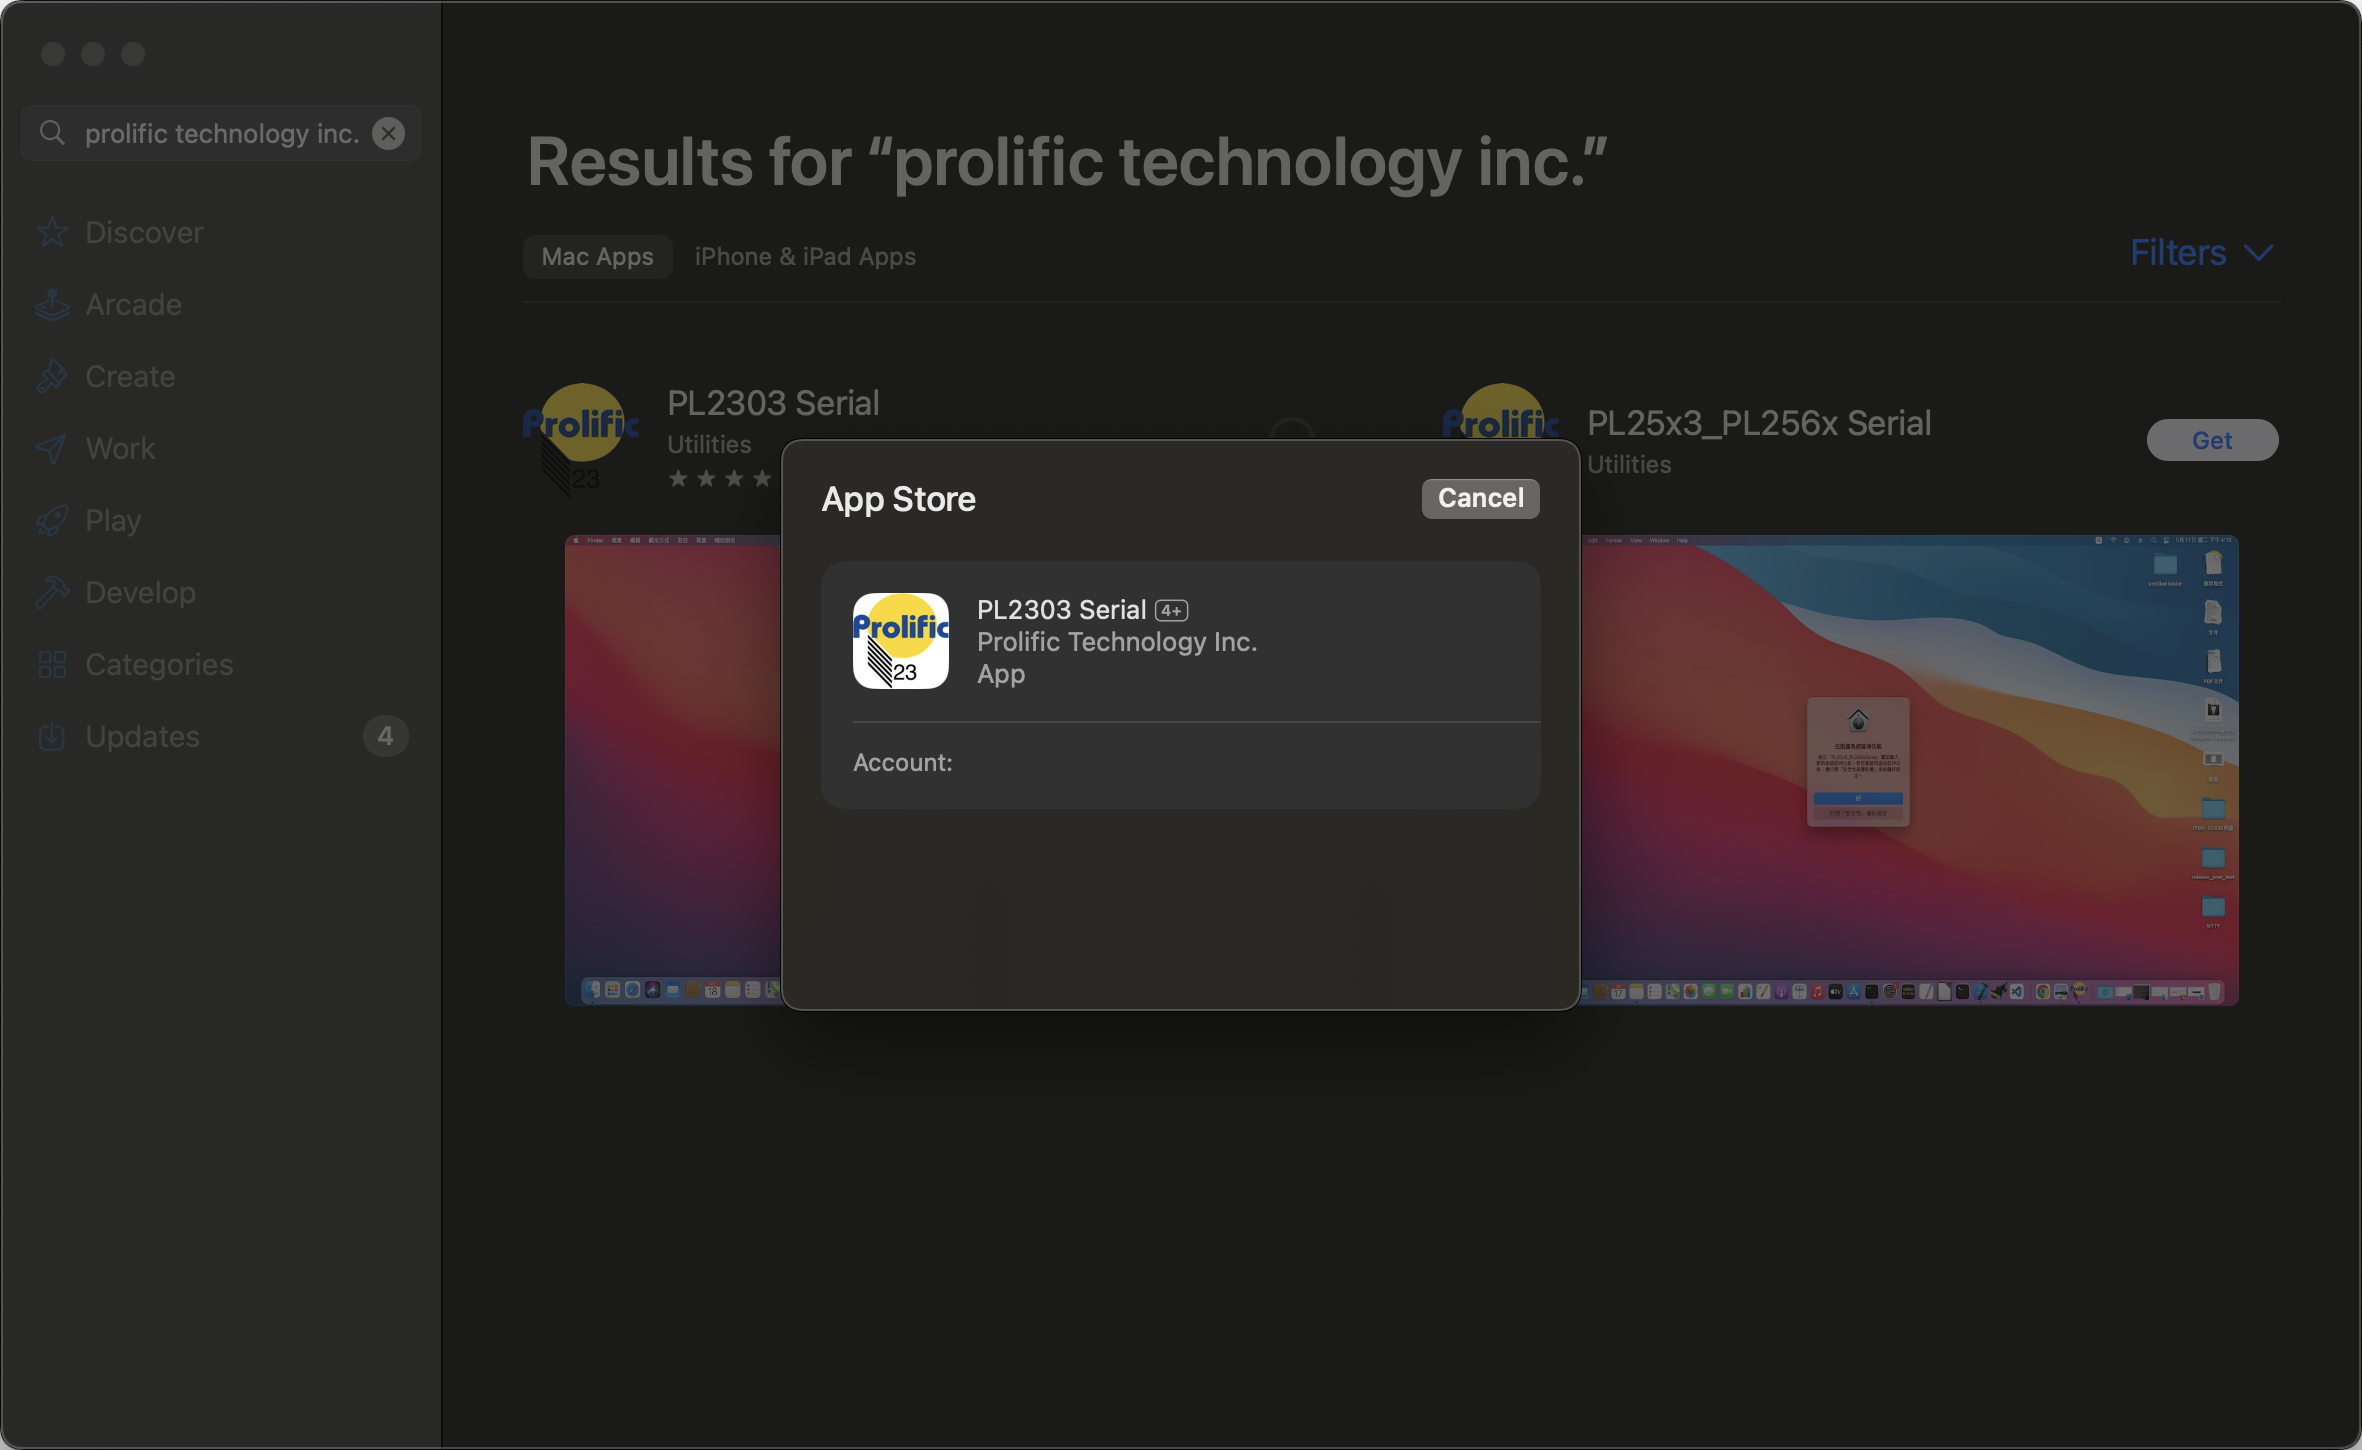
3. When the installation completes, open the "PL2303 Serial" app from the macOS Applications folder
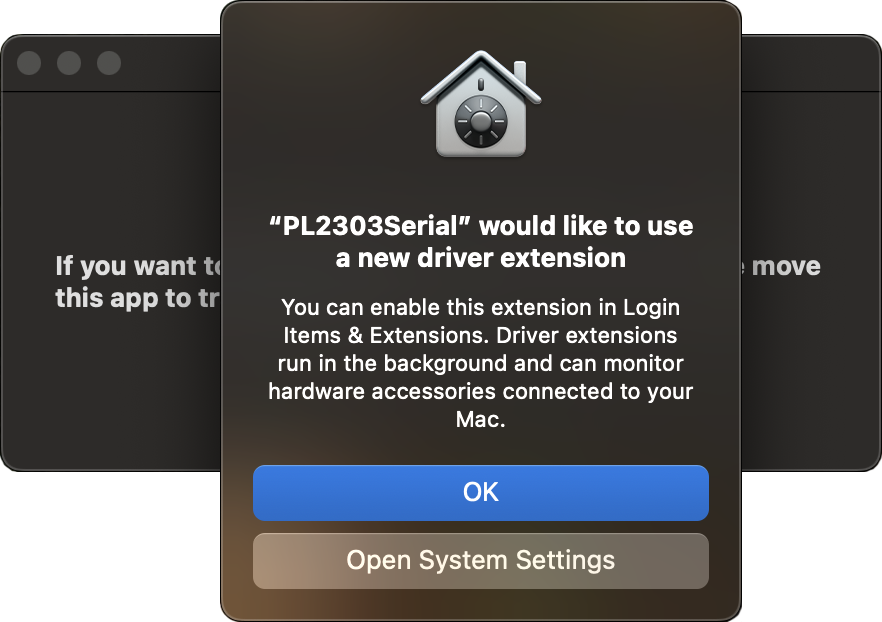
4. When the "PL2303Serial" would like to use a new driver extension" prompt comes up select "Open System Settings" to approve the new driver
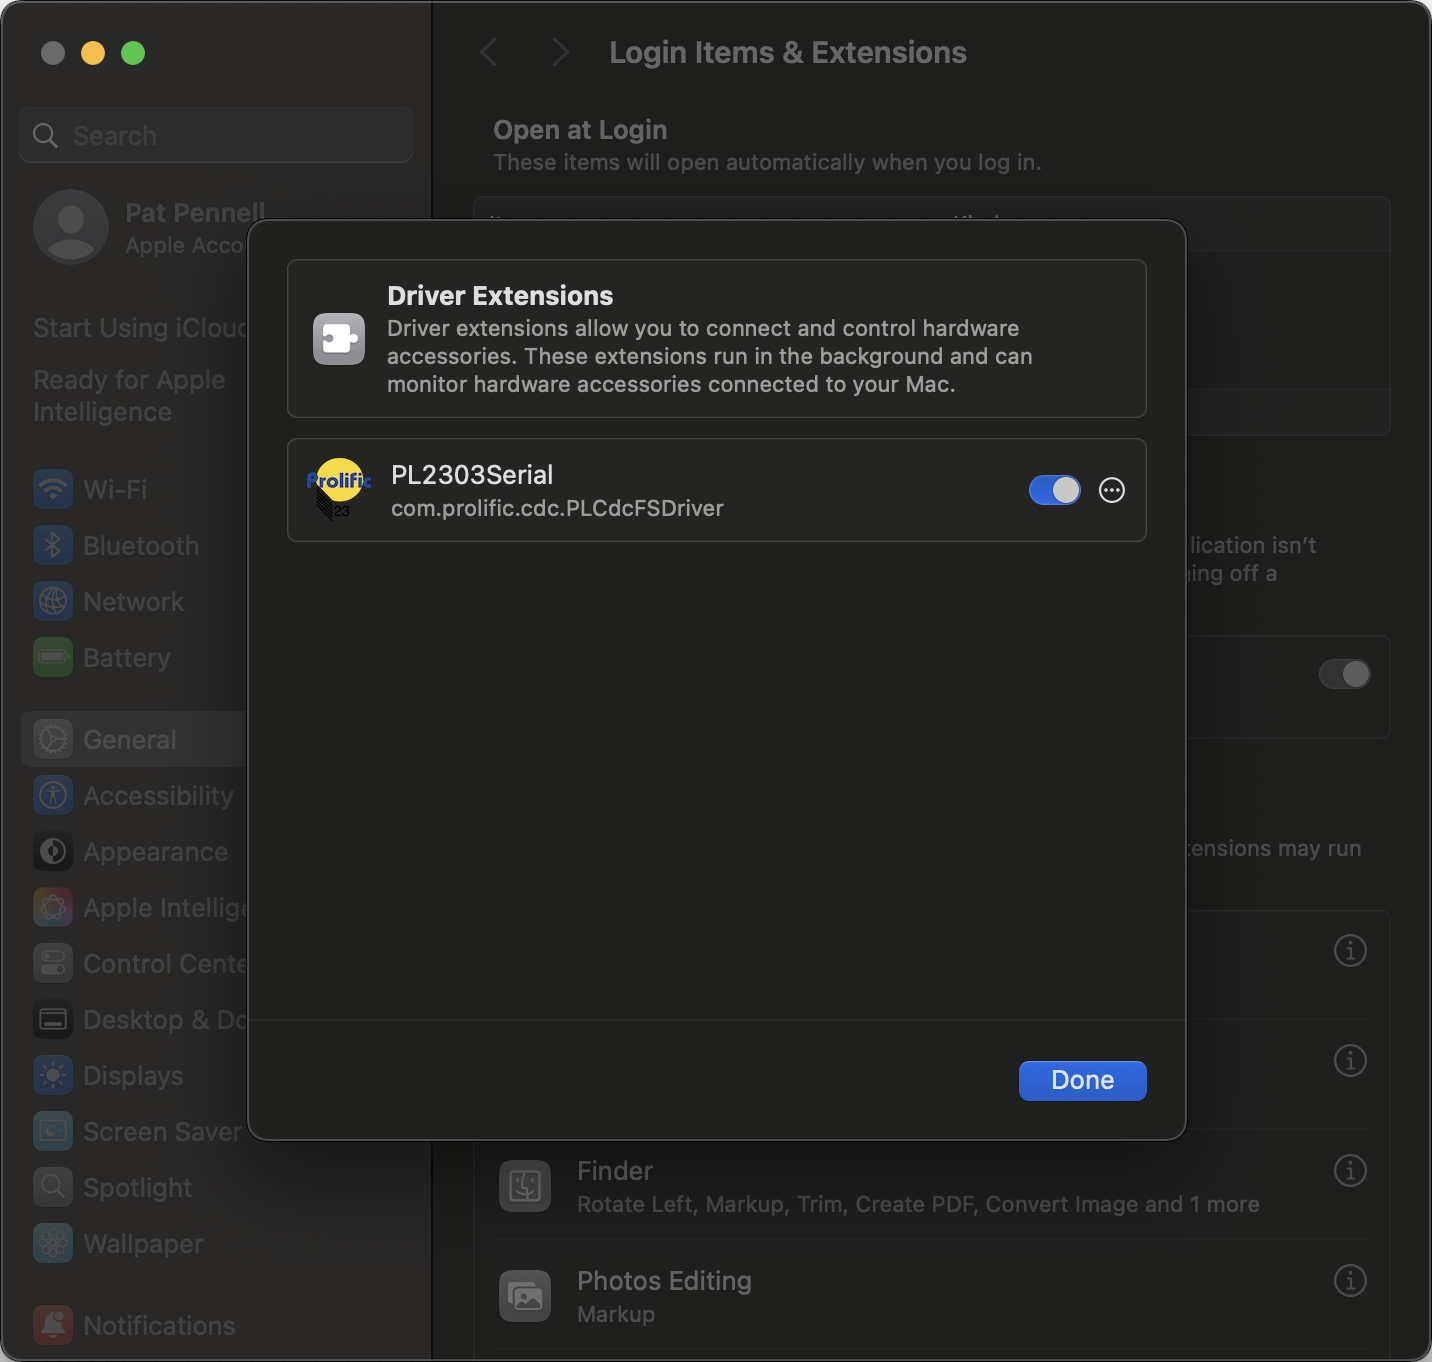
5. Under the "Driver Extensions" toggle on the "PL2303Serial" extension
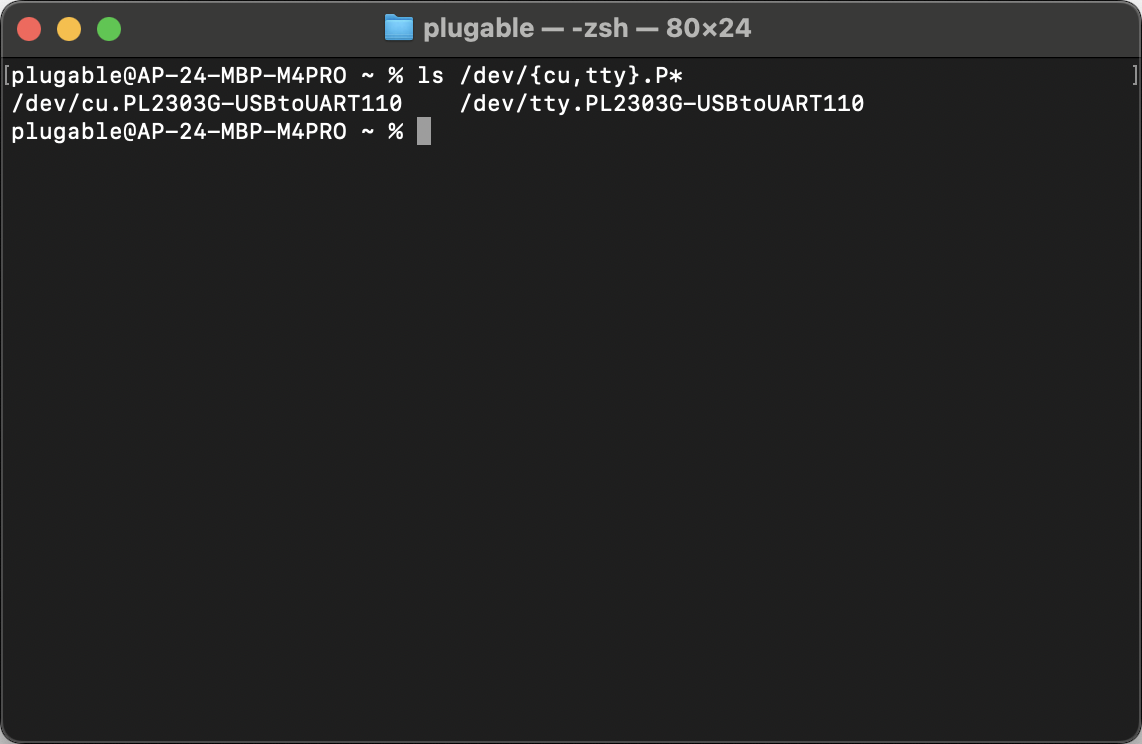
6. The system should now assign /dev/cu.P* and /dev/tty.P* devices to the serial adapter and can be confirmed with the terminal command ls /dev/{cu,tty}.P*
Applicable To
PL2303-DB9
How Do I Connect to a Serial Device in Linux?
You can send and receive data from serial devices in Linux using command-line utilities like Screen or Minicom, or by redirecting the echo command. Before establishing a connection, you must identify the correct serial port path, which is typically found at /dev/ttyUSB0 for USB serial adapters.
How to Identify the Serial Port
Connect the serial adapter to the computer.
Open a terminal and run
dmesg | tailto look for the attached converter path, or runls -tr1 /dev/tty* | tail -n 1to print the newest created serial adapter.
How to Connect Using Screen
Run
screen /dev/ttyUSB0 9600in the terminal to transmit and read text.Disconnect while leaving the session open by pressing Ctrl+a then Ctrl+d, or quit completely by pressing Ctrl+a then k, and 'y' to kill the session.
How to Connect Using Minicom
Run
minicom -b 9600 -D /dev/ttyUSB0to open an interface to send text.Quit the application by pressing Ctrl+a, then z, then x.
Configure presets using the setup mode by running
minicom -s.
How to Write Directly to the Serial Device
Set the port speed with
stty -F /dev/ttyUSB0 speed 9600.Send text for one-way communication by running
echo helloworld >/dev/ttyUSB0.
Workarounds for Serial Device Errors
Resolve permission denied errors by adding your user account to the 'dialout' group or the group with control of the serial port. Check group ownership with
ls -l /dev/ttyUSB0and add your account by runningsudo usermod -a $(whoami) -G dialout, then log out and back in or restart the computer for the changes to take effect.Fix scrambled text by correcting baud rate mismatches on either the computer or the device. Check the device's sticker or user manual for the correct port settings and configure them accordingly.
Applicable To
PL2303-DB9
What is the pinout of the RS-232 connector?
The RS-232 connector on the PL2303-DB9 uses a standard DTE pinout. The pin numbering can be found inside the DB9 connector of the adapter to identify the connections.
How the RS-232 Connector Pins Are Configured
The pin configuration is as follows:
| Pin | Function |
|---|---|
| Pin 1 | DCD |
| Pin 2 | RX |
| Pin 3 | TX |
| Pin 4 | DTR |
| Pin 5 | GND |
| Pin 6 | DSR |
| Pin 7 | RTS |
| Pin 8 | CTS |
| Pin 9 | RI |

Applicable To
PL2303-DB9
My PL2303-DB9 appears to be different than what is currently pictured, why?
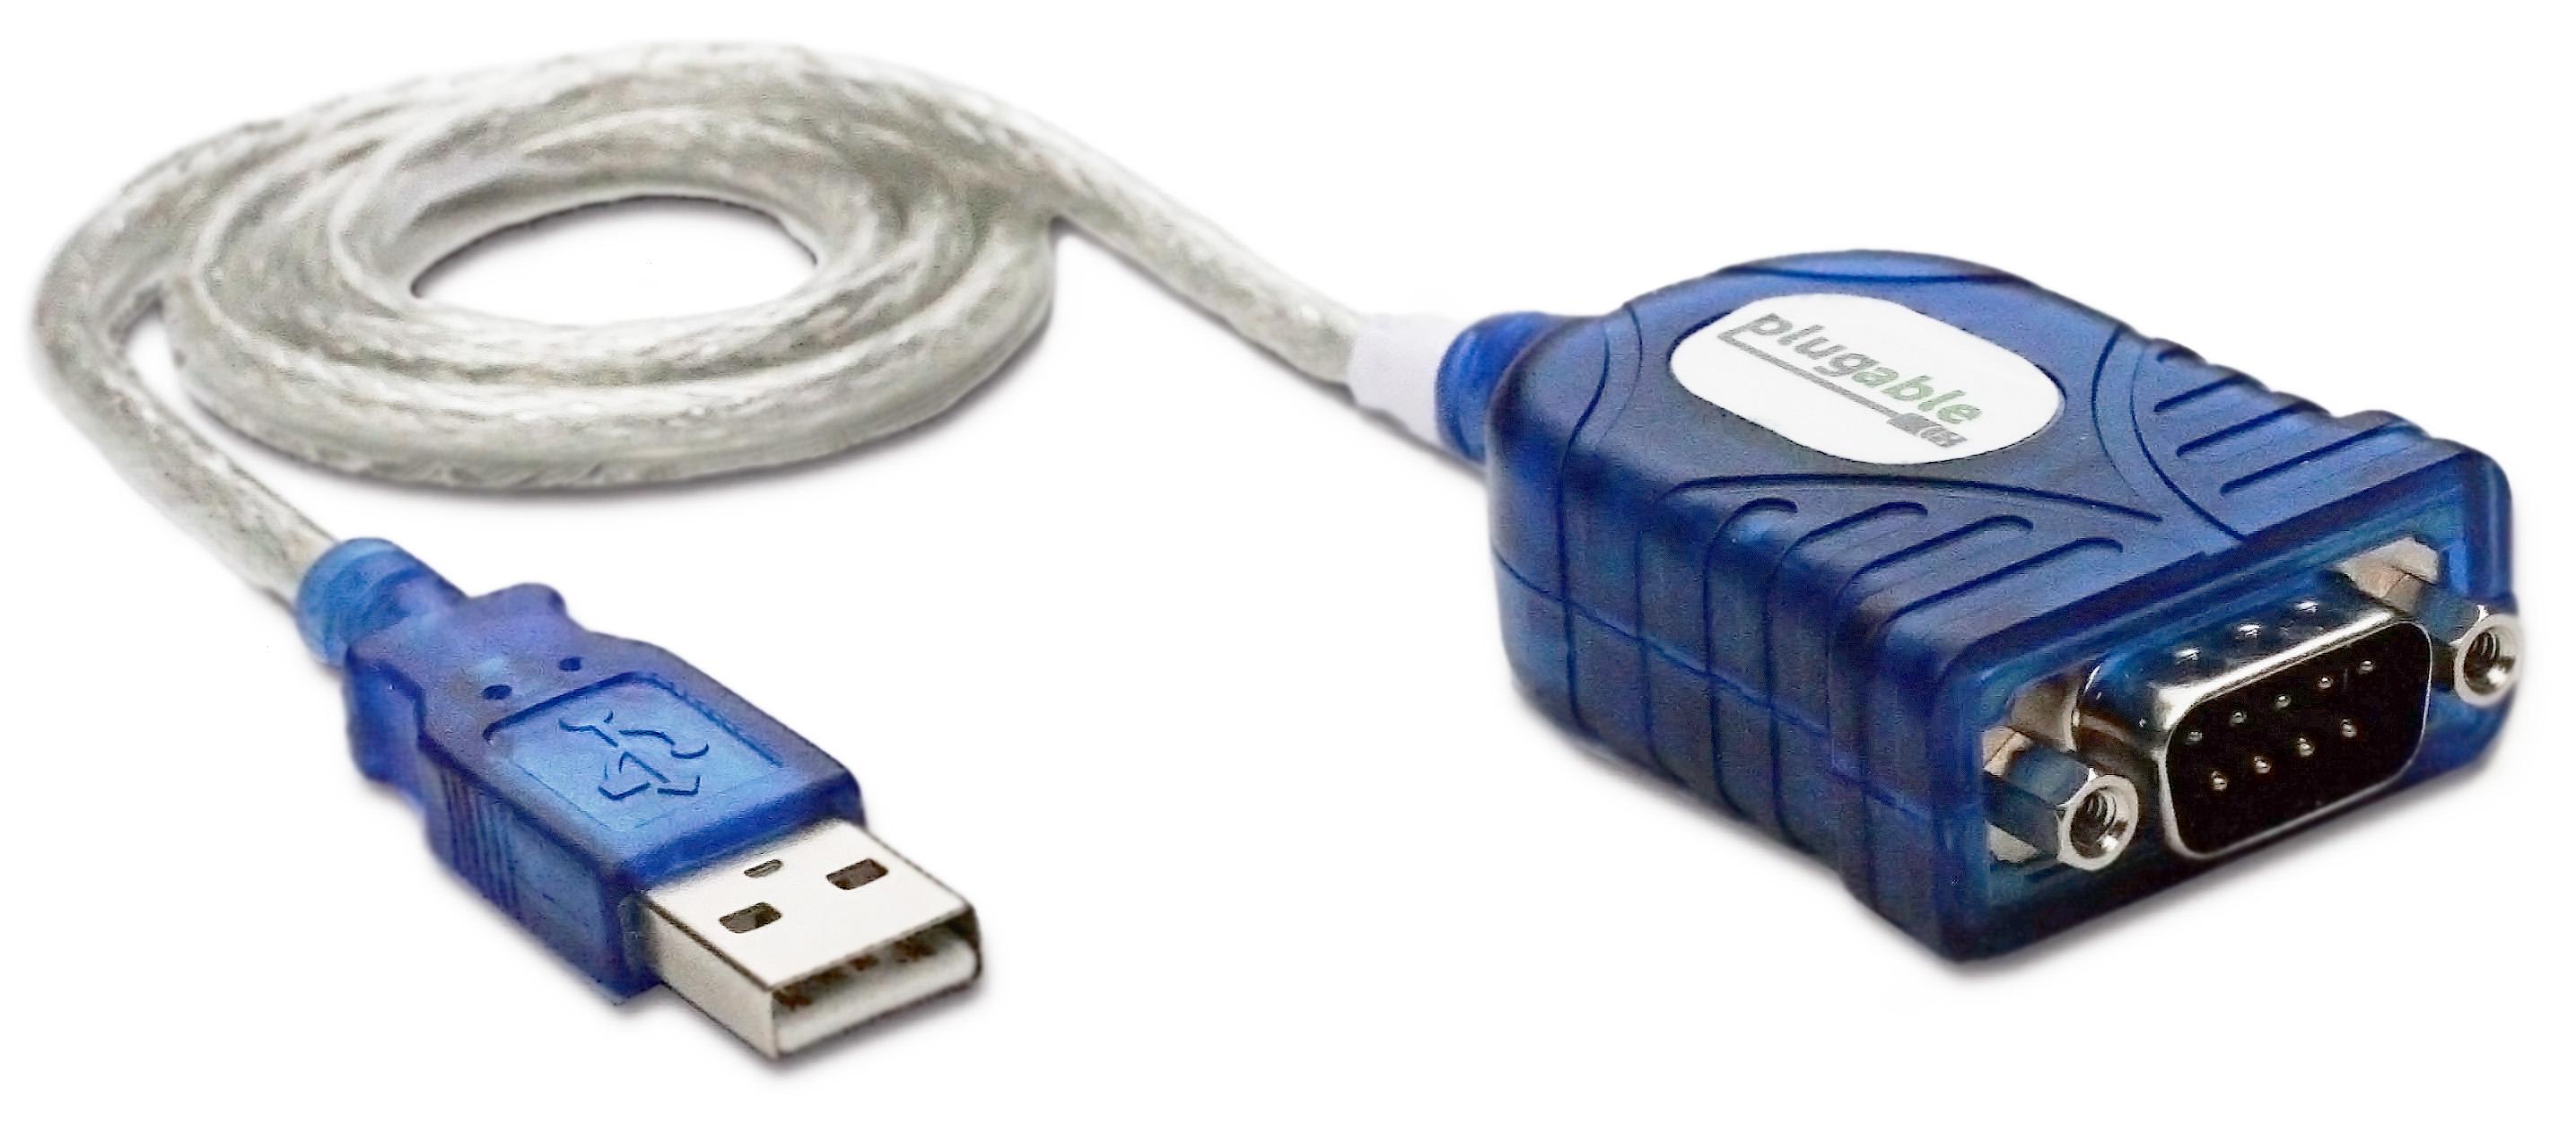
The original PL2303-DB9 was revised with an updated chipset in April of 2021. The original version of PL2303-DB9 featured a Prolific PL2303HXD chipset which was discontinued by Prolific in 2020. This version of the adapter featured a blue plastic casing as shown below:
The adapter has since been updated to use the more recent PL2303GT chipset from Prolific. This chipset offers many of the same features as PL2303HXD and is a drop-in replacement in most applications. The new version of the adapter features a grey plastic casing as shown below:
If you have any questions about the different versions please contact us at support@plugable.com and we'll be happy to assist.
Troubleshooting: How to Perform a Loopback Test
A loopback test is a simple way to verify that a USB to RS232 adapter is functioning correctly. This test involves bridging the transmission (TX) and reception (RX) pins and sending data to the adapter and checking if it is received correctly.
Step 1: Identify the Adapter’s COM Port
Windows
- Connect the USB to RS232 adapter to the computer.
-
Open Device Manager (
Win + X> Device Manager). -
Expand Ports (COM & LPT) and note the COM port assigned to the adapter (e.g.,
COM3).
macOS
- Connect the adapter to the Mac.
- Open Terminal and run:
ls /dev/tty.* - Identify the device name (e.g.,
/dev/tty.usbserial-XXXXX).
Linux
- Connect the adapter to the system.
-
Open a terminal and run:
ls /dev/ttyUSB* -
Note the assigned device (e.g.,
/dev/ttyUSB0).
Step 2: Bridge the TX and RX Pins
-
Identify the TX (Transmit) and RX (Receive) pins on the adapter. PL2303-DB9 uses a standard RS232 DTE pinout which assigns TX to pin 3, and RX to pin 2

- Position a jumper wire, paperclip, screwdriver, or any other conductive object so it's touching pins 2 and 3 to electrically bridge them.
Step 3: Open a Terminal and Test Communication
Windows
Open a serial terminal application (e.g., PuTTY, Tera Term, or RealTerm).
-
Configure the connection:
Select the adapter’s COM port.
Set baud rate (e.g.,
9600), data bits (8), parity (None), stop bits (1), and flow control (None).
Open the connection and type in the terminal. If the characters you type appear on screen, the adapter is working.
macOS & Linux
-
Open Terminal and run:
screen /dev/ttyUSB0 9600Note: the name of the port you connect to should match the port name found in step 1.
Type in the terminal. If the characters you type appear on screen, the adapter is functioning.
To exit
screen, pressCtrl + A, thenK, and confirm withY.
Troubleshooting
If no characters appear when performing the loopback test, ensure:
The correct COM port is selected when connecting to the port.
TX and RX pins are properly bridged.
The adapter appropriate drivers are installed.
What is COM Port Retention?
Windows historically assigns communications ports (COM ports) a number based on their order of detection. This worked fine when system boards had built-in Serial ports where the COM port number could be assigned in hardware or firmware settings, or Serial expansion cards which reliably detected in the same order on system boot. However USB connected serial adapters can be connected to, or disconnected from, the running computer in any order, and may detect in a different order on system reboot depending on other devices connected to the computer.
COM port retention stores the COM port number and settings for each USB to Serial adapter based on a unique identifier within the adapter chipset. This allows Windows to restore the COM port number and settings after a system reboot, or USB serial adapter unplug and connection.
This ensures that a serial adapter will be assigned the same COM port number reliably, even if there are multiple USB to serial adapters connected to the system. This provides the most benefit when using multiple serial devices on the same host computer by providing a reliable assignment of COM port numbers to specific devices.
Settings stored include
- The COM port number
- Bits per second (sometimes referred to as "baud rate")
- Data bits
- Parity
- Stop bits
- Flow control
- And additional advanced settings
Serial adapter settings can be found in the Windows Device Manager > Ports (COM & LPT) section on serial device Properties > Port Settings tab.
COM port retention is included with our latest PL2303-DB9 USB To RS232 Serial Adapter with brown over-molding, our older blue adapter does not include this feature.
If you have any questions please feel free to contact us at support@plugable.com and we'll be happy to assist!

